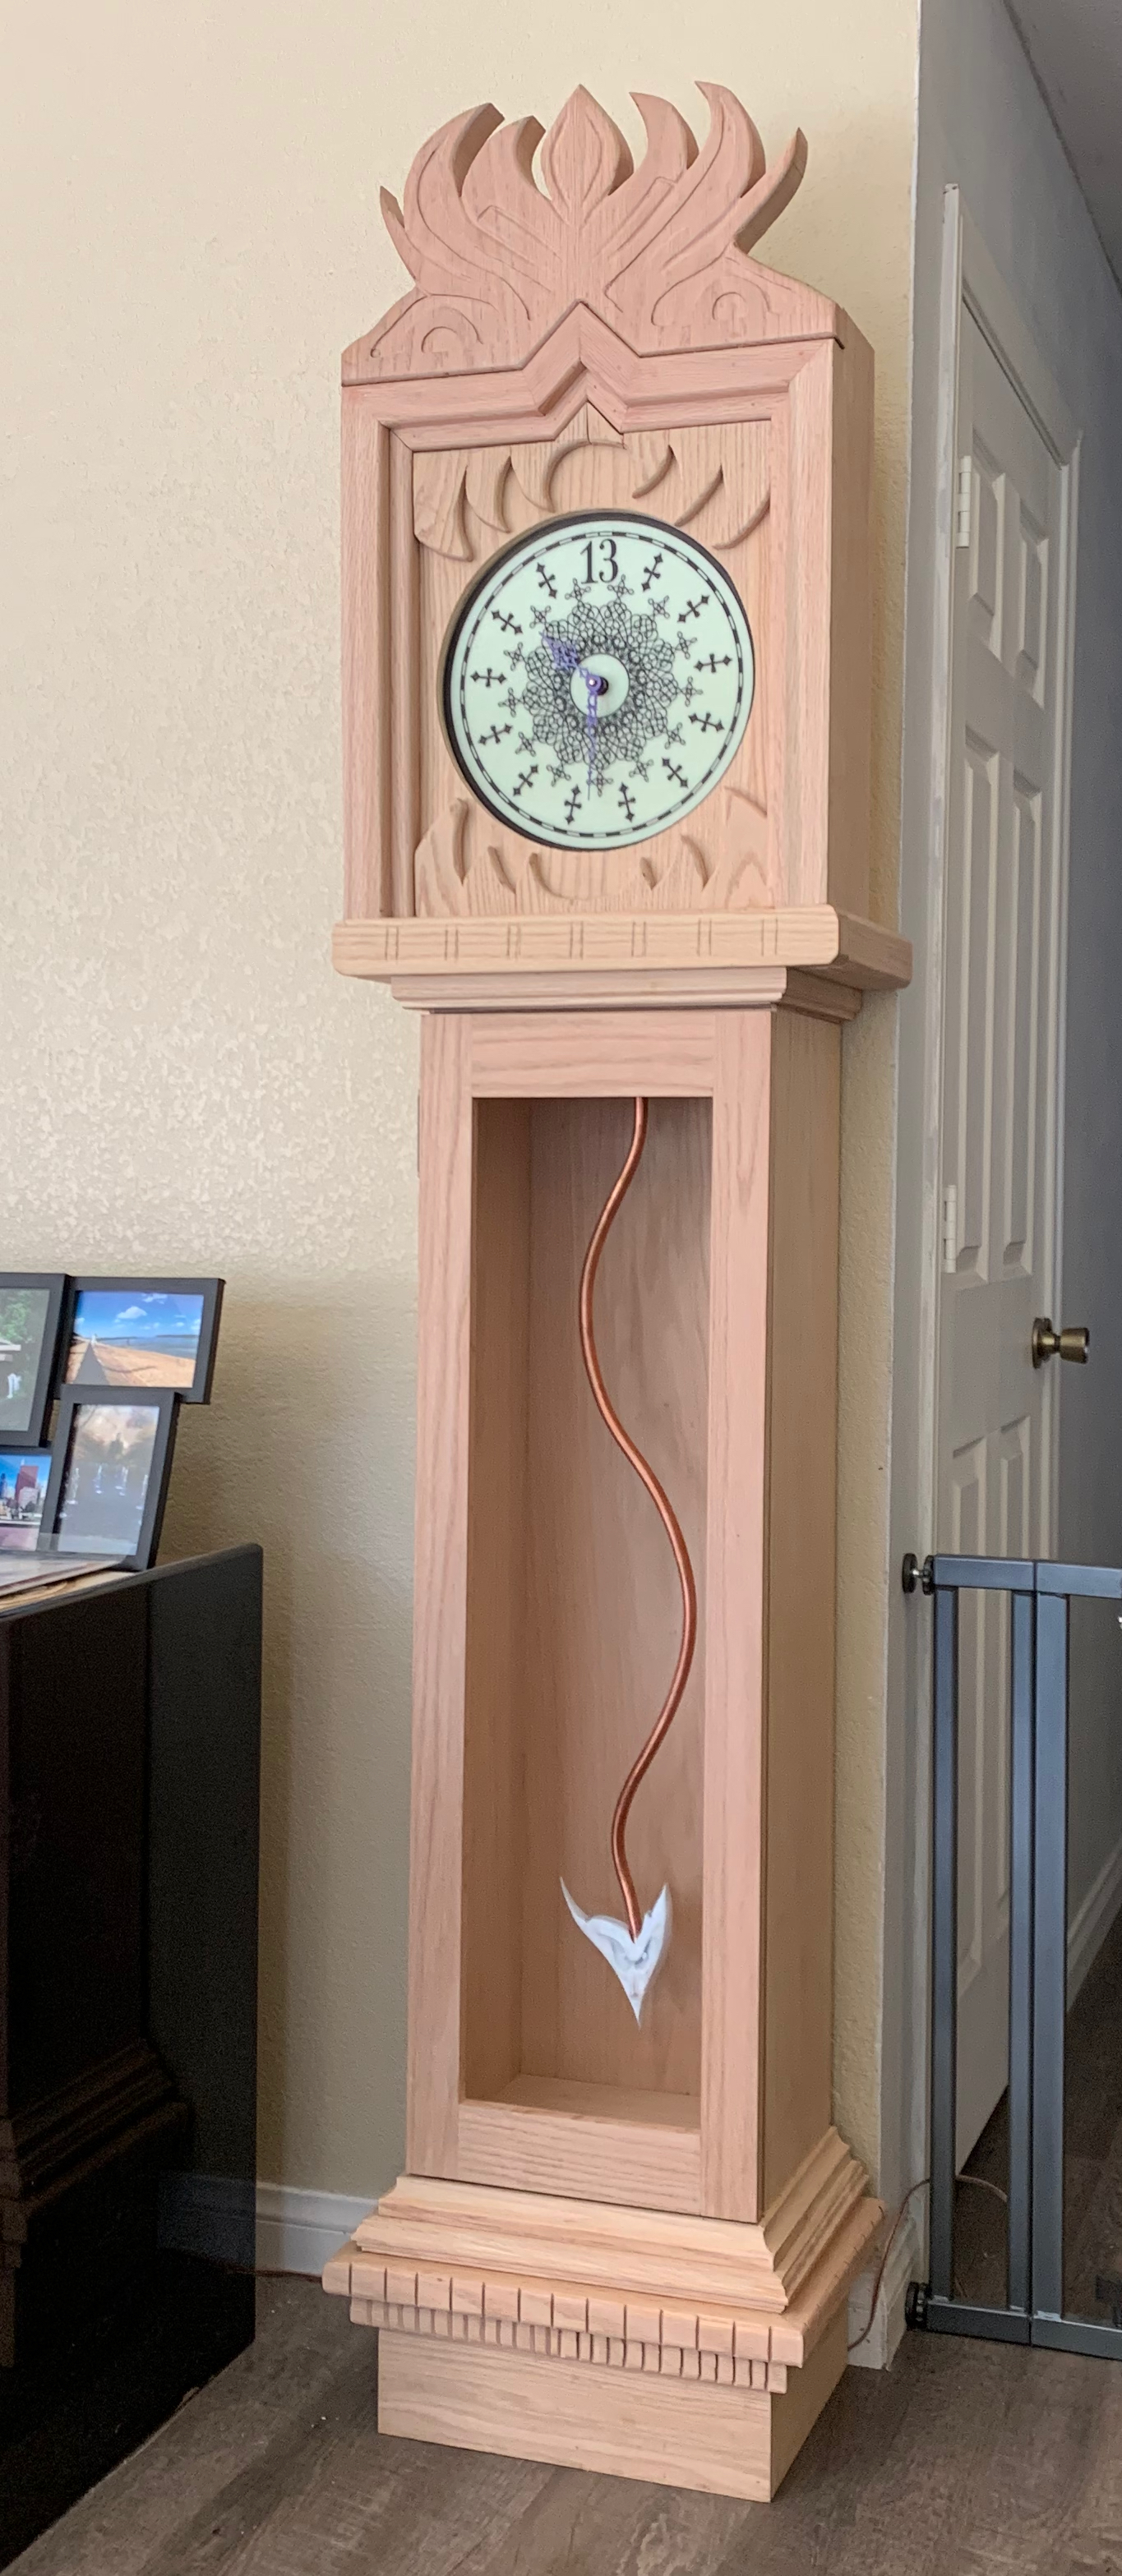
This is the build page for tracking progress of my Disneyland’s Haunted Mansion Gargoyle Grandfather Clock. Currently coming in at 81.5″ tall and 107lbs, this build began August 5th, 2018 and has been a very slow and meticulous build. I’ve taken my time because it’s been a very relaxing passion project. I love working on this clock and making sure every detail is right, no matter how long it takes.
Through these posts you will see this clock mature to fruition from a couple marked up photos of my parents’ Grandmother Clock upon which this is partially inspired. Couple these with the marked up photos of my Disney Parks Haunted Mansion Clock miniature and the one good real life photo I was able to find of the actual Mansion Clock in its natural setting, upon which all of the details are based.
As of March 2020 I think I’m calling this project completed. I’m sure I’ll still be doing minor tweaks and improvements to it forever (#1 being articulating the pendulum), but none of these improvements will make any difference in what is shown here. So now it is my turn to just sit back and enjoy this thing.
I hope you enjoy following the process as much as I’ve enjoyed creating it.
I was planning on posting a whole thing about this next step and pictures and whatnot but I just want to post it and get it out there. This clock now has audio. I’ve added an hourly chime. Now every hour on the hour it plays about 30sec of the mansion chamber music before playing the hour in bells using the bells from Hell’s Bells (I wanted deep church bells, this was pretty appropriate!) And just for a fun little easter egg that nobody but me will ever appreciate because it only happens once a day, it chimes 13 bells at noon.
Raspberry Pi, Hell’s Bells mp3 chopped into 13 different files (01.mp3, 02.mp3, 03.mp3 for each hour of the day), Mansion chamber music which I already had for a ringtone anyway and a cronjob to play a little script I whipped up on the hour from 8am to 8pm. I’ve got a perfect set of speakers for it, but they may be a little too nice, especially since the sub fits ALMOST perfectly in the base of the clock… ALMOST, but not quite… These speakers are too nice to cut up the sub box, but not too nice to use… I’ll have to figure that out later, for now it’s sticking out the back a little bit. Sub in the base, L/R speakers in the top box behind the clock dial.
Next up, add glass to the door, automate the pendulum, and carve out the legs.
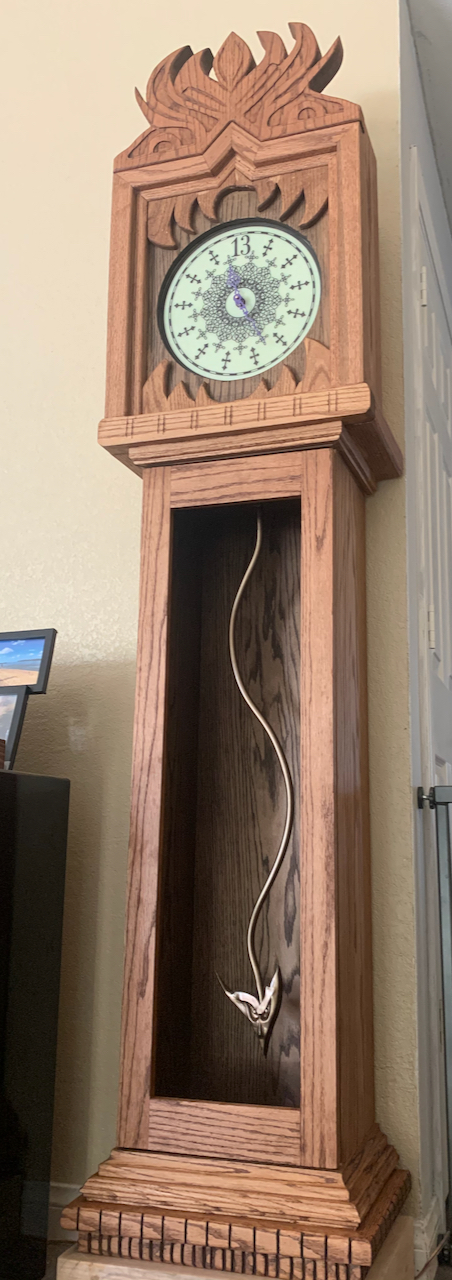
I spent the weekend staining, nervous even after the samples, and I think it came out absolutely beautifully. I’ll need to do a little bit of touchup on the teeth (they broke, were glued back together, and the stain wouldn’t take there. Need to sand that a little more I guess.)
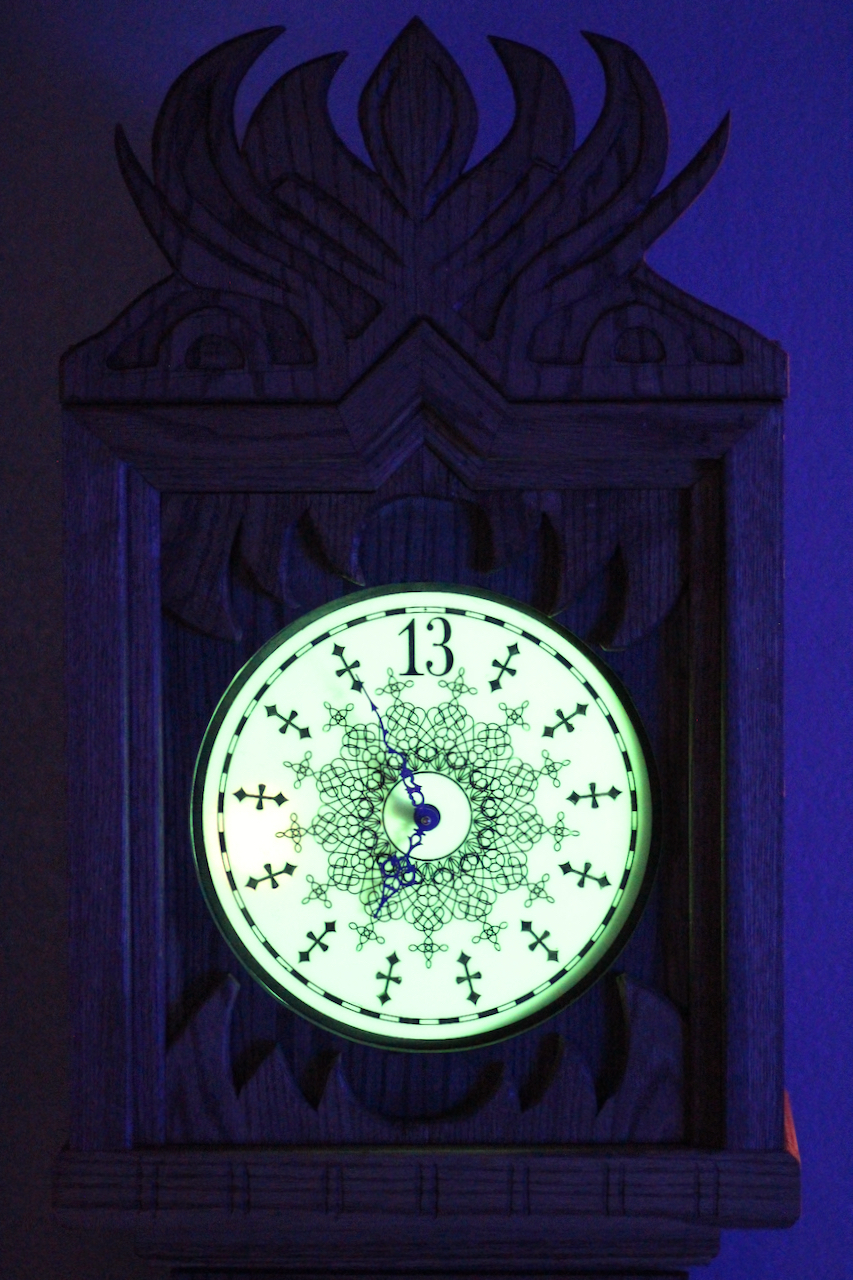
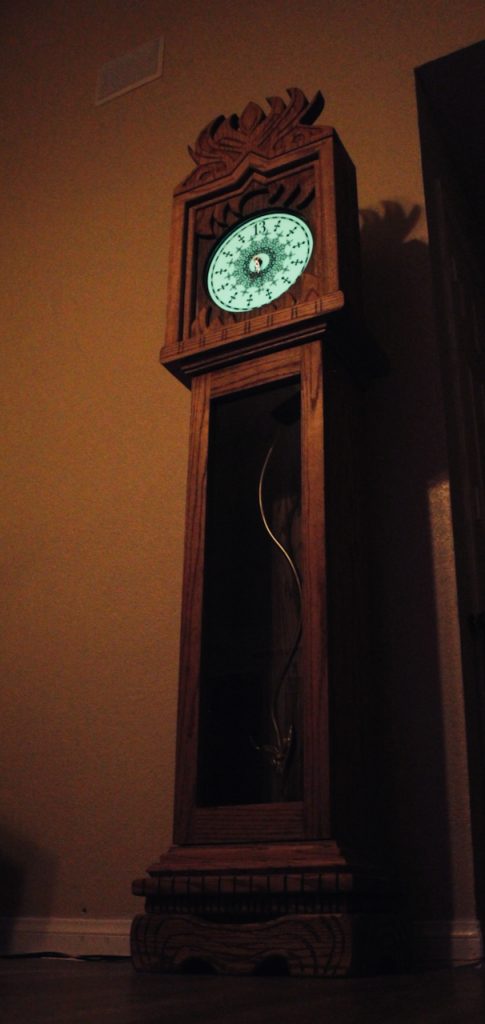
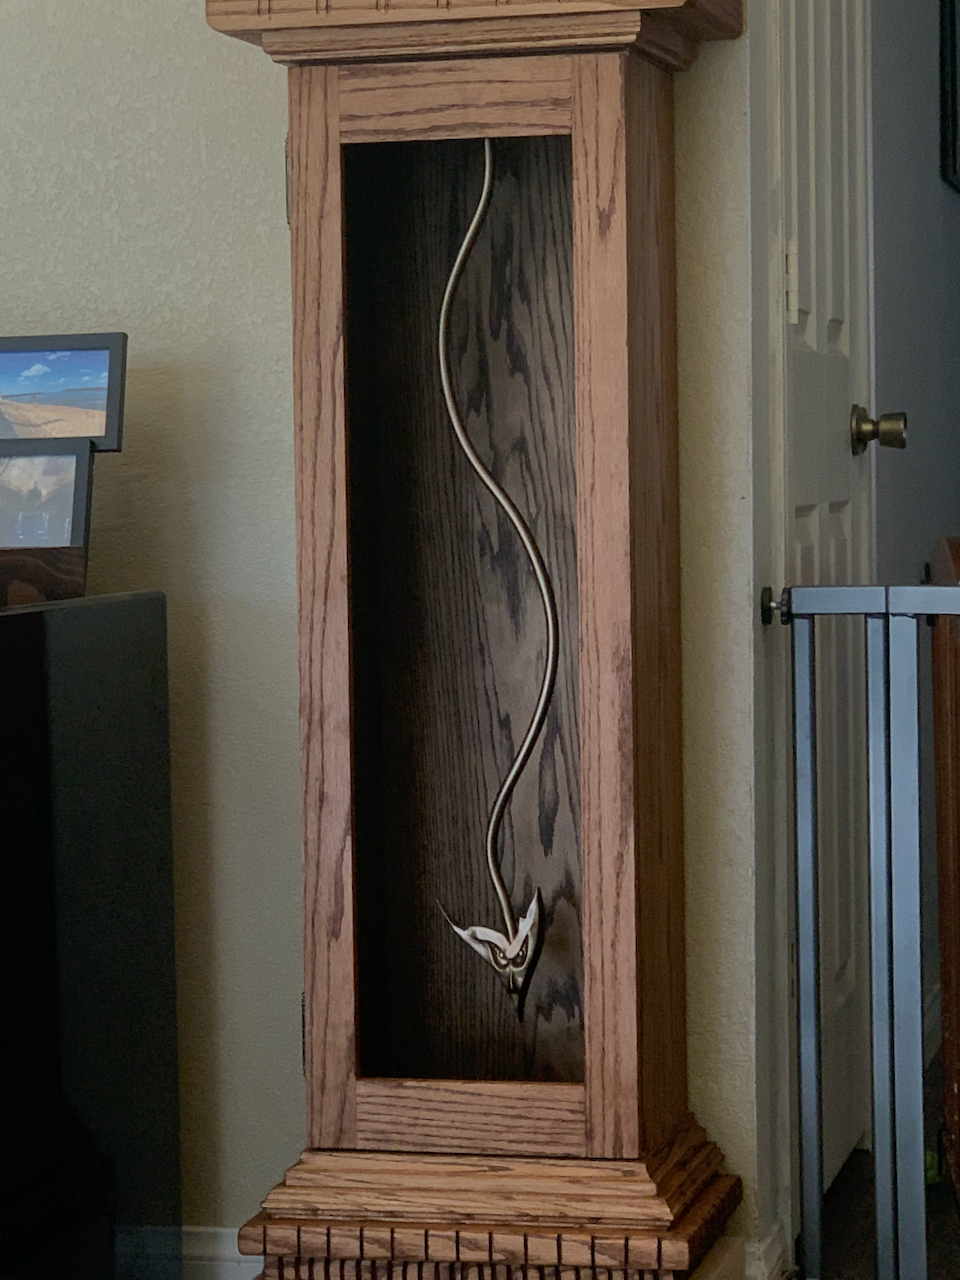
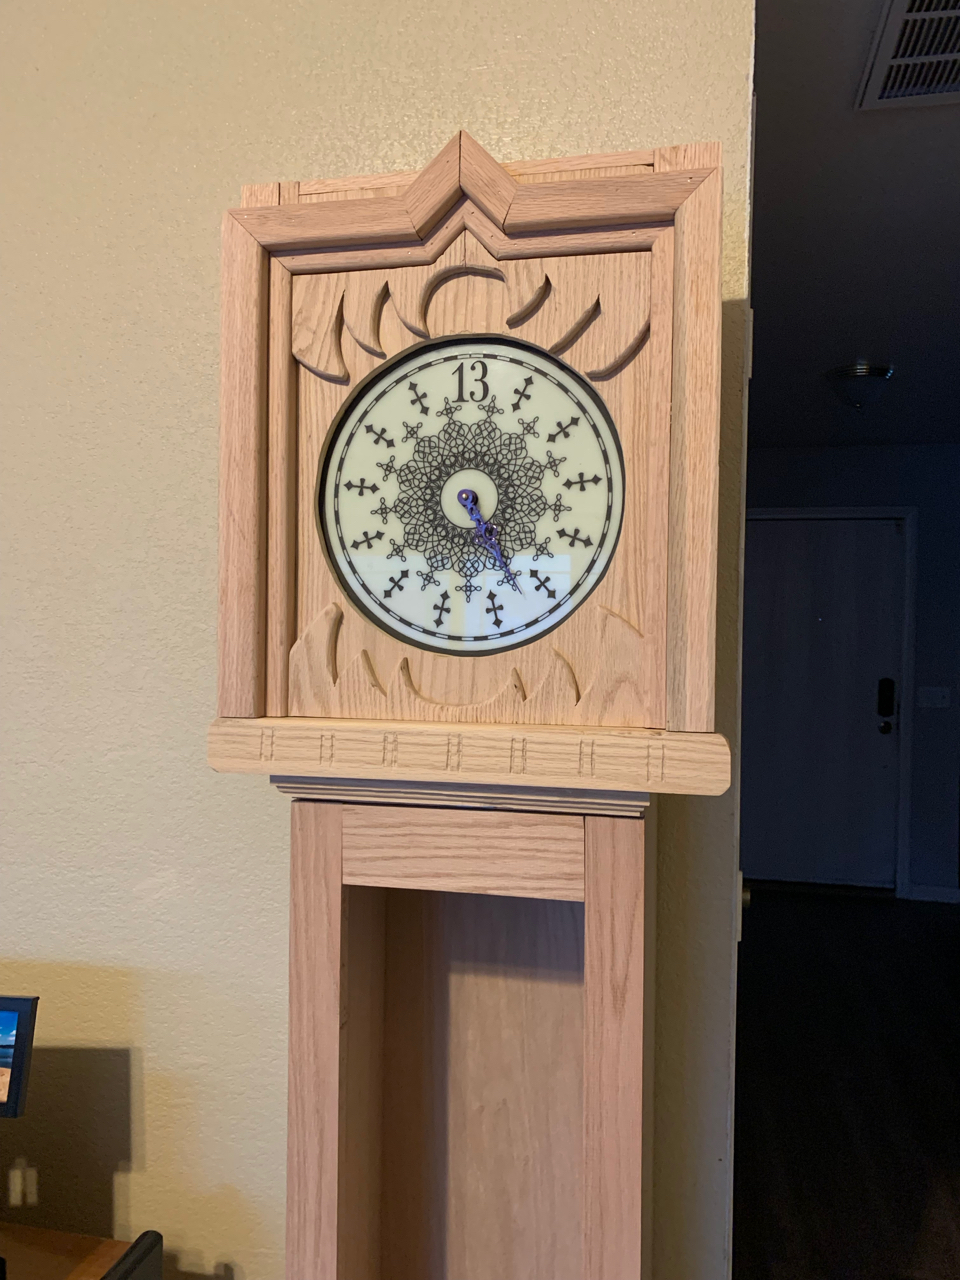
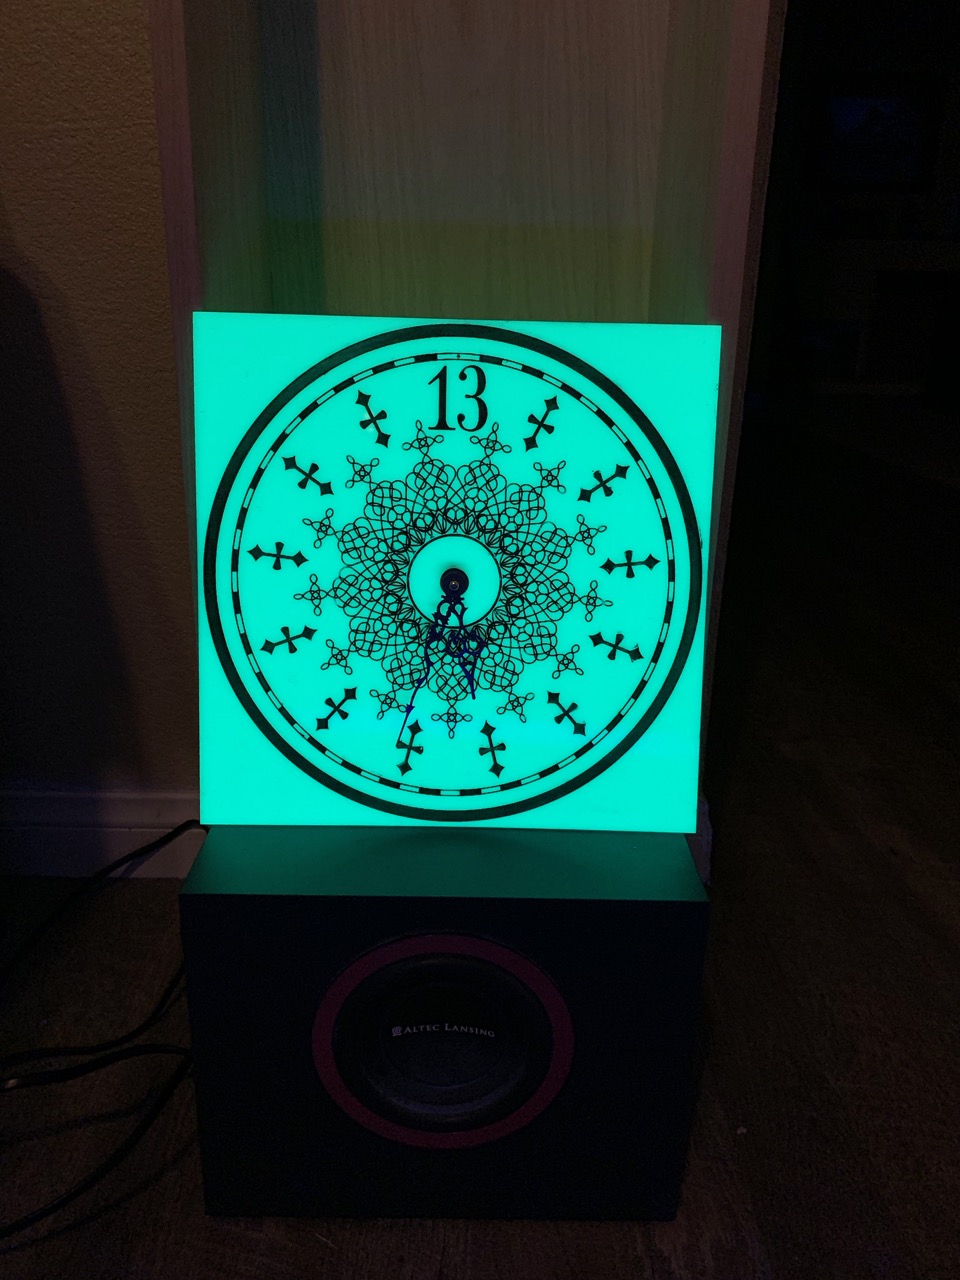
Here’s the whole thing, and pictures just don’t do it justice. I’ll have to take some better shots soon, and some black-lit shots to showcase the dial with the new stain job once it gets darker:
Red Oak stain for the entire outer body. Espresso stain for the inside of the box and the inner mouth. The votes were really close on that, and I figured the brown is more ‘clock like’, to me this is a clock first and foremost, I still got the darkness I need, while keeping it ‘wood color’…
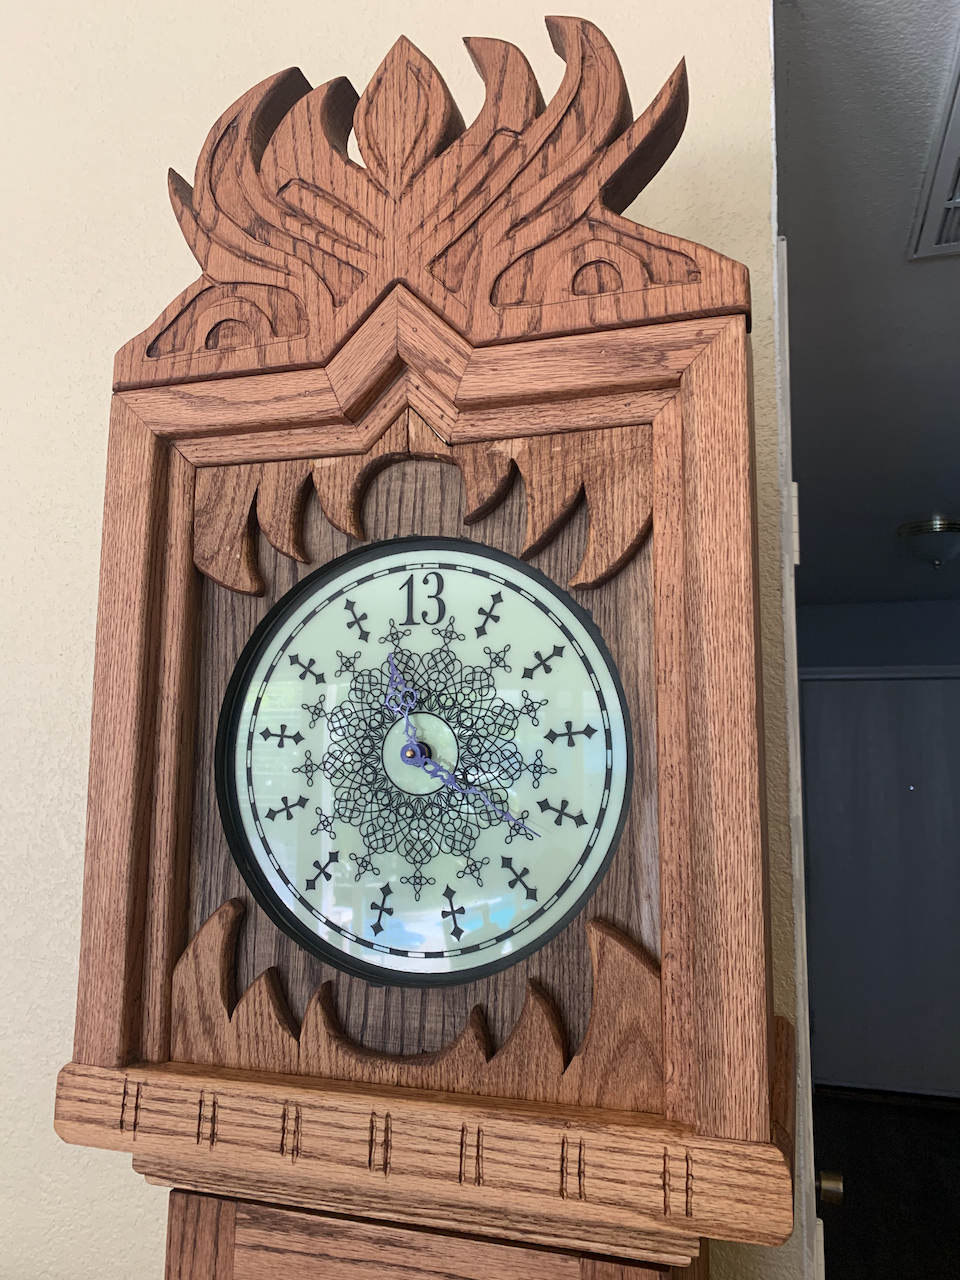
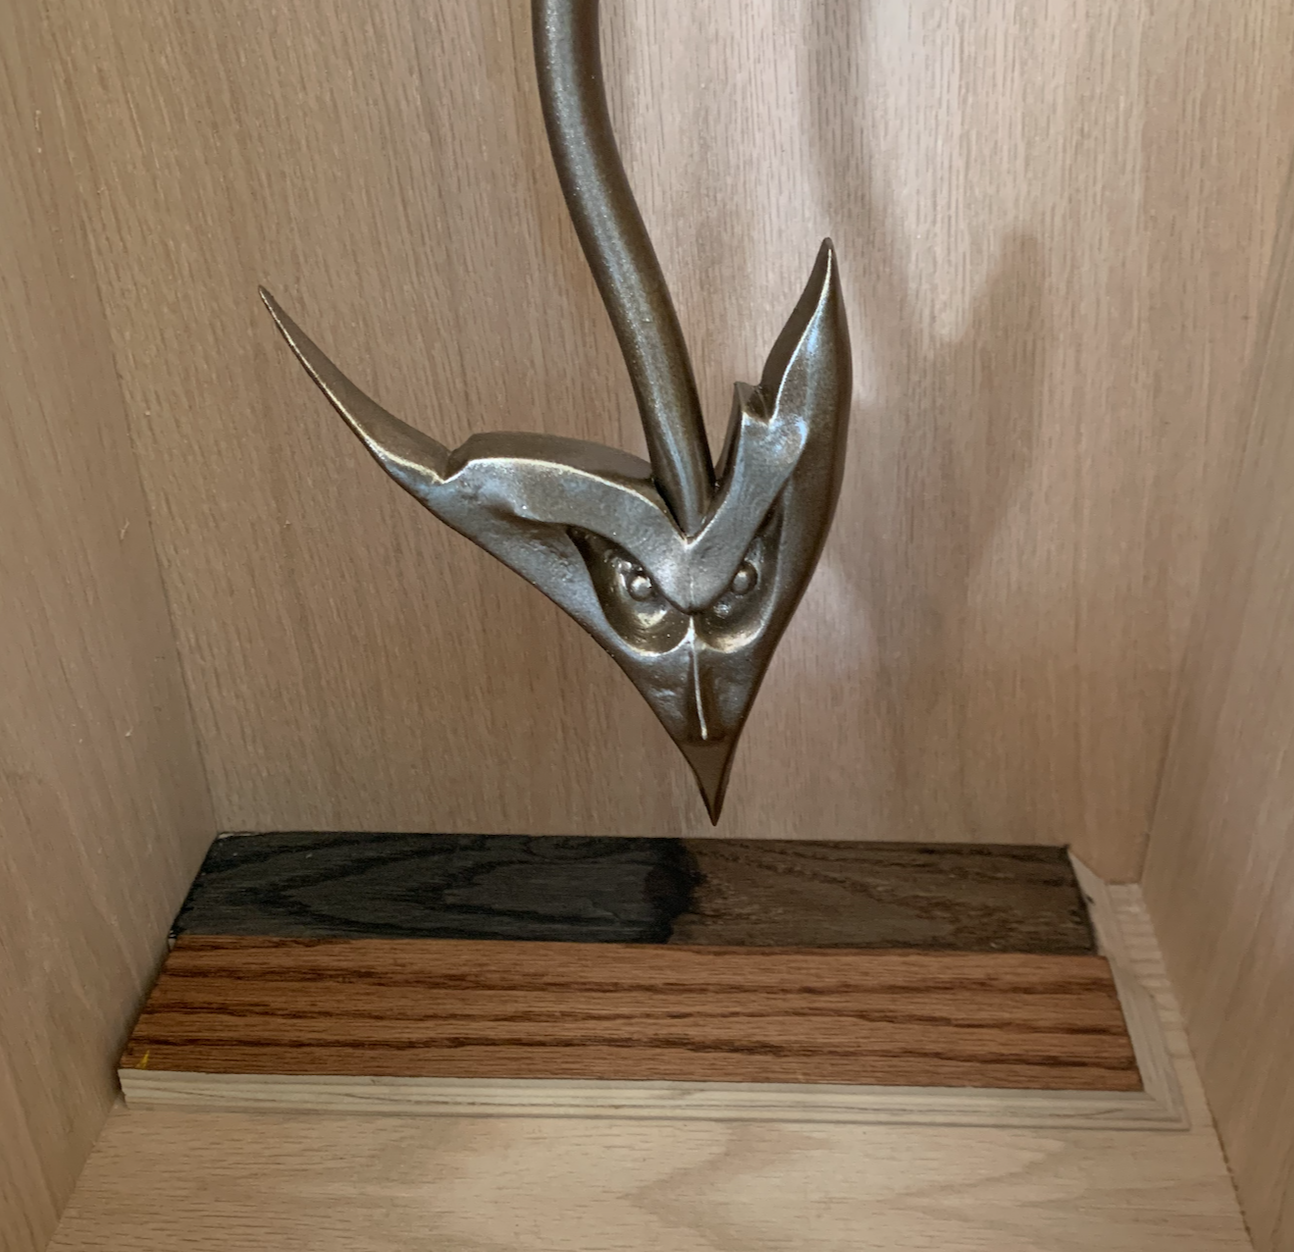
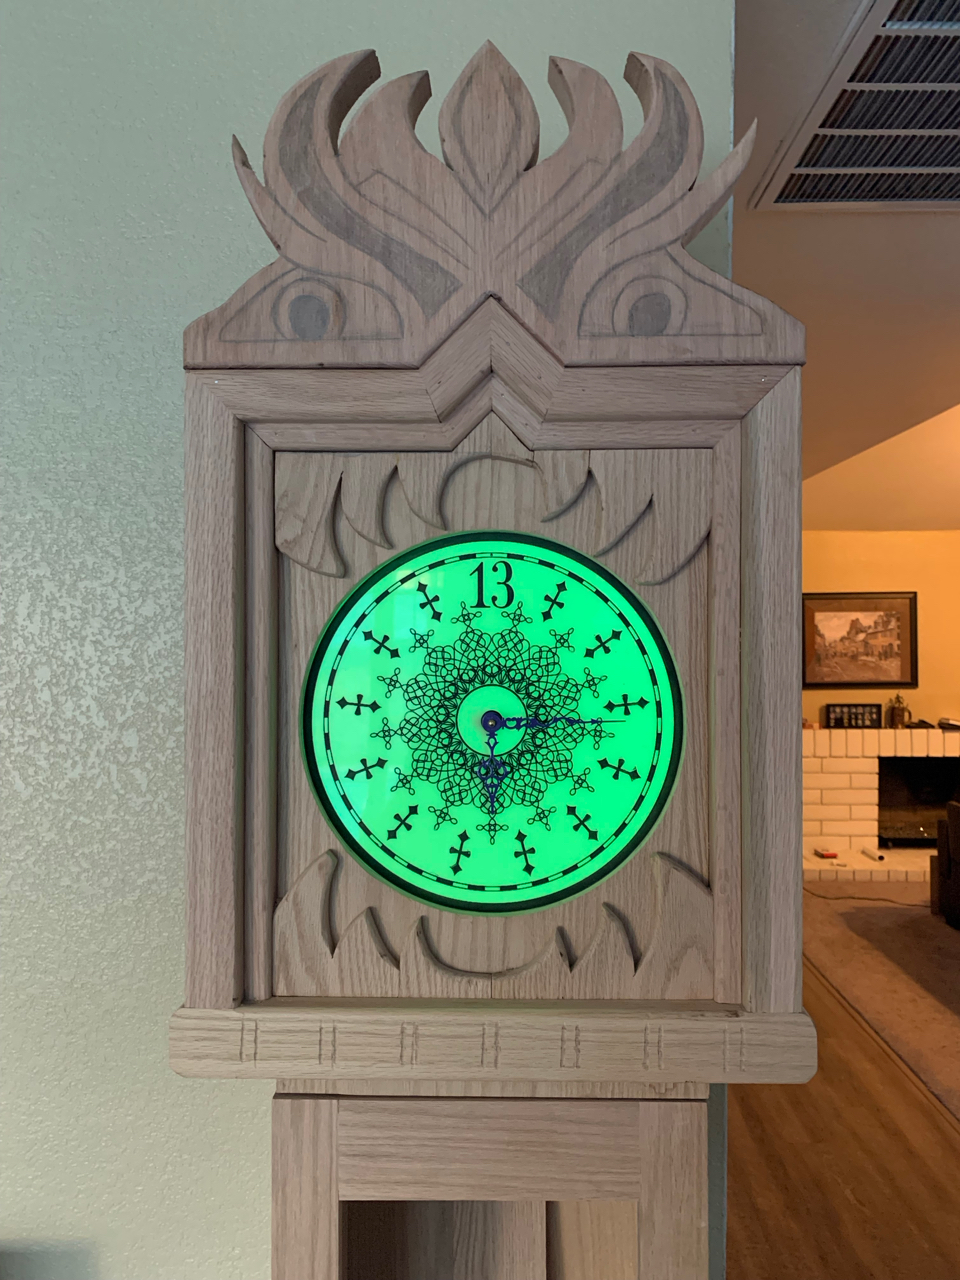
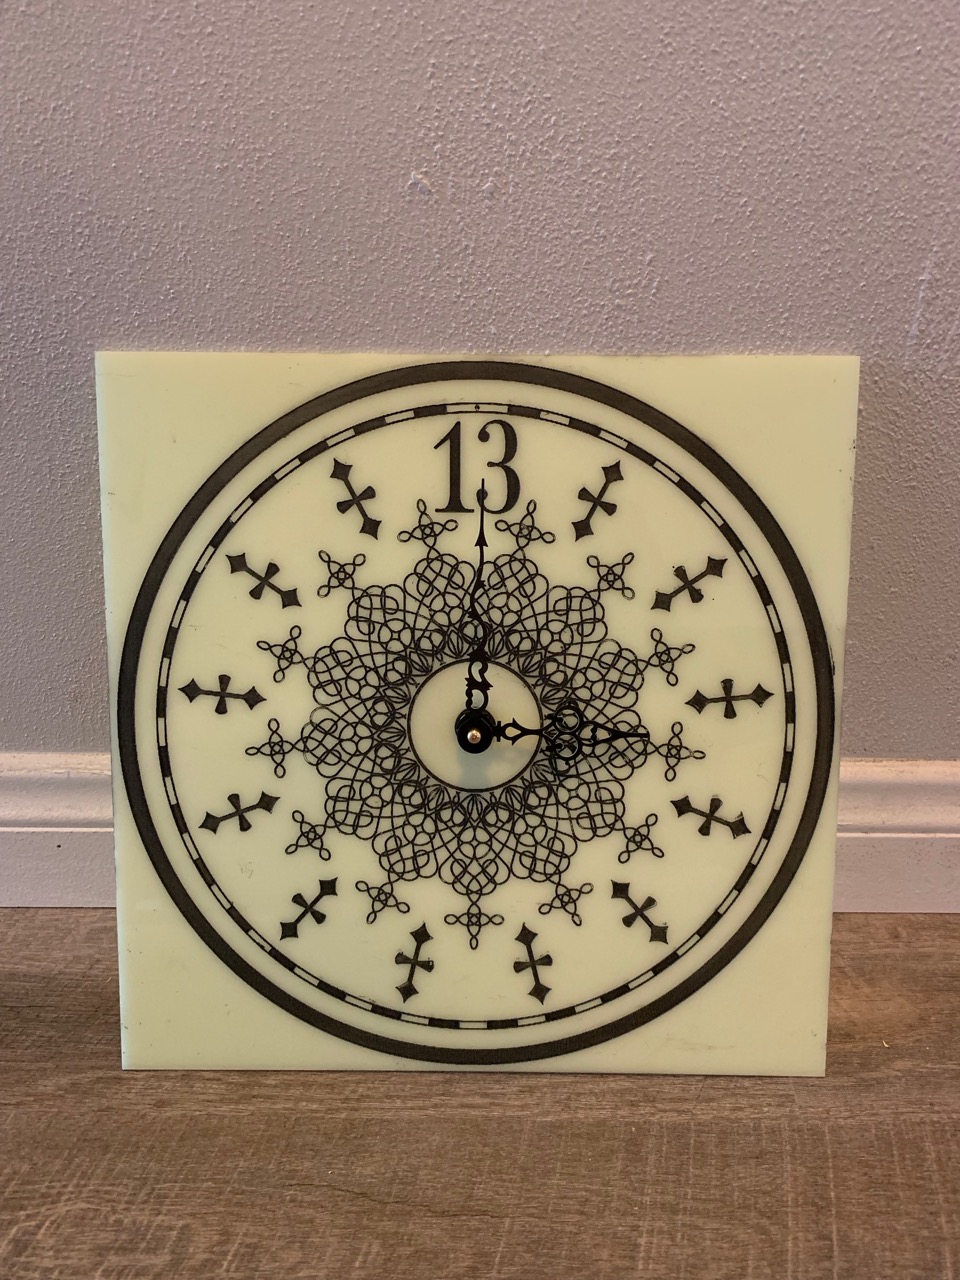
Closeup of the face:
And the body REALLY benefitted from this. The pendulum looks amazing now and the shadows cast within the box make it look a whole lot darker and more foreboding.
This clock is made of Red Oak… So I’m planning on staining the entire clock with Red Oak stain. However, the inside of the box and the inside of the mouth on the toy clock are both black. Before passing a serious point of no return I wanted to get some opinions on a couple stain samples I got.
Bottom sample is Red Oak, that I am pretty sure will be covering the entire clock. Top sample is Black on the left, Espresso on the right. I’ve got a preference, and I’ve sampled a few friends to see their opinions. Black? Or Espresso?
PS: I’m *REALLY* happy with how the brass paint came out on the demon pendulum. There are a couple spots I wish I had painted a little bit cleaner, I may sand and touch them up, but for now I love it more every time I see it. I just realized I hadn’t posted the painted pendulum yet, sorry! I’ll backtrack a little after getting a couple stain opinions.
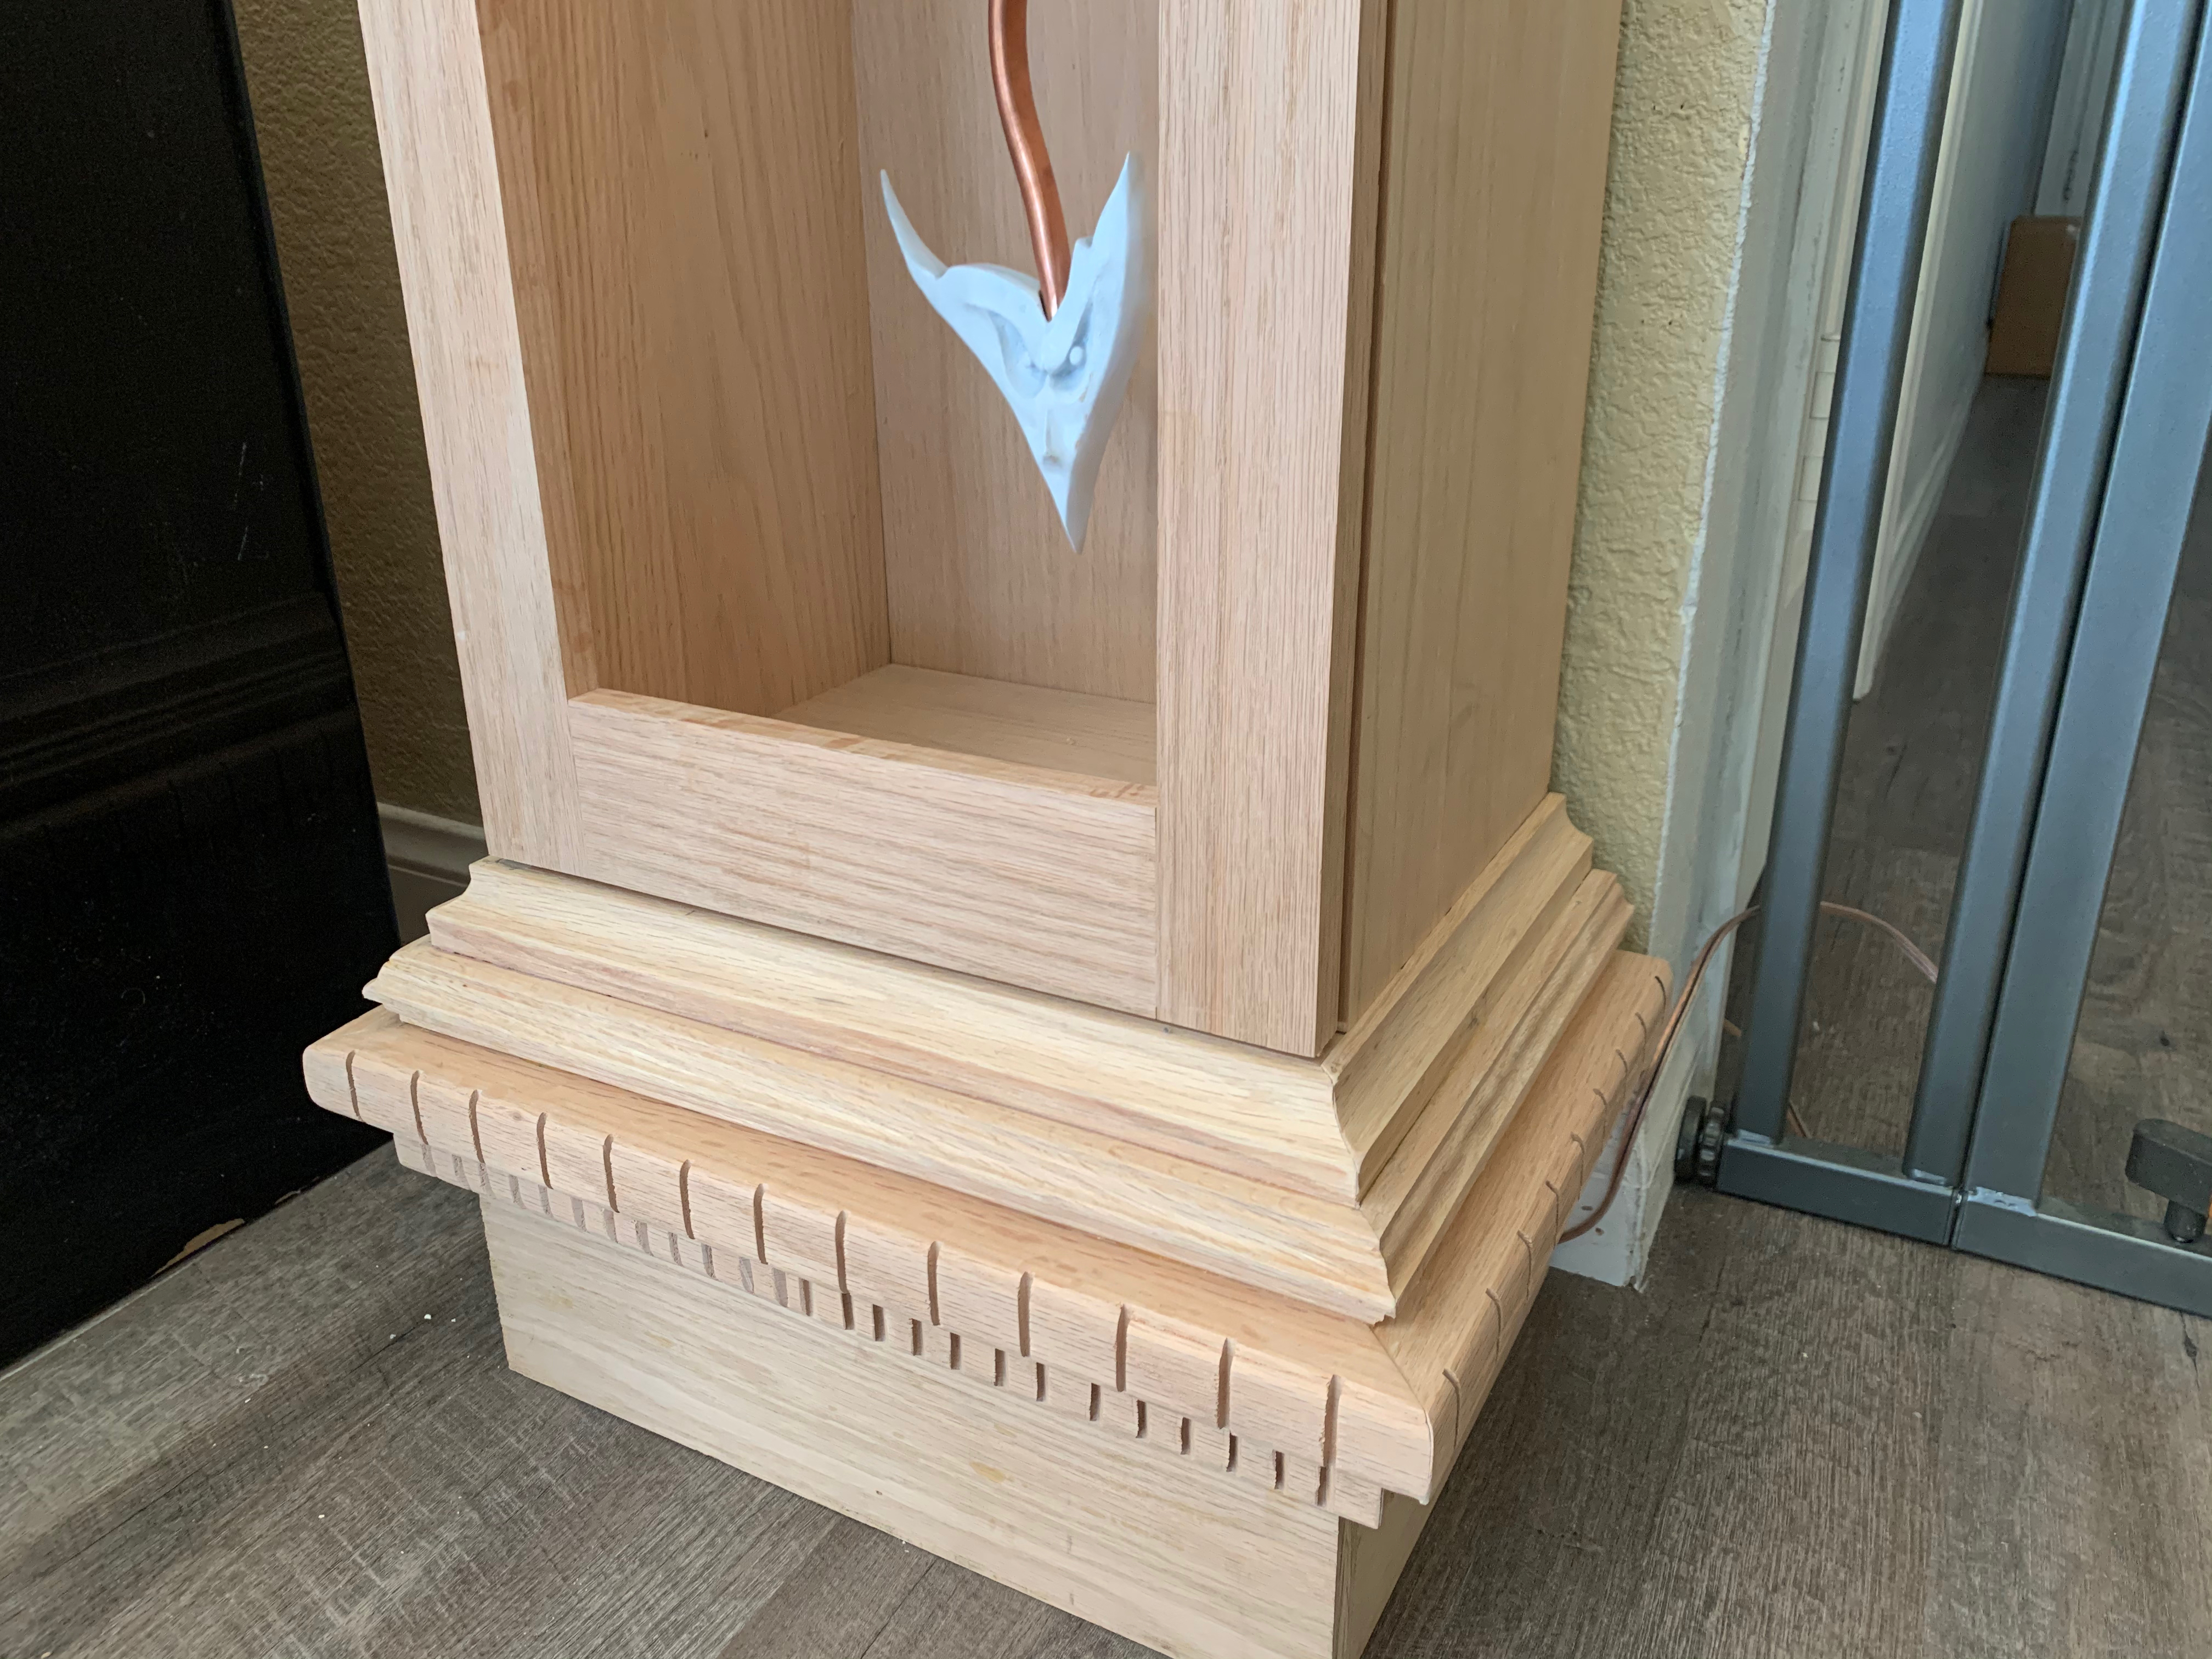
I’ve added a ton of detail to the base of the clock over the past couple weeks…
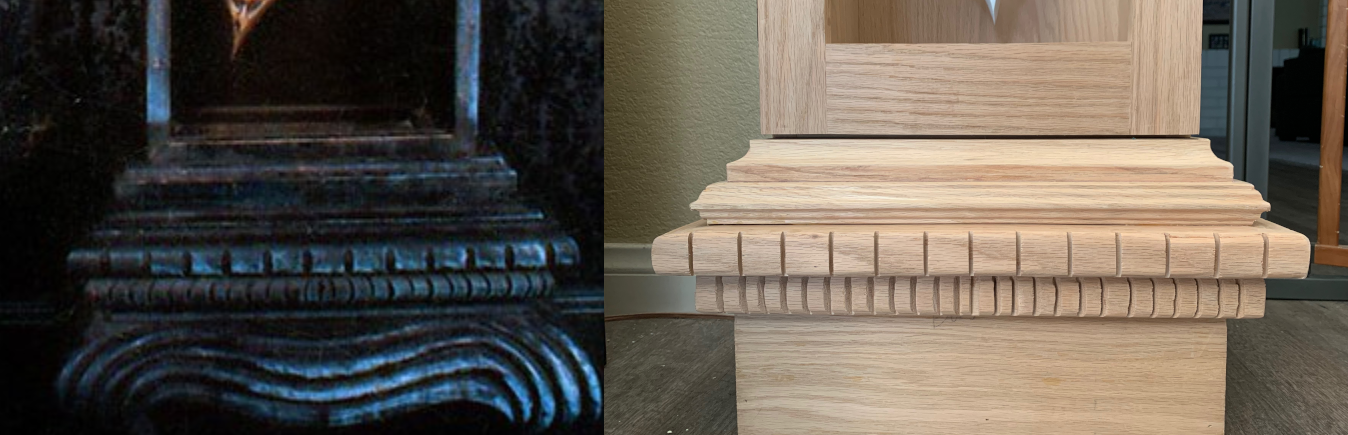
Based off of this image of the original clock off of flickr, a comparison of what I’ve got so far on the base:
I’m really happy with the way this adds to the clock… It’s a little less rounded than the original, but I think it wears it well.
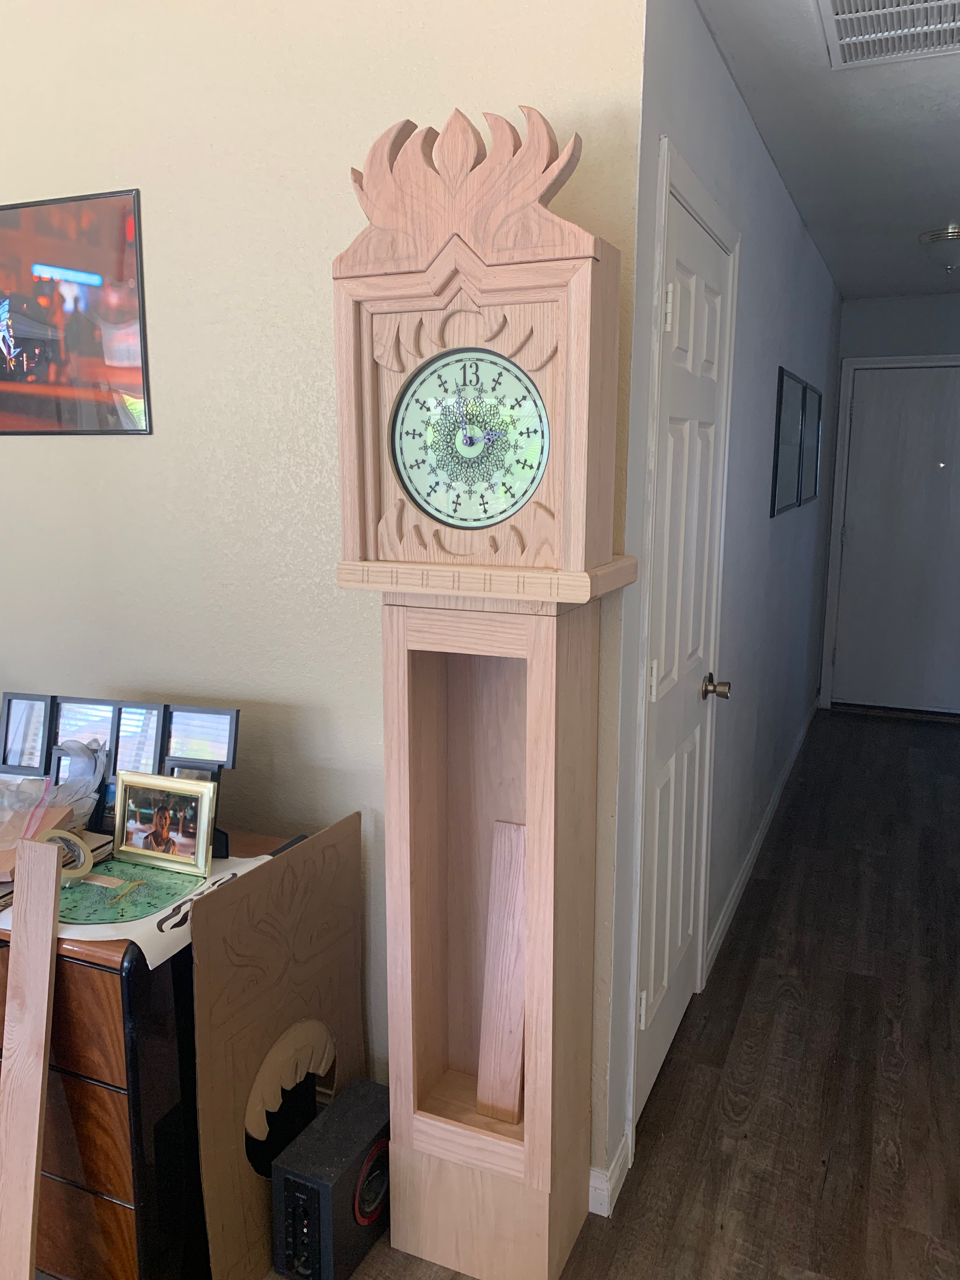
And a full length version…
I took the base box and added a sheet of plywood leaving a 3/4” ledge at the top of the box. I inset the first piece of 3/4” moulding that I routed into that and it fit perfectly. Beneath that I had a piece of moulding that I originally intended for the top box, but didn’t use… It wasn’t quite right, but after I flipped it over and routed the other side I was able to give it a jutting-out type lip which matches the original clock enough that I’m totally satisfied with it. The next piece was 2×3/4” pieces on top of one another, I rounded the edge and ran it through the table saw on 1-1/4” intervals (giving me 13 marks!). Beneath that I had to set the saw to a 45º angle and ran it through every 5/8ths facing the outside from the middle, so the left side cuts to the right, right side cuts to the left, 12 on each side and a 13th in the middle shared by both, totally unintentional, there’s one more mark on the top piece, and I think one on each side on the bottom piece, but it made the spacing work out a lot cleaner..
Next up I’m going to have to make a skirt for the bottom with the beast’s legs, that one is going to be tough, but I think I’ve got an idea to make it work. I think while I work on that I’ll order some glass and paint the pendulum. I think we’re going to go with an old aged/weathered brass for the pendulum and the serpent head. It’ll be a first and I really hope I don’t mess that part up. After that is the even more intimidating staining of the clock, looks like we’re getting into no-mistakes-allowed land.
So it’s been a VERY long time since my last post, but I have not stopped working on this thing little by little and I’ve made some real progress I think.
Notable but less visible of changes, the door now has hinges. I know the toy uses magnets, and it was an idea, but I think for practicality and safety (this will have glass in it) a more permanent real-world solution would be a little bit better.
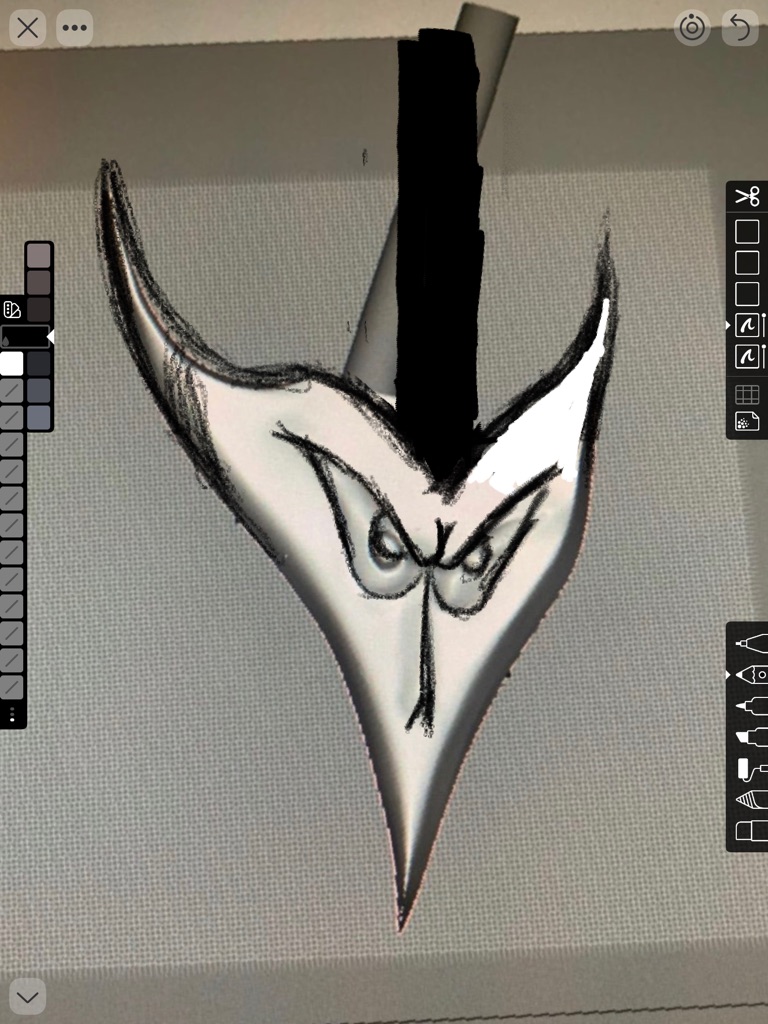
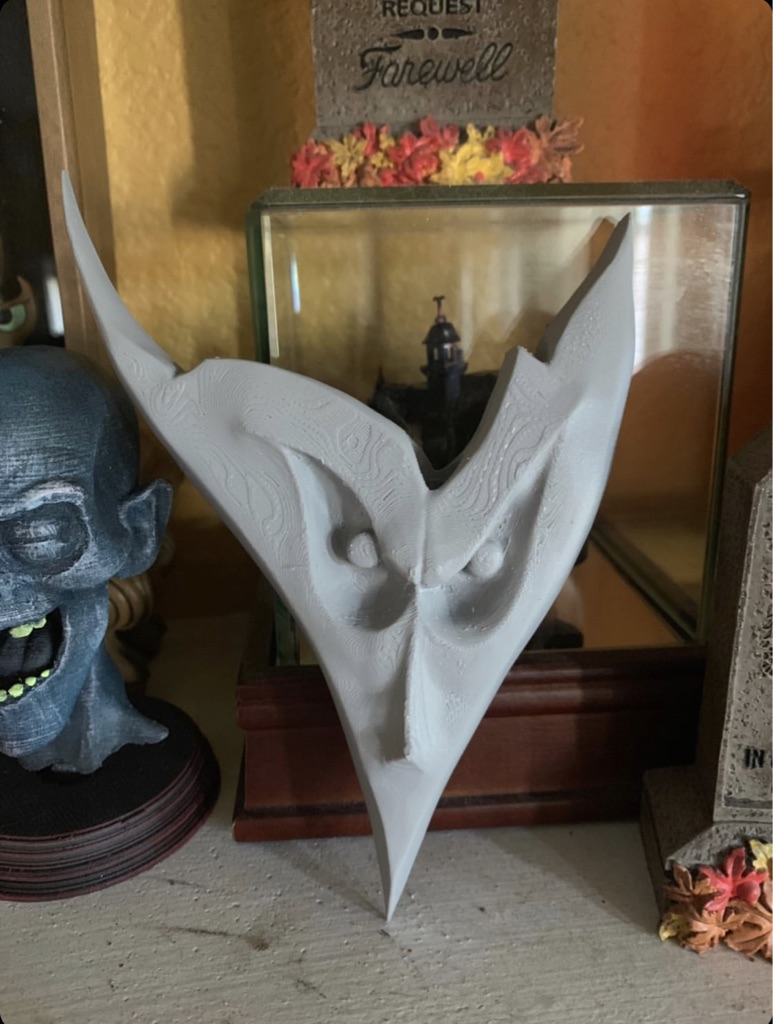
Next, I’ve worked with someone who’s stuff I’ve seen on IG (I’m not sure if the RPF lead me to them or not, I THINK so?) but their mansion 3D prints are spectacular, Doug and Jessica Hogan (@prototypes_and_pixie_dust) • Instagram photos and videos I’d commissioned the pendulum from them as I don’t think carving that from wood would be at all practical, and since it’ll be covered in brass(?) paint, I think a print is probably the best solution. I couldn’t be happier with this thing, it looks amazing. A couple pics back and forth and this is what we came up with:
working from the original on Flickr at:
zoomed in:
after a week or so of passing ideas back and forth I was hit with the following image:
and I couldn’t be happier.
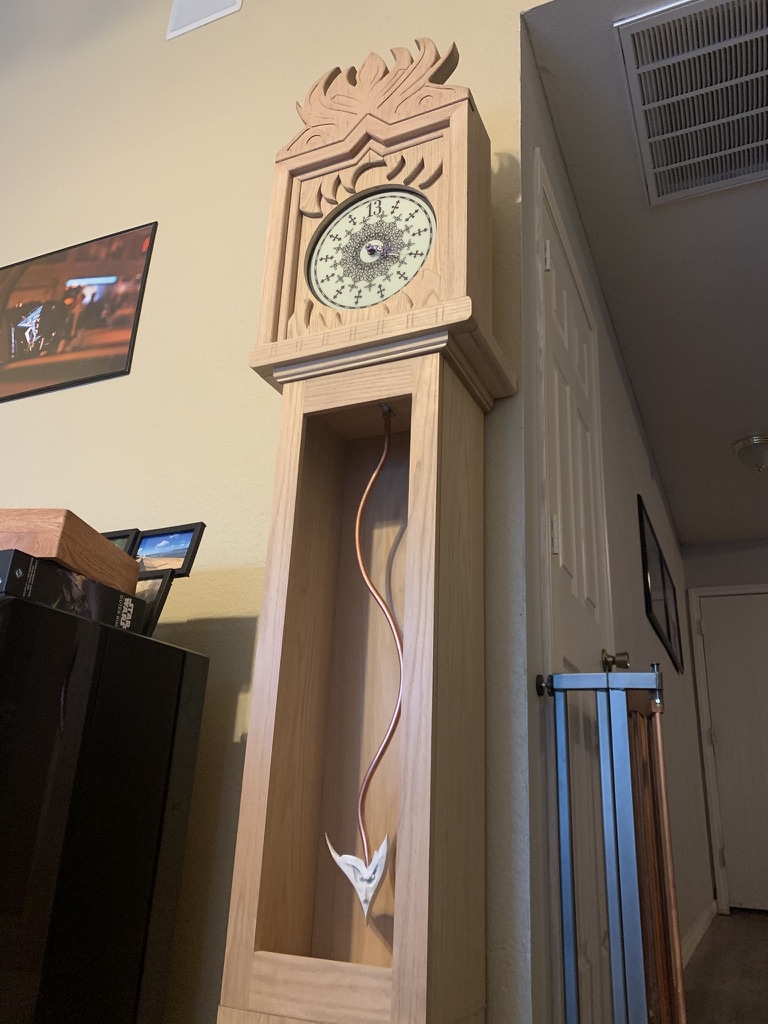
I used a roll of copper pipe and just from unwinding it I had a pretty perfect serpentine that was close enough to the real thing that all I ended up doing was drilling a hole to mount it at the top of the box (later on I’ll be building a motor for articulation) and squeezing the pendulum on.
and this is where we’re at after that!
I’ve spent a lot of time over the holidays working on the base, and that’s coming along great. I’ll put up a post for that shortly!
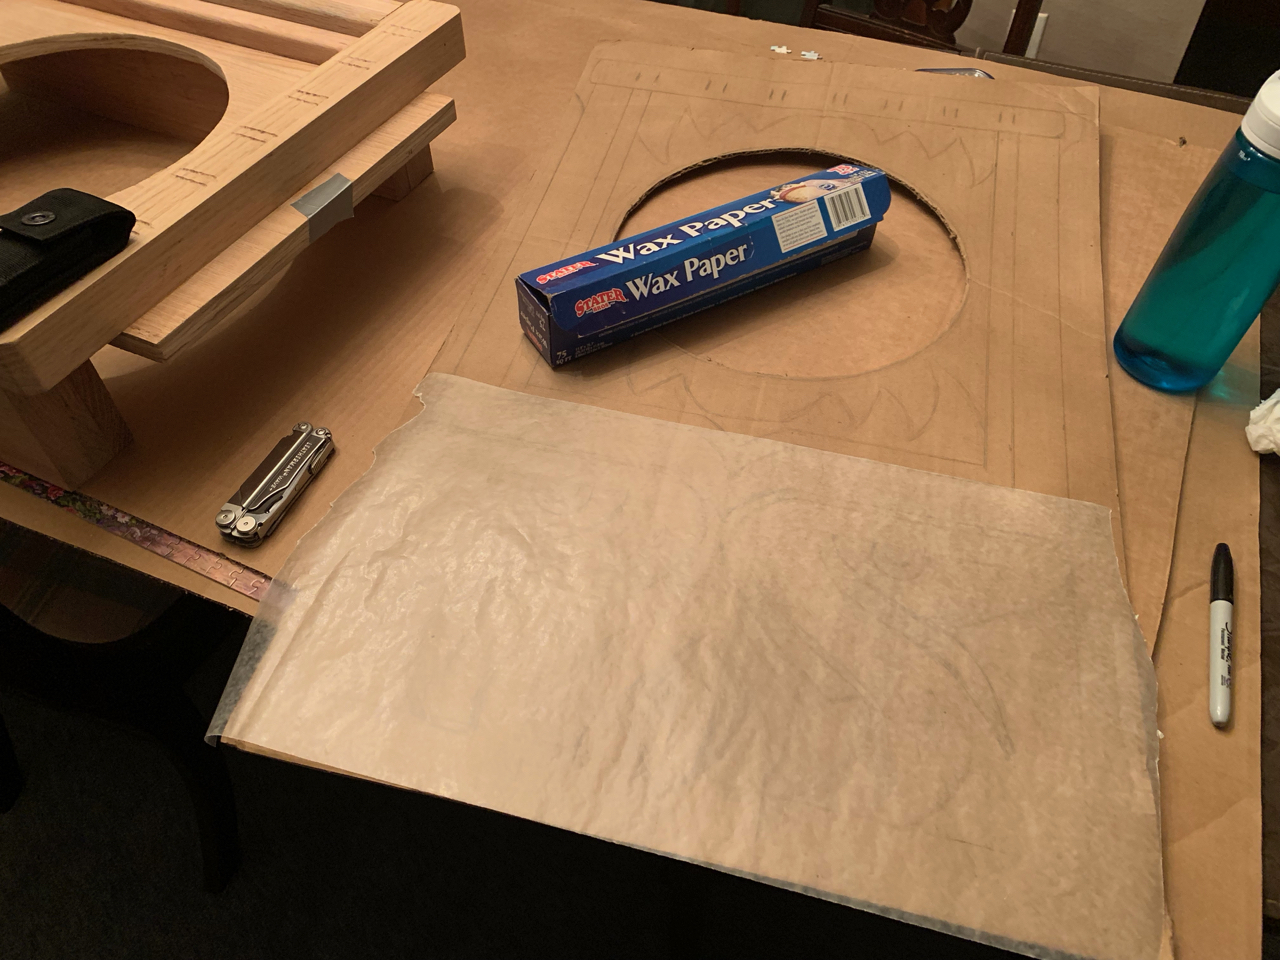
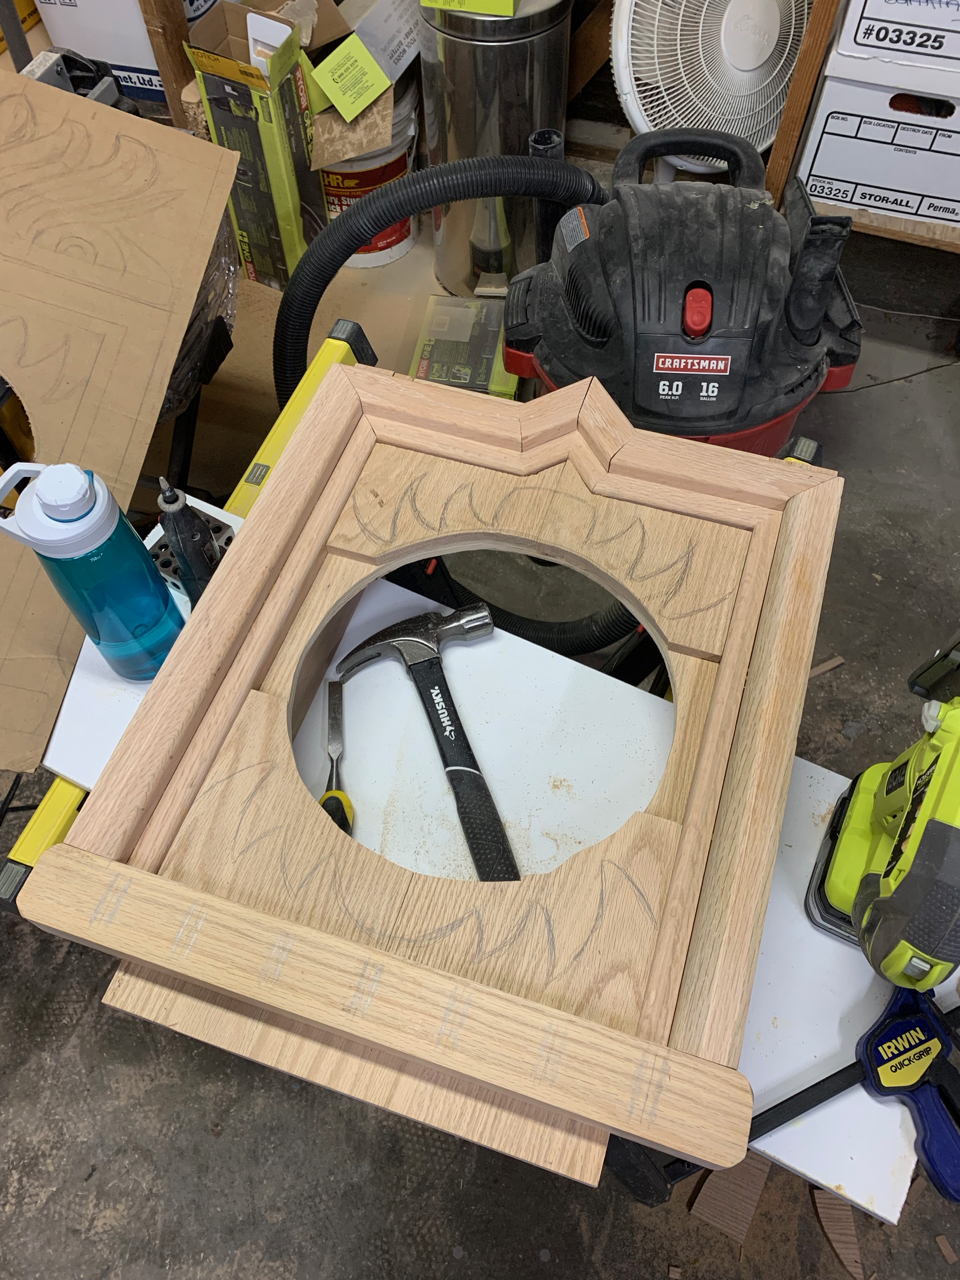
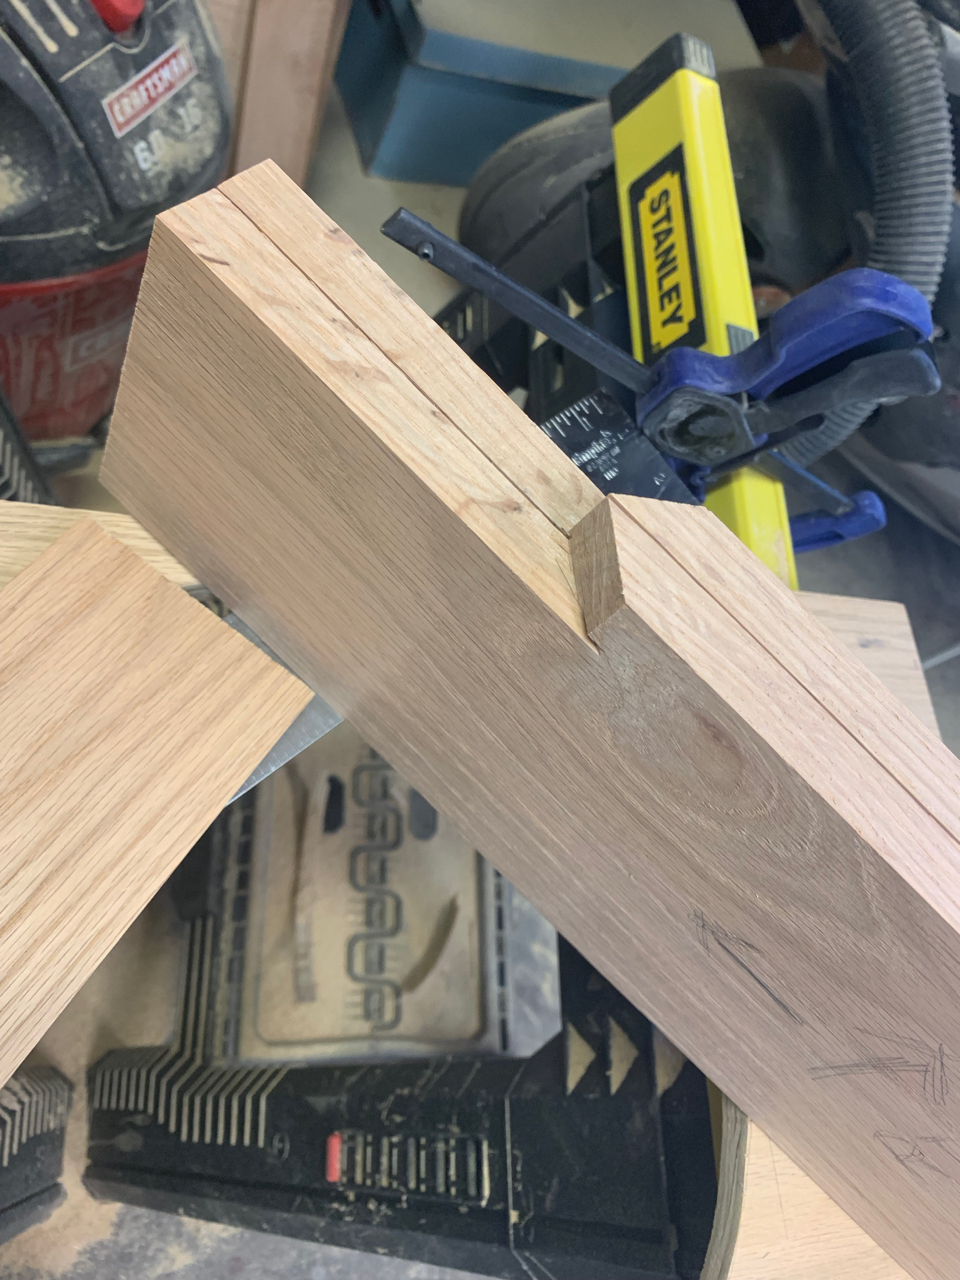
A loooot happened the other weekend. I was visiting my parents and decided to bring some stuff to work on with my dad. At this point I’ve gotten the head glued together… Probably one of the most expensive pieces for this whole thing. I needed 19” wide for this thing and 10” tall, since I couldn’t get oak wider than 12”, and my local selection didn’t have anything thicker than 3/4 for me, I needed almost 4’x12” of this stuff at about 10 bucks a foot. Oof. Got it home, cut it into 3 10” pieces and glued and clamped them for a while, cut them to size after the glue to make the edges nice and smooth and had a nice little couple of planks here. I waited to glue them into one piece until I got to my parents’ where we decided to dowel it as well, since we had the jig out for the door.
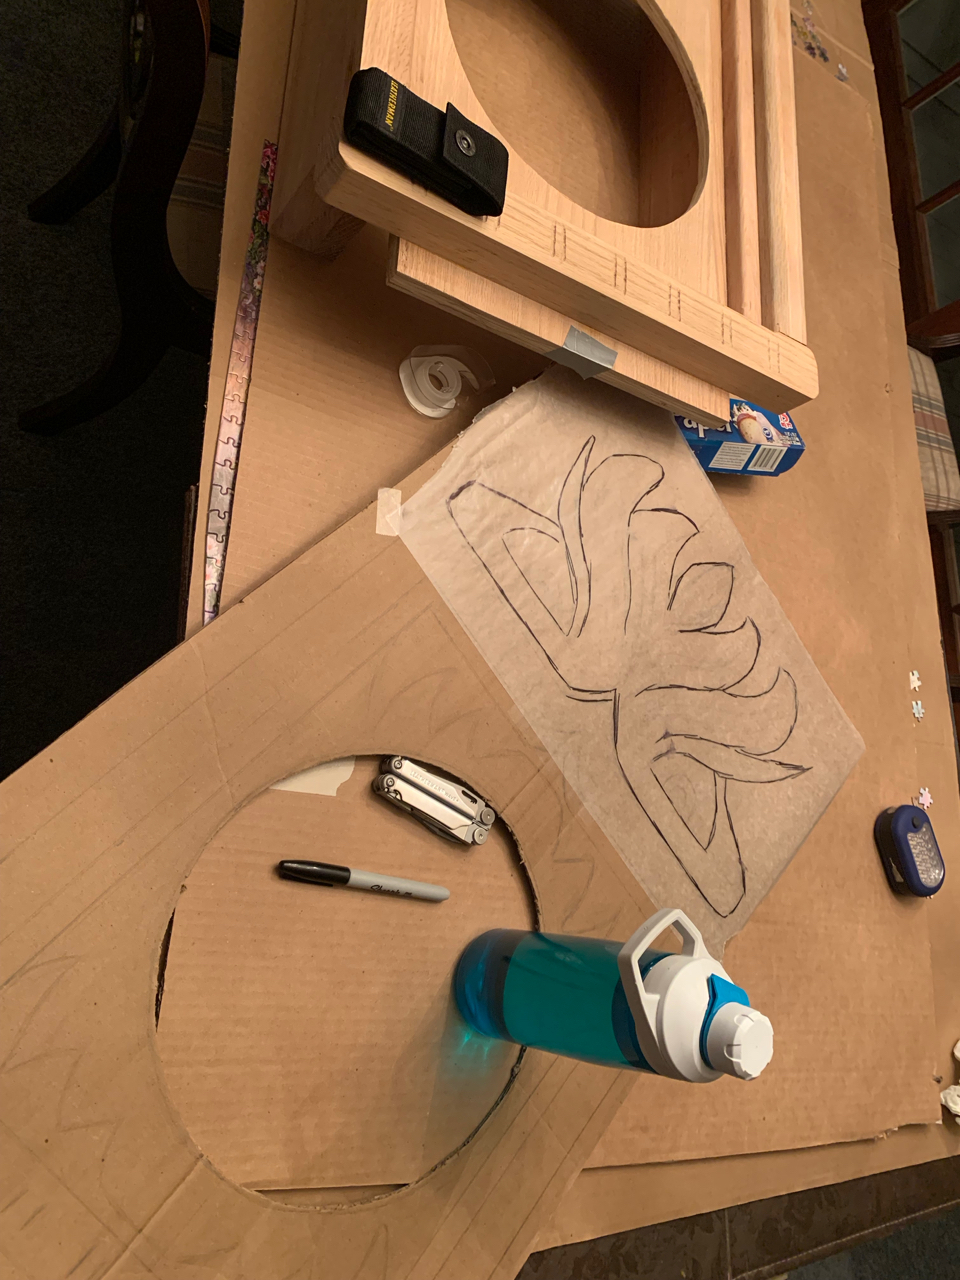
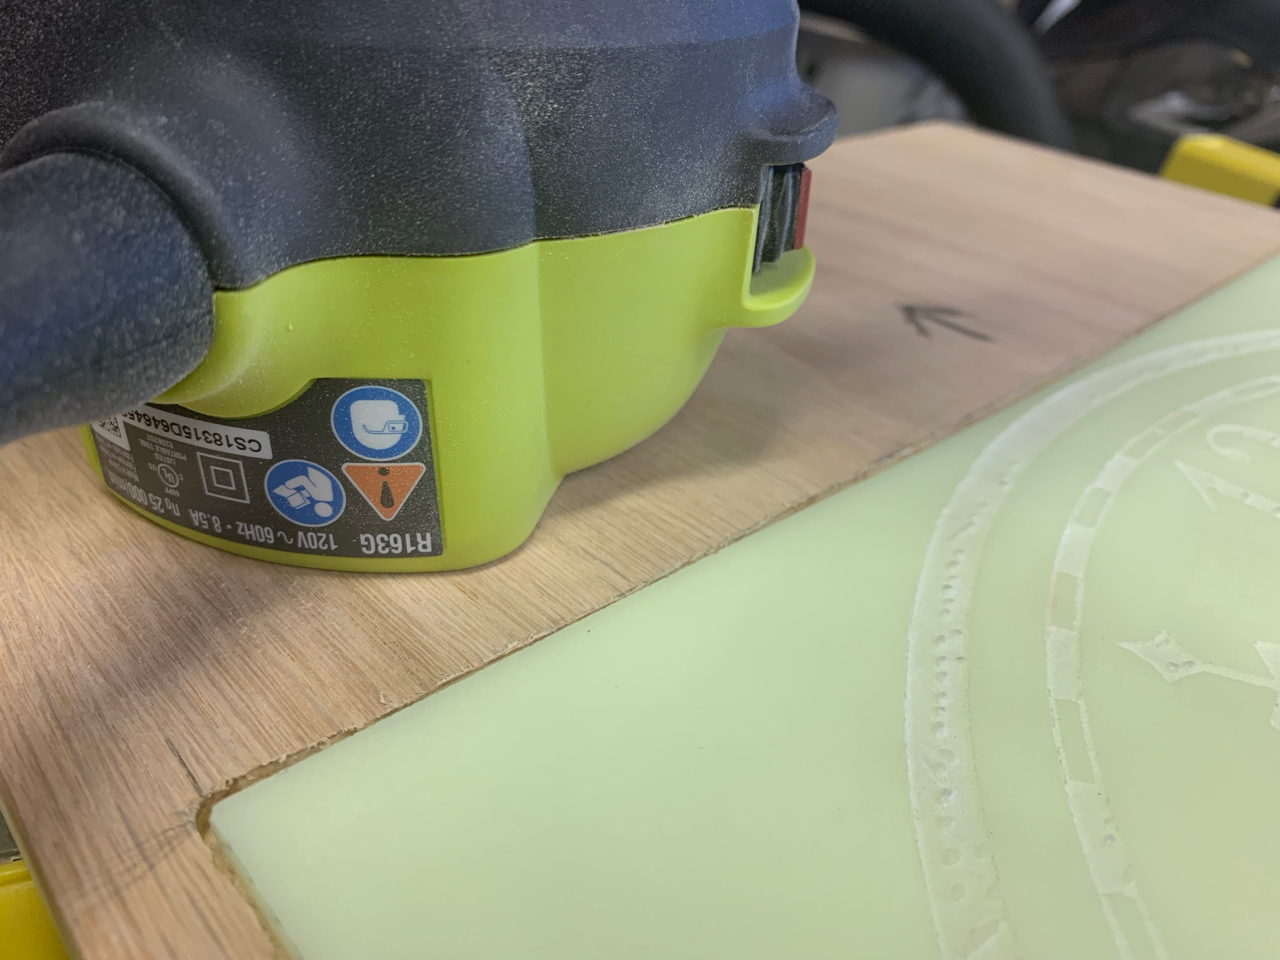
First thing’s first, when I got there I took my cardboard ‘practice’ piece that I’d used way back in order to get the measurements and dimensions right. Took that and some wax cooking paper and a sharpie and made a stencil/transfer for getting the shape onto the wood. I wish I’d taken a liiiiiittle more time on this because I think a couple dimensions came up a little bit short… But that’s OK, they’re not that noticeable, and the size of the details within those cuts can make them even less noticeable without inspecting it with a ruler.
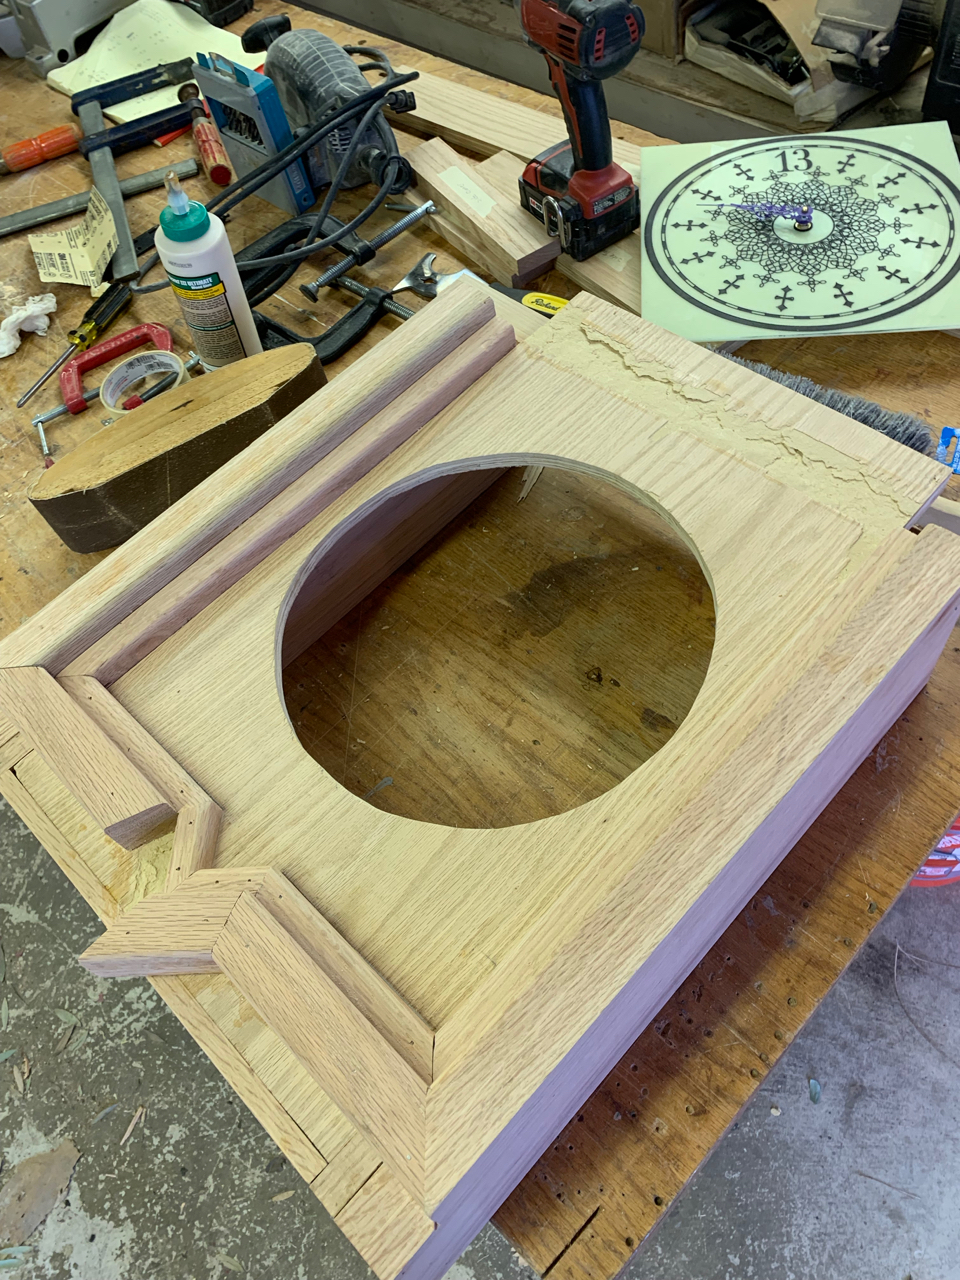
Dad wanted to clean up a couple of the more noticeable gaps in the trim, turns out it was a great idea, and the trim looks a lot better now.
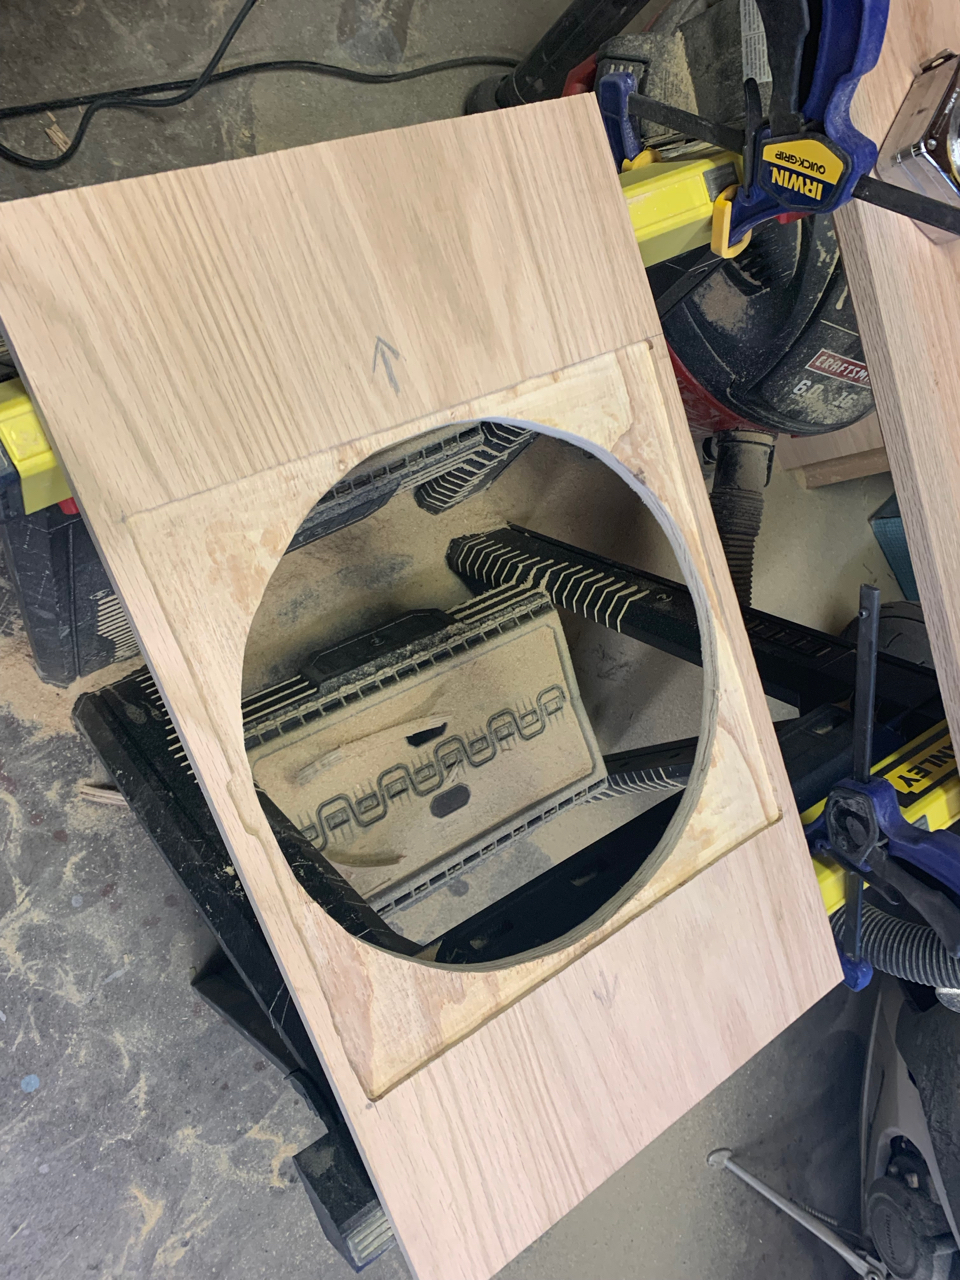
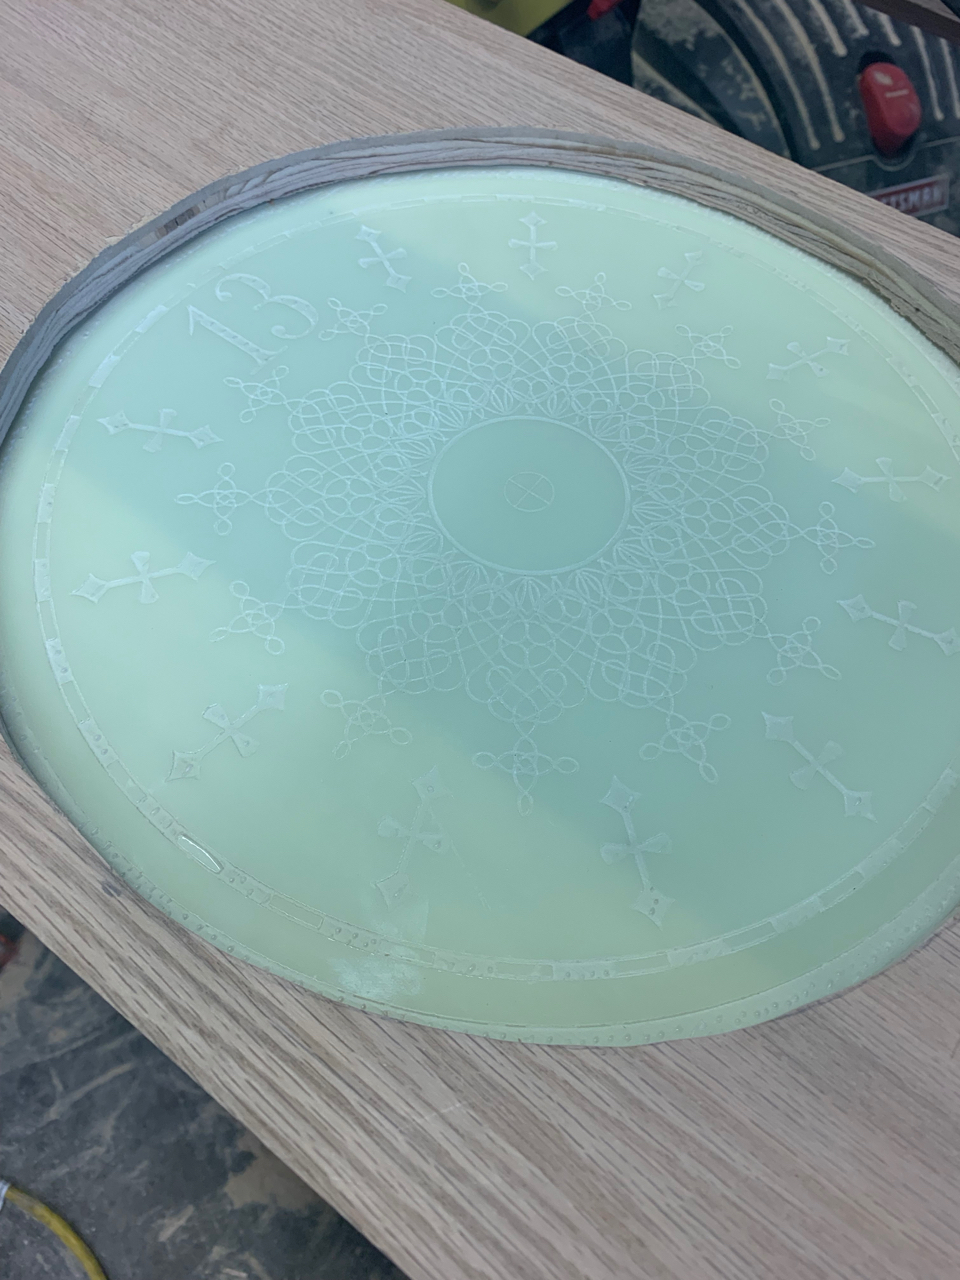
Another idea of his was to perfect the hole that the dial shows through with a stencil that he created. When we put the stencil in it looked like it couldn’t have been right because removing that much wood just couldn’t have been right. Turns out it was perfect, and the dial hole looks absolutely amazing now.
Once I got home I put together the pieces I’d cut for the ‘shelf’ across the bottom of the top box. Thinking pretty 3D about this one since it sticks out PAST the front of the top box in order to line up with the facade of the shelf across the front. In hindsight… maaaaaaybe I’d have cut a 45 into the front, so I could 45 the sides and have them line up with no ‘side’ grain showing… That’s going to stick out a bit. Maybe I could fix that later, but… I can’t take that facade off again, it ripped the hell out of the plywood last time. If I cut a 45 out of that one it’d have to be in-place… And I’d have to redo the wood for the sides. So, mark that as a future wish-list ‘if i get bored enough’ upgrade once the entire clock is finished.
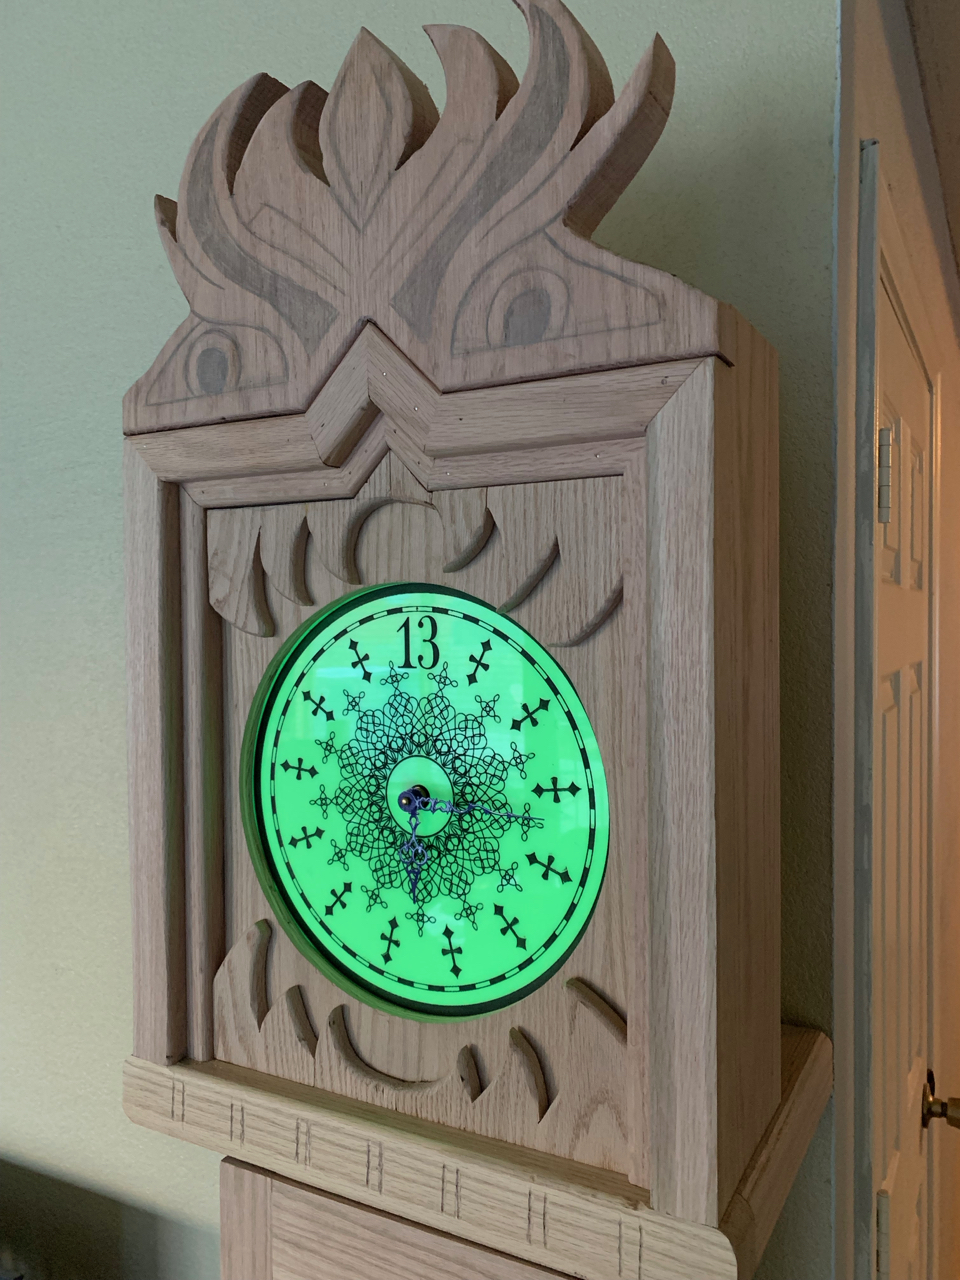
We cut the outline out of the eyes, it looks fantastic. I just swish the stencil were done a tiny bit better… The eyes are cut a little bit low so you can see the 90 degree angle across the top of the box. It’s only about 1/4” of the corner that’s visible, I’ll probably just fix that with sanding. You can’t tell at all from the front, it’s just obvious to me for being taller than the clock… Once I add feet maybe it’ll bug me less. Also once I’m done sanding it so that it lines up it’ll bug me less. Also I can’t wait to find some good moulding to put across the bottom of the ‘shelf’ facade. I think that’ll really finish the top off nicely.
I don’t have any closeups or in-progress shots of the door being put together. We drilled some dowel holes in with a jig, glued it, hammered ‘em in and sanded it down. While I was out my dad took the liberty of cutting an 1/8” recess into the door and some matching shims so I can put some glass into it when all is done. Also he donated some beautiful hinges that they were going to use at one point that they had extras of and fit the style of the clock perfectly. Originally I was struggling with what to do about the door, I was considering holding it on with magnets (recess and glue into the door and the box) but … that could be dangerous. Hidden hinges? Expensive, but, that hasn’t stopped me in this project yet, so those were definitely an option, but these just look perfect, I’m gonna use ‘em.
Here’s what the full thing looks like put together so far…
I know I haven’t posted in a while, but I have been working a bit and I think the last couple updates were huge milestones.
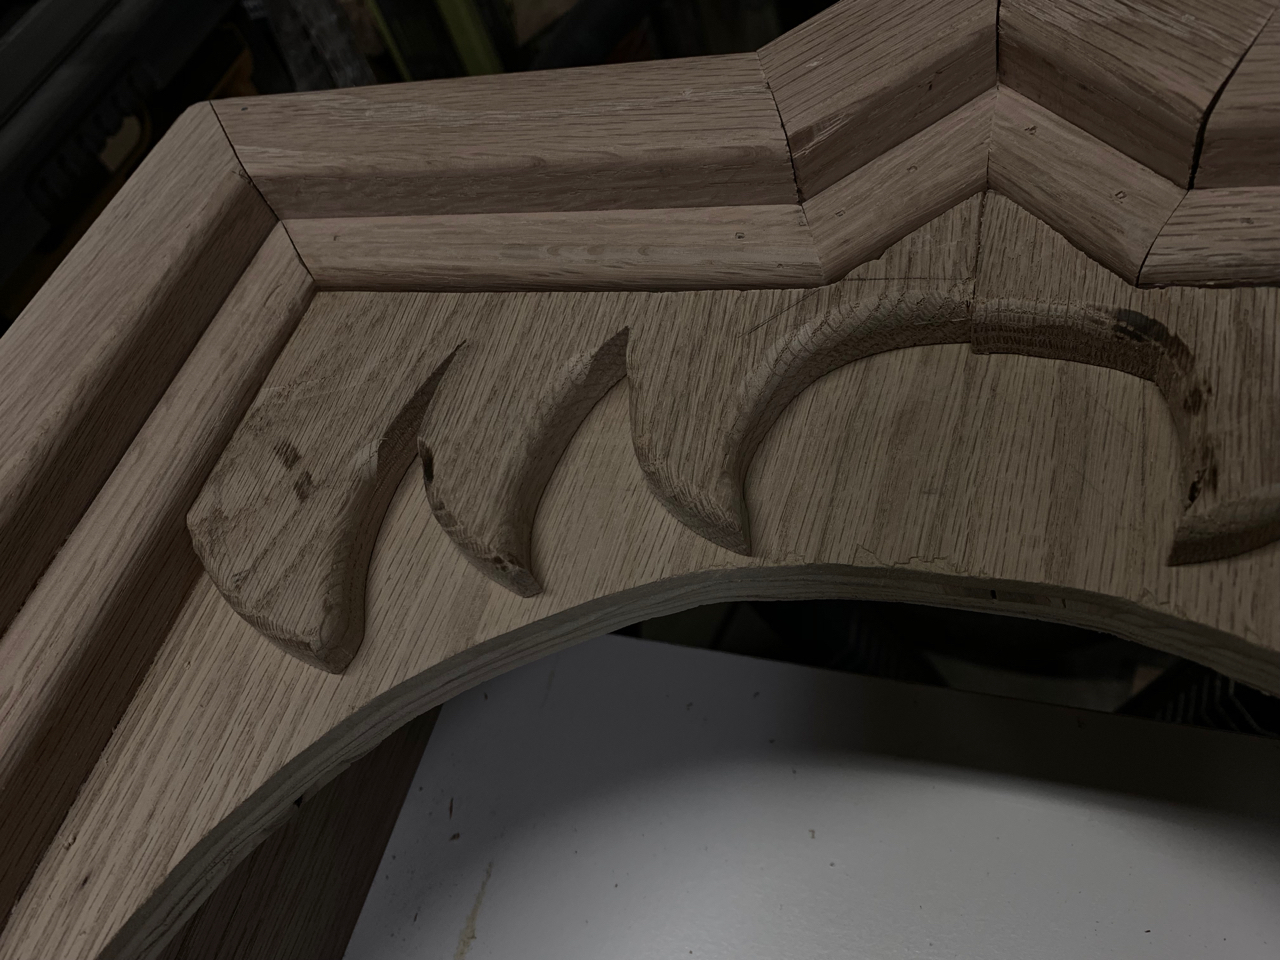
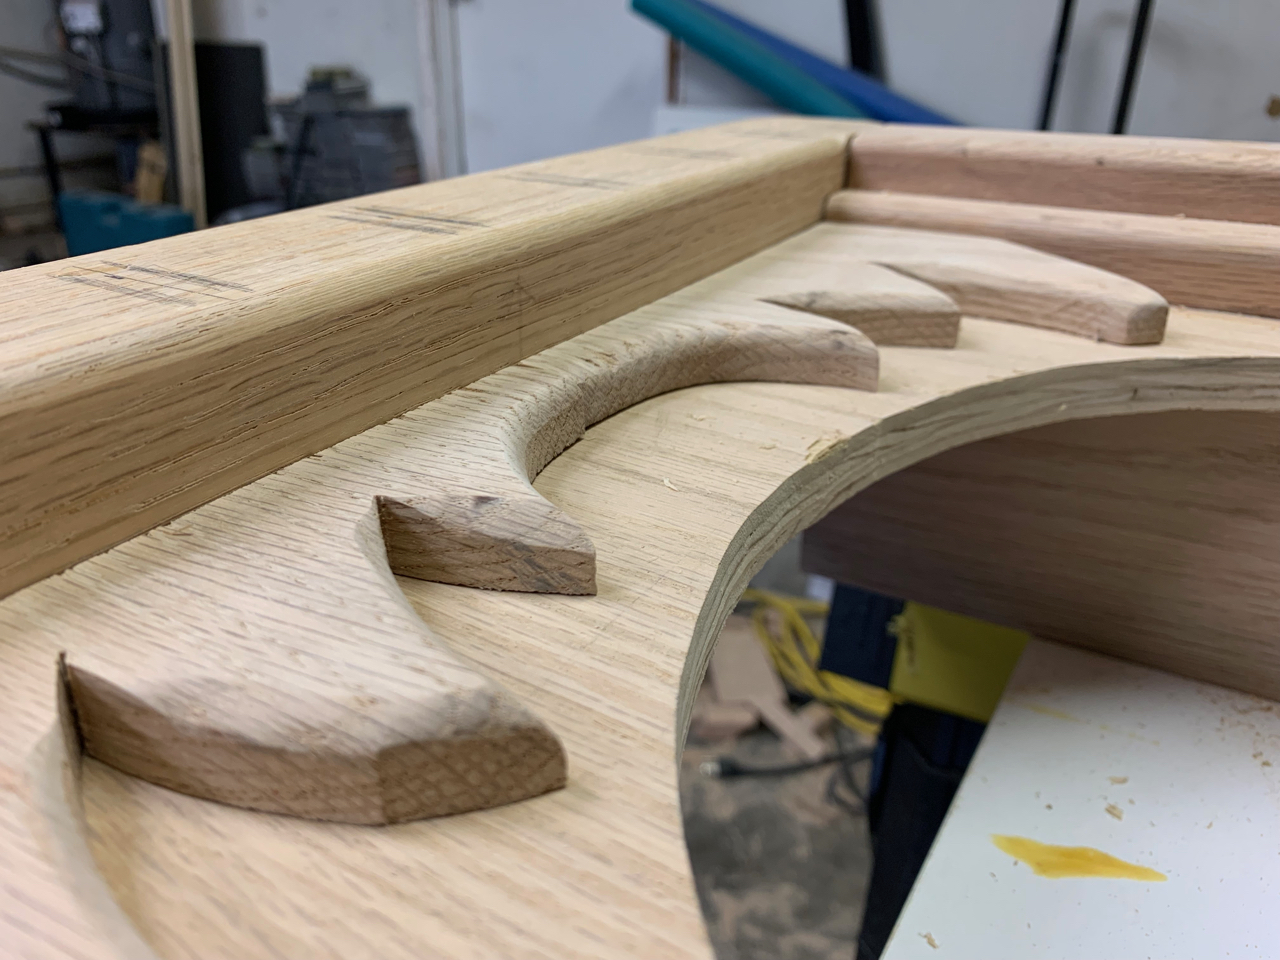
Since I last posted I’ve added TEETH! And the bottom ‘shelf’ across the bottom of the mouth.
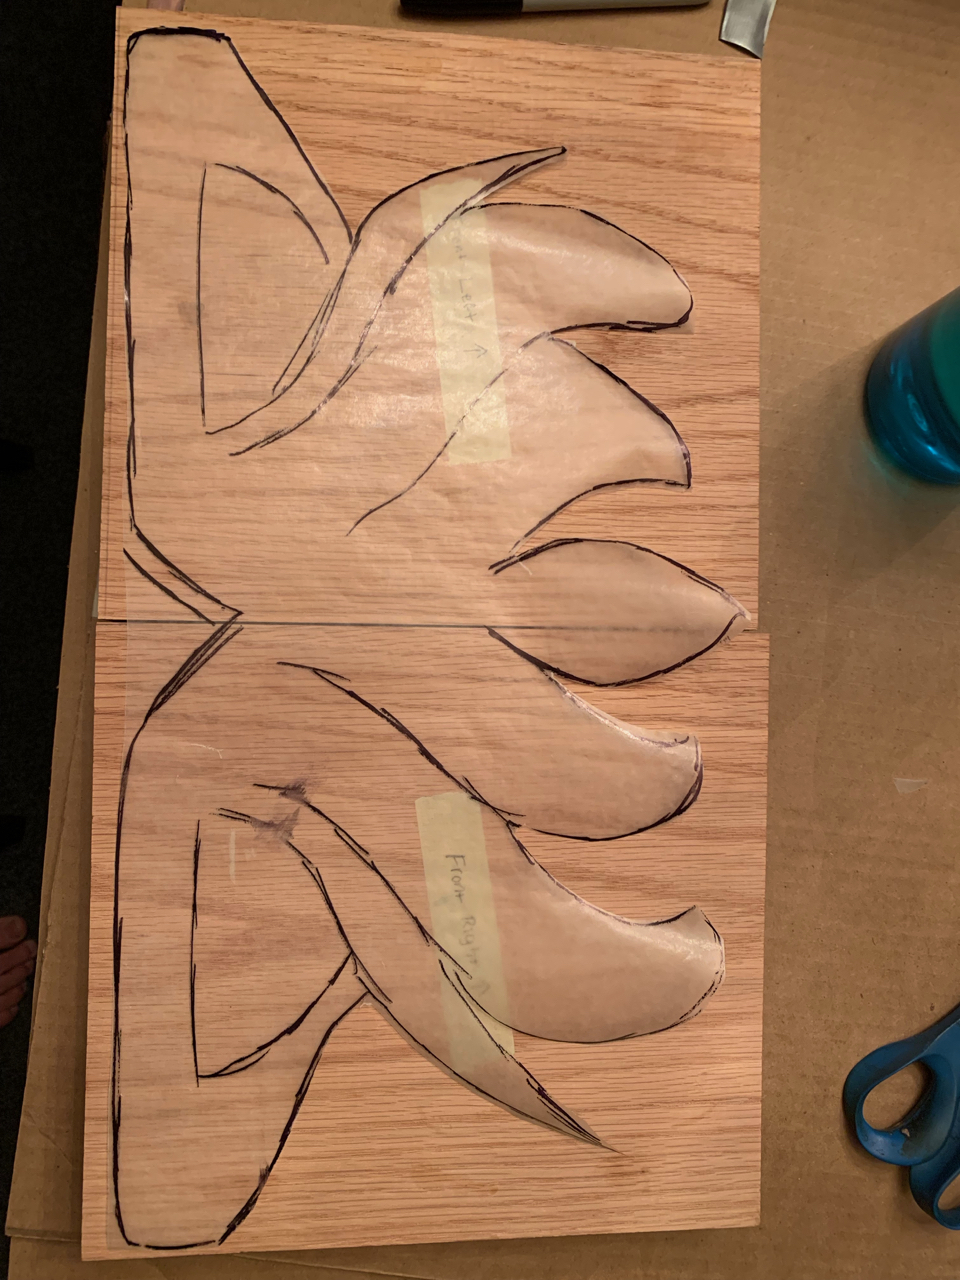
Once again I run into an issue with the red oak solids not being available above 12” widths. Not a problem though, I just got a 2×8” plank of wood, thinned it to .5”, and cut each side to JUST over 6.5”. This way it’s a REAL tight fit for these pieces to snap in. Since these all came from the same piece, and it had an open grain on one side and a tight grain on the other, as long as I connect these uppers and lowers where the grain is nice and tight, it totally hides the seam. Also the open grain looks kinda flame/tooth like, so I think it looks really cool on the bigger teeth on the outside. (unfortunately I screwed up on the upper right and cut it backwards… It’s not very noticeable, but, you’ll always notice your own mistakes, so I MAY redo this later.)
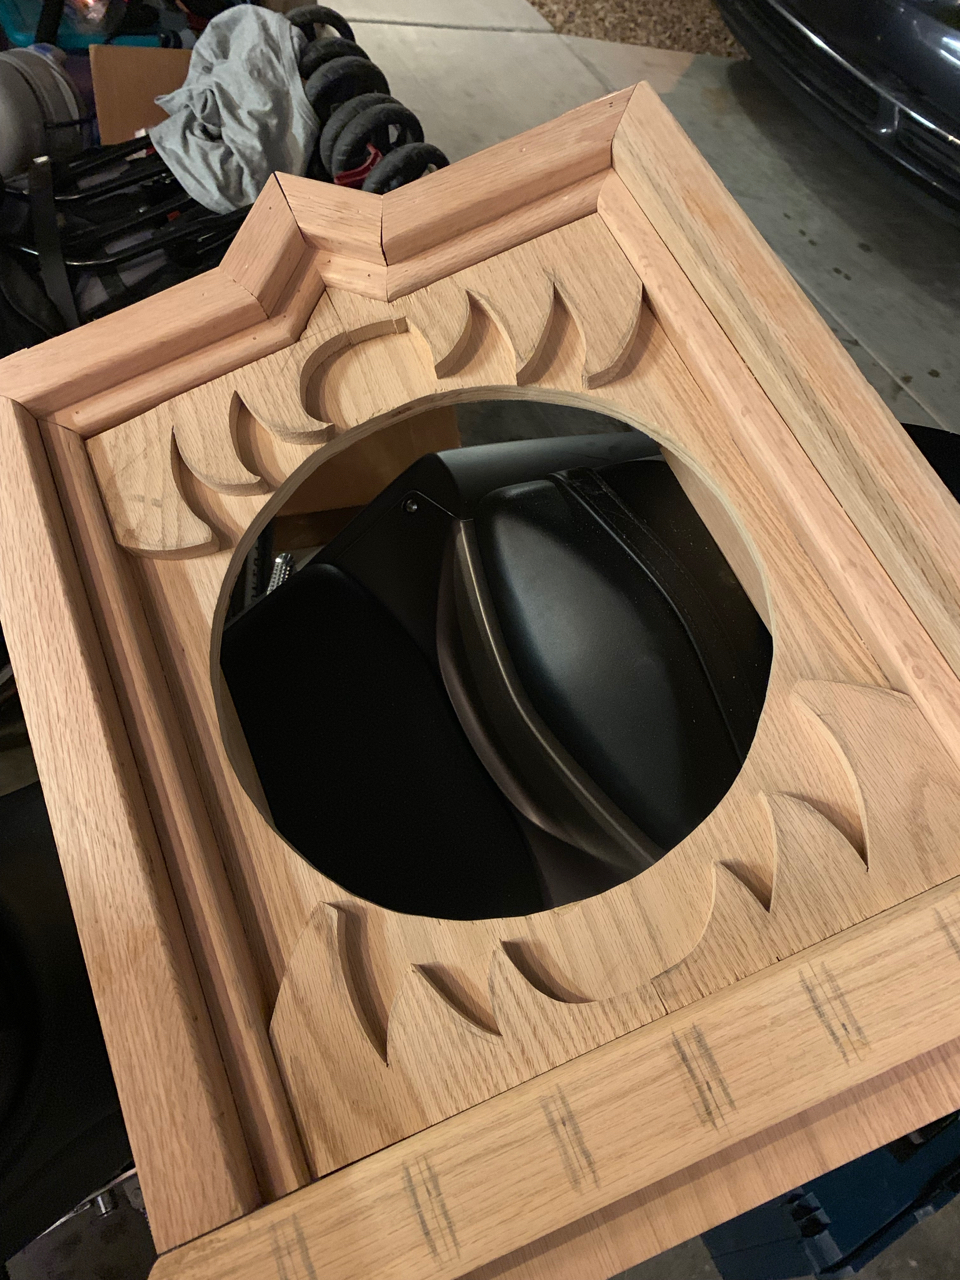
So now I’ve got 4 5×6.5 squares and I snap them into the frame where they belong nice and tight, flip the front over, and trace the opening onto it. Now it’s nice and easy to cut a circle to match the opening, which makes it nice and easy to draw the teeth to the length they need to be, to butt right up against the circle.
I think I nailed it on the top left, the bottoms look really good as well, the top right… I cut a tooth a little too short. Part of me thinks it adds to the character, part of me thinks “well if I’m redoing it anyway, I may as well cut that one a little longer next time.” So we’ll see about that. For now this is where we are.
After cutting them out I took the router to them to give them a nice rounded edge and a little bit of depth. I love the effect this gave me.
And this is how it sits in the dining room right now:
I forgot to mention, I’d also built the door for the mid-section. I don’t have a dowel jig and I figure rather than paying for one I’ll use my dad’s when I’m in town this week, so that’s just held together with duct tape for the time being. But I think just that tiny bit, a couple bucks worth of wood and a few small cuts on the table saw gave a very finished look to the mid-section.
Bonus!
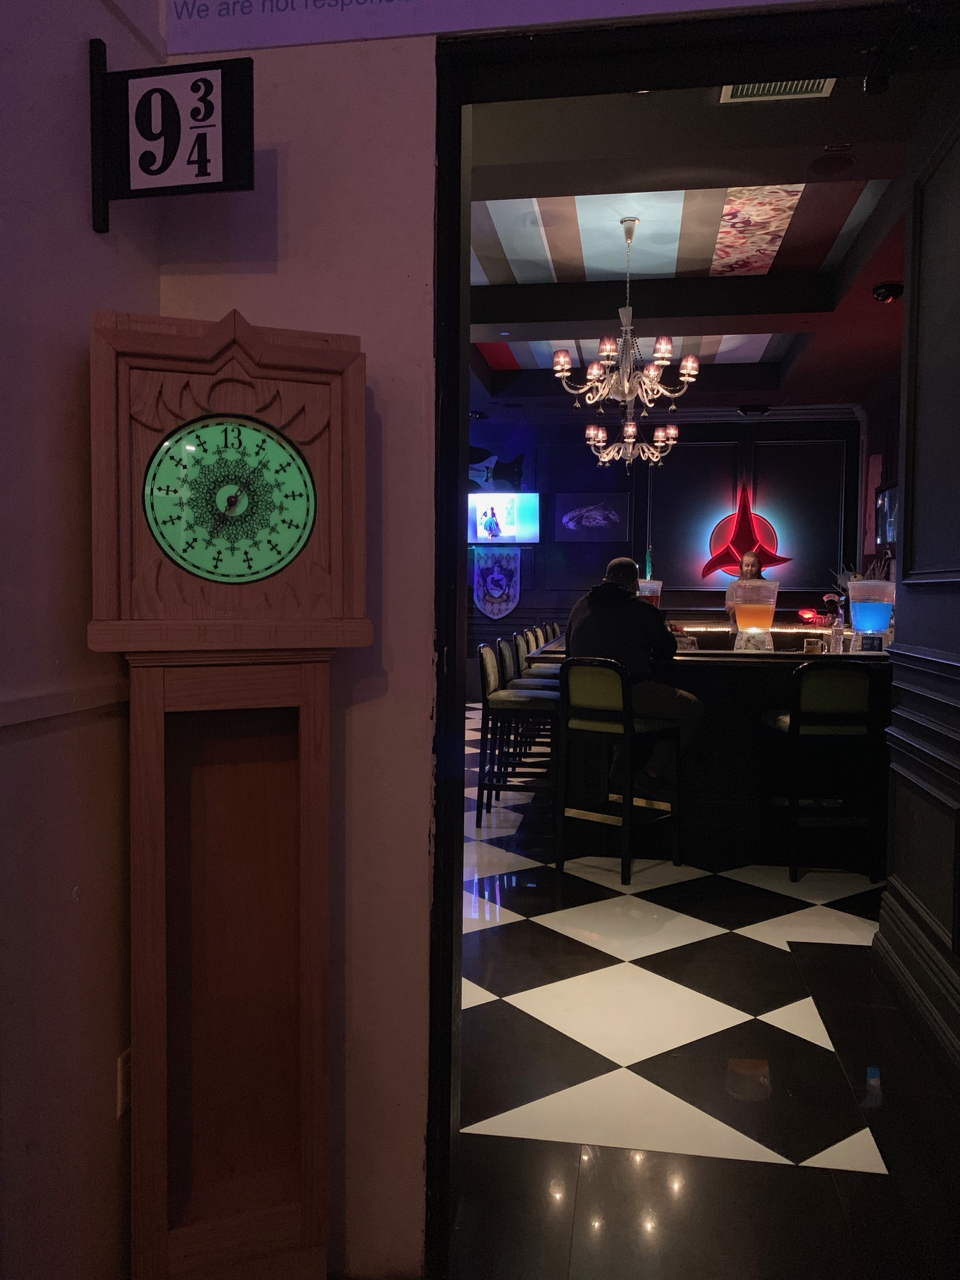
My buddy has a cosplay bar out here in Vegas (Millenium Fandom, great spot) and they have a different theme every weekend. Last weekend the theme was Haunted Mansion soooooo I got to share this (unfinished) creation with everyone!
This also gave me an idea that I may need to move on once I’m finished. I wish I had a couple of those Bat Stanchions and a velvet rope to put in front of this thing at the time, I may have to make that my first ‘after-project’ add-on.
Hopefully next week I can get some pics with the eyes and sides of the shelf and moulding added!
It’s been a while since I’d last posted, but I think I’ve made some small but very satisfying progress.
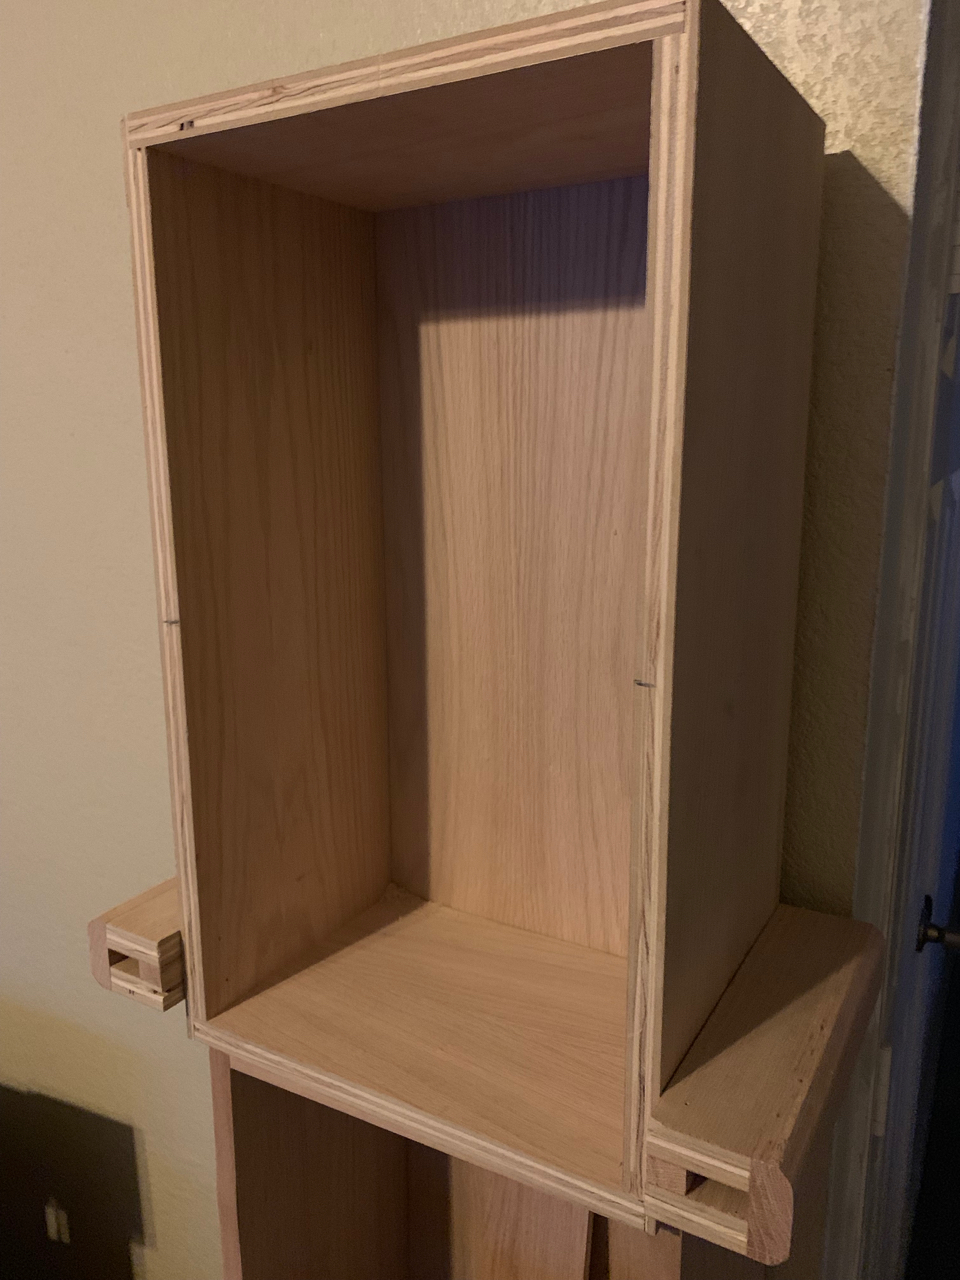
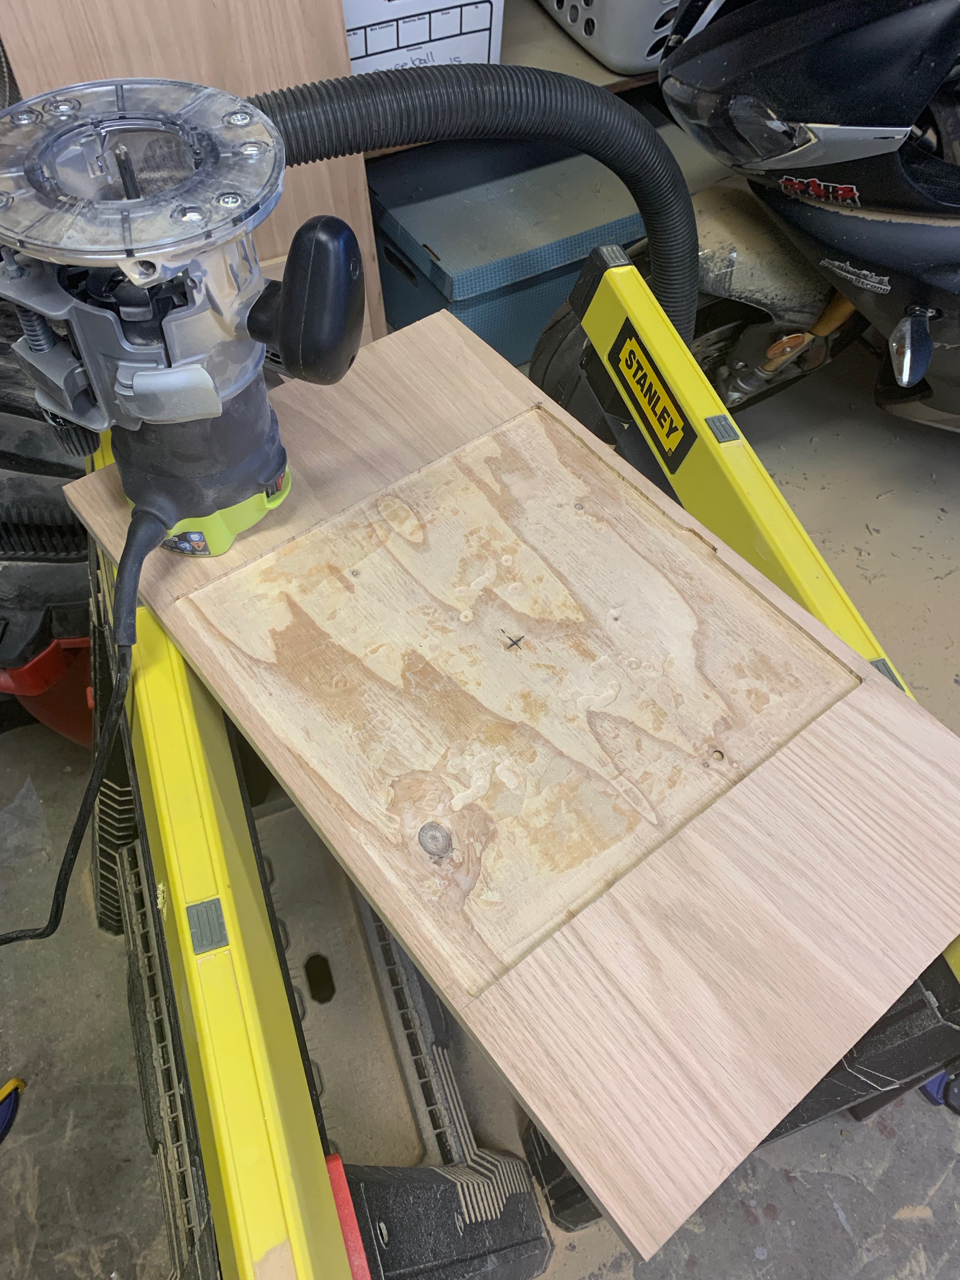
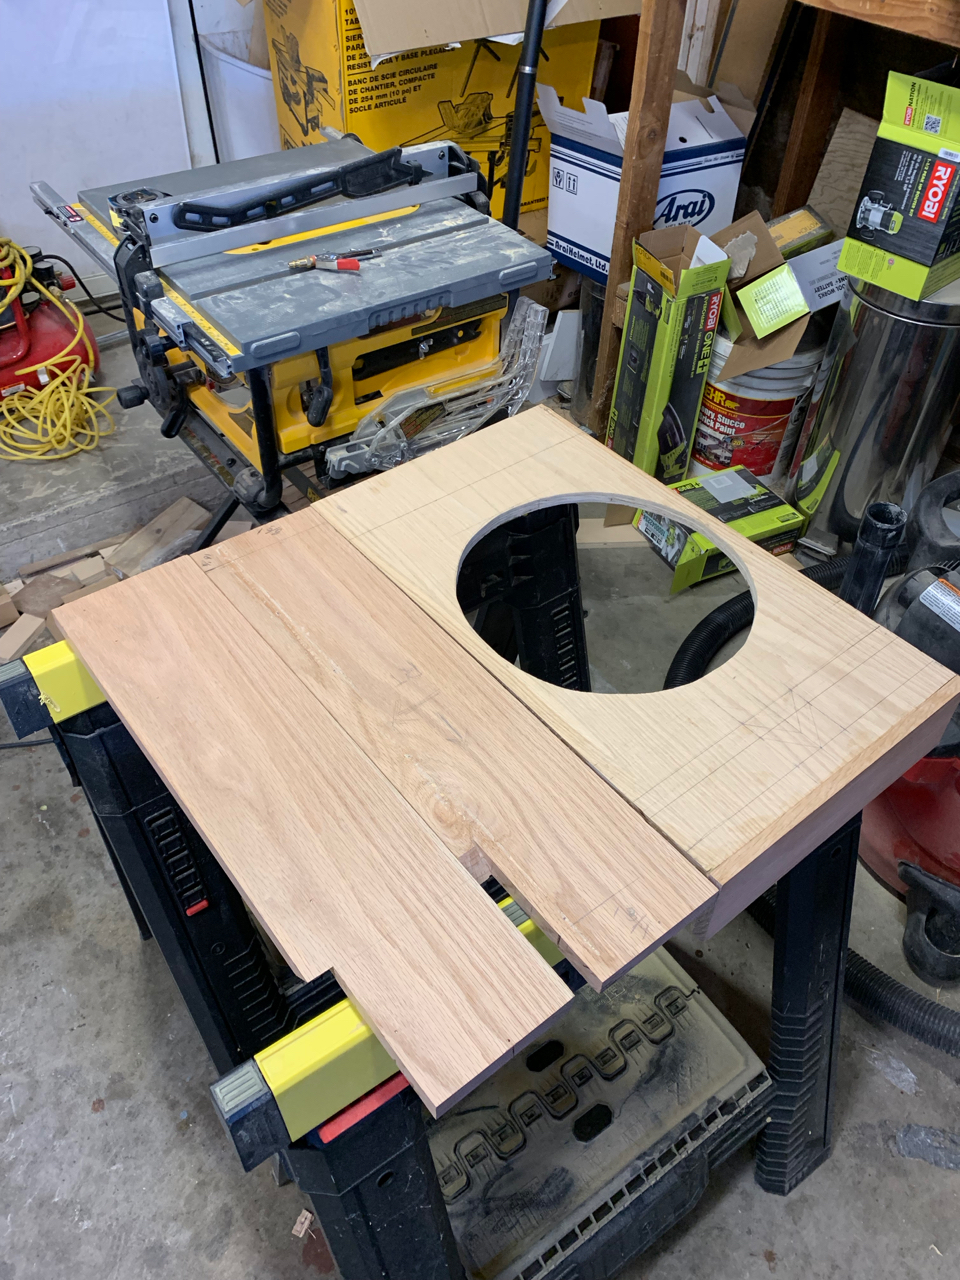
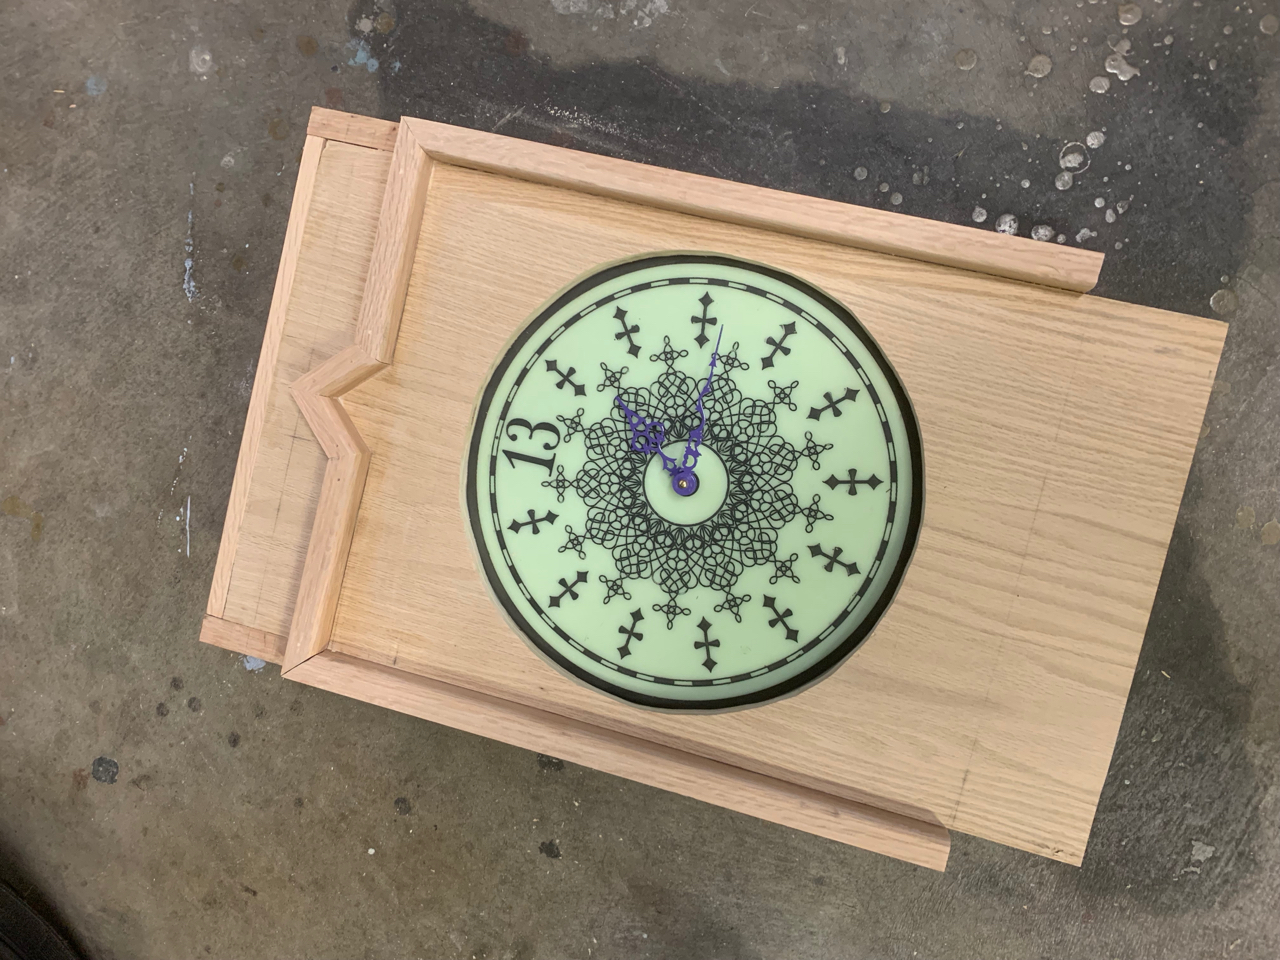
First thing — I created a front cover for the top box. 13” wide by 22.5” tall. The only problem I’m having with this is that apparently it’s really hard to find red oak solids larger than 12” wide… So I used some of the left over plywood from the structural build. MOST of this piece’s edges will be covered, the only problem is you can kinda see the layering in the circle around the dial… I plan on staining this though, probably relatively dark, and I figure the shadowed parts I’ll stain even darker, so I think that may fix that particular issue.
In the back of this piece I routed a 1/8” deep square before cutting my circle, so the clock dial will set into that, held in by a half dozen mirror clips… (once I cut those down to fit, they’ve got a 1/8” gap to accommodate a mirror.)
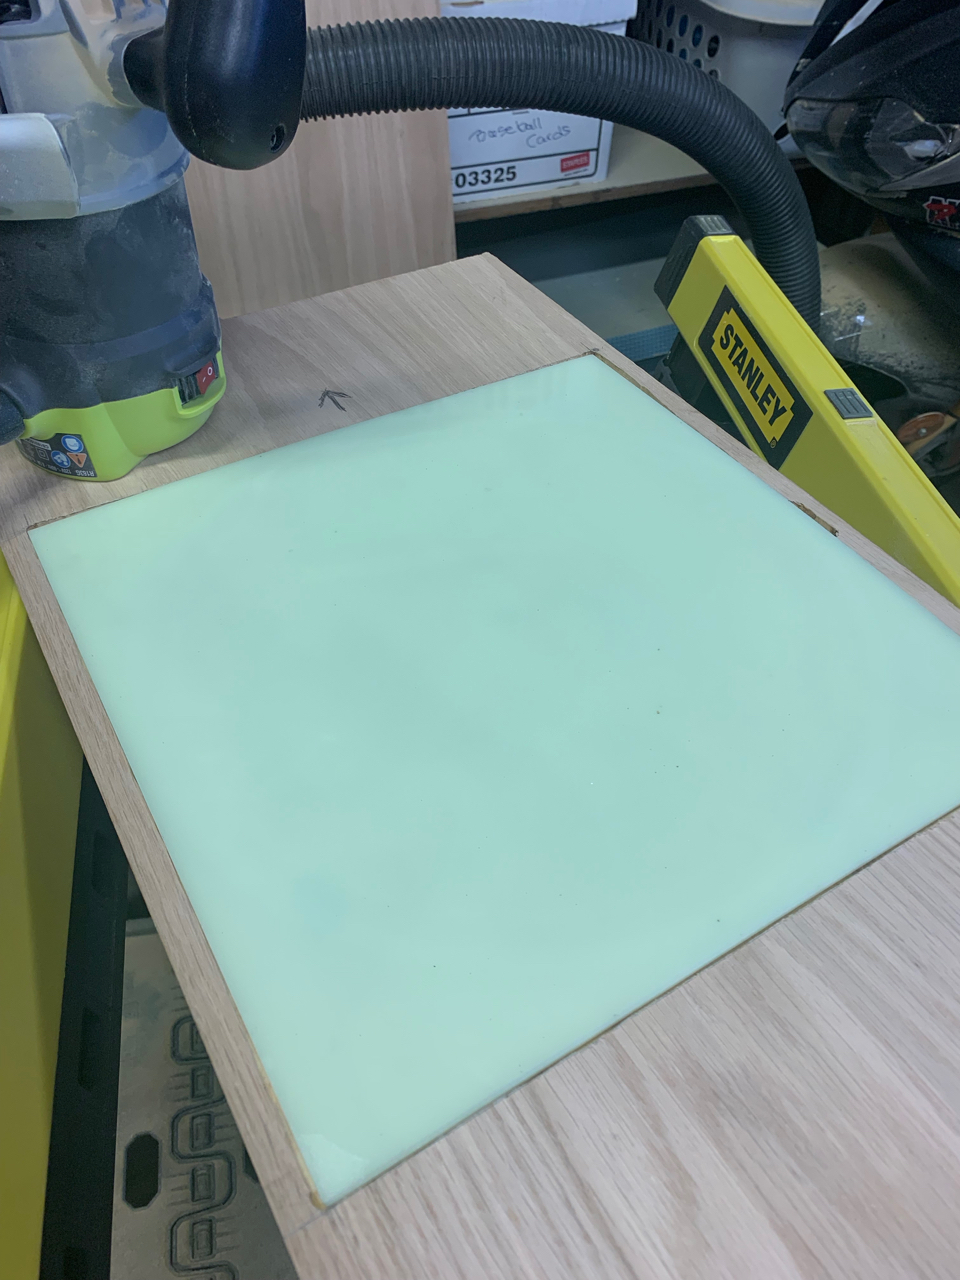
Routed a 12” square into the back of this piece…
Acrylic fits perfectly within, added a little notch on the side to help take the clock dials out if I ever want to (actually I messed up with the router, but it worked out great.)
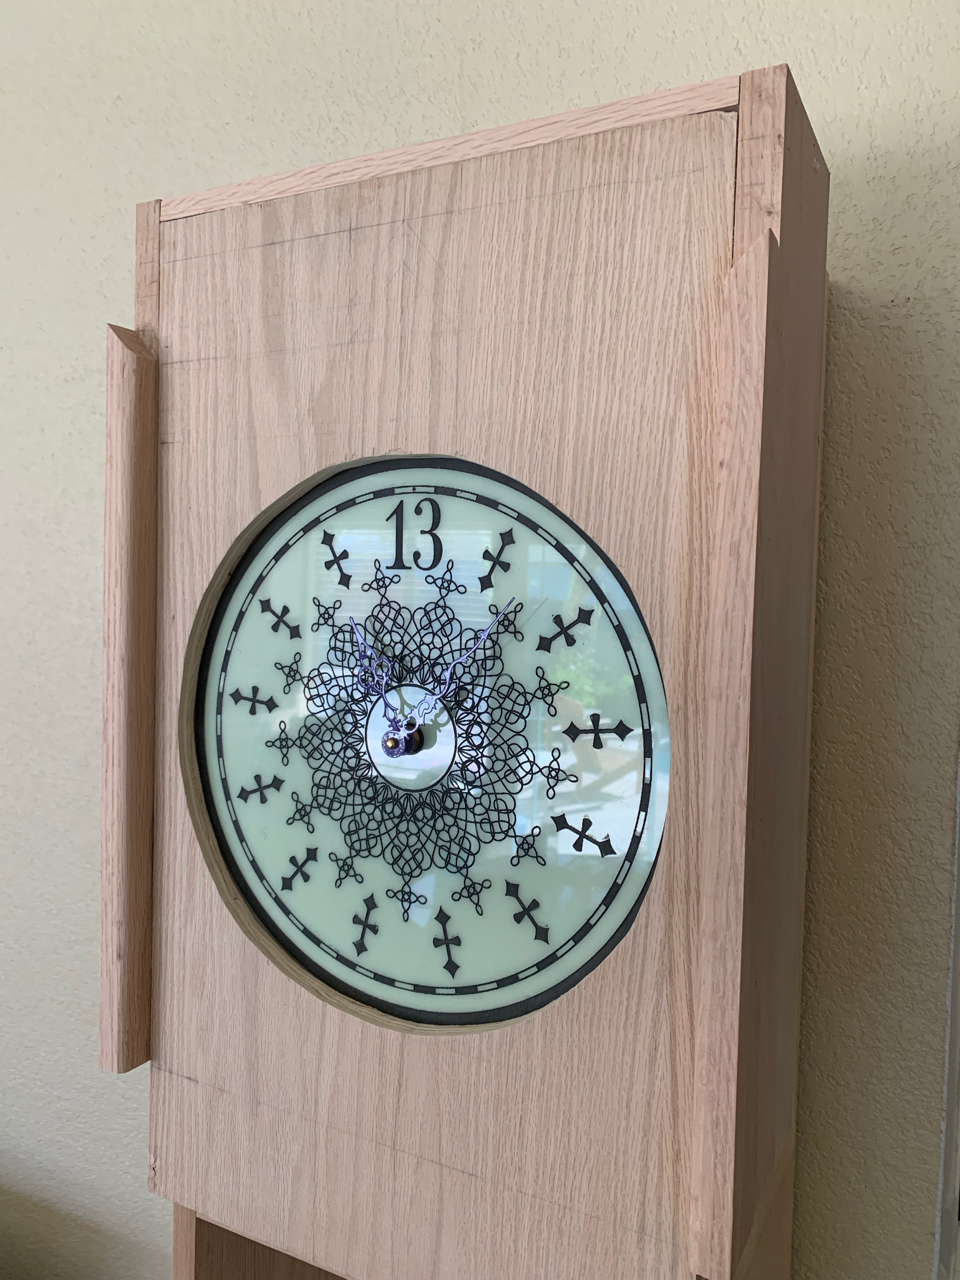
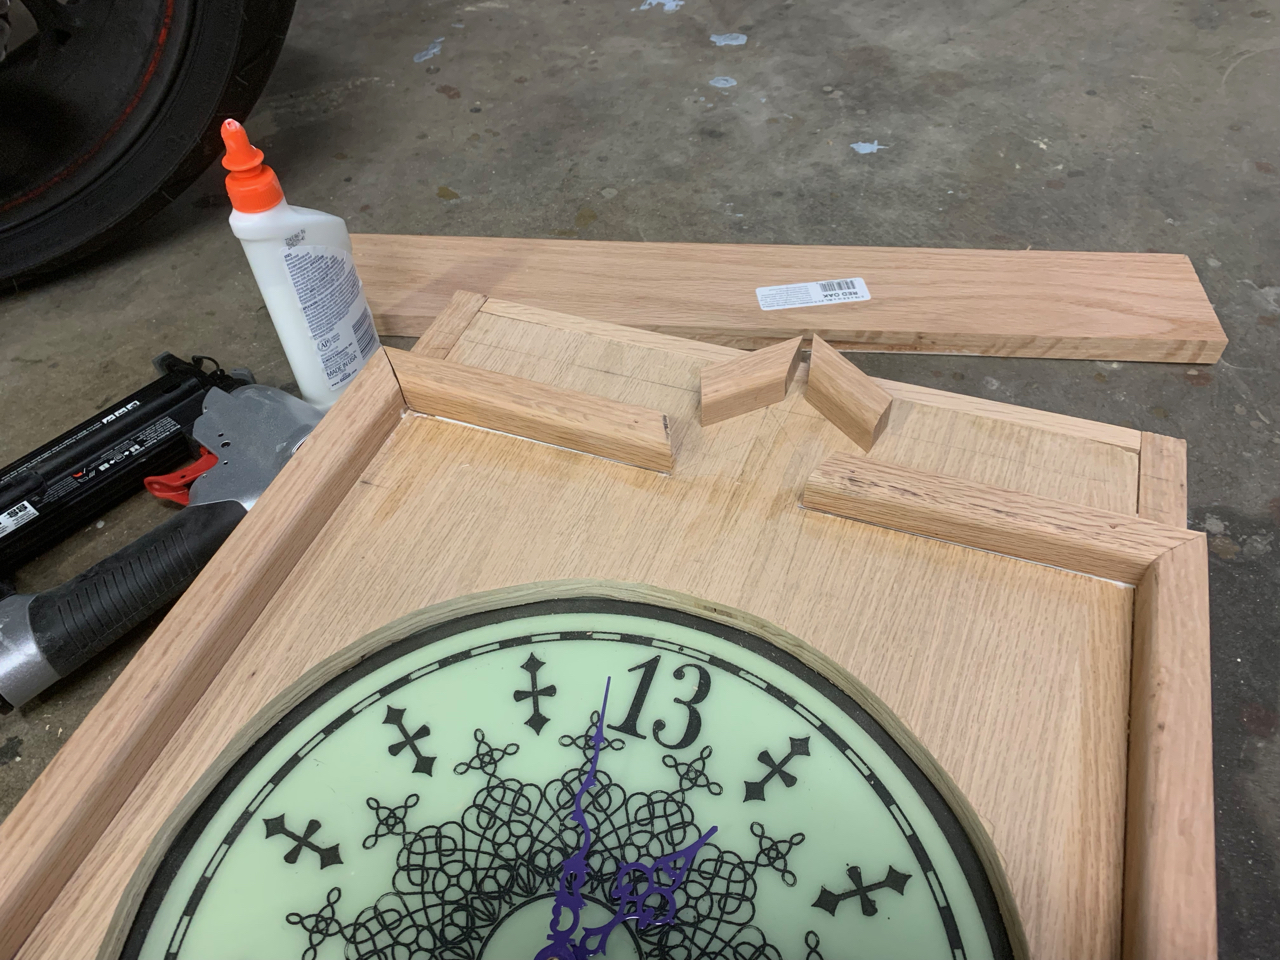
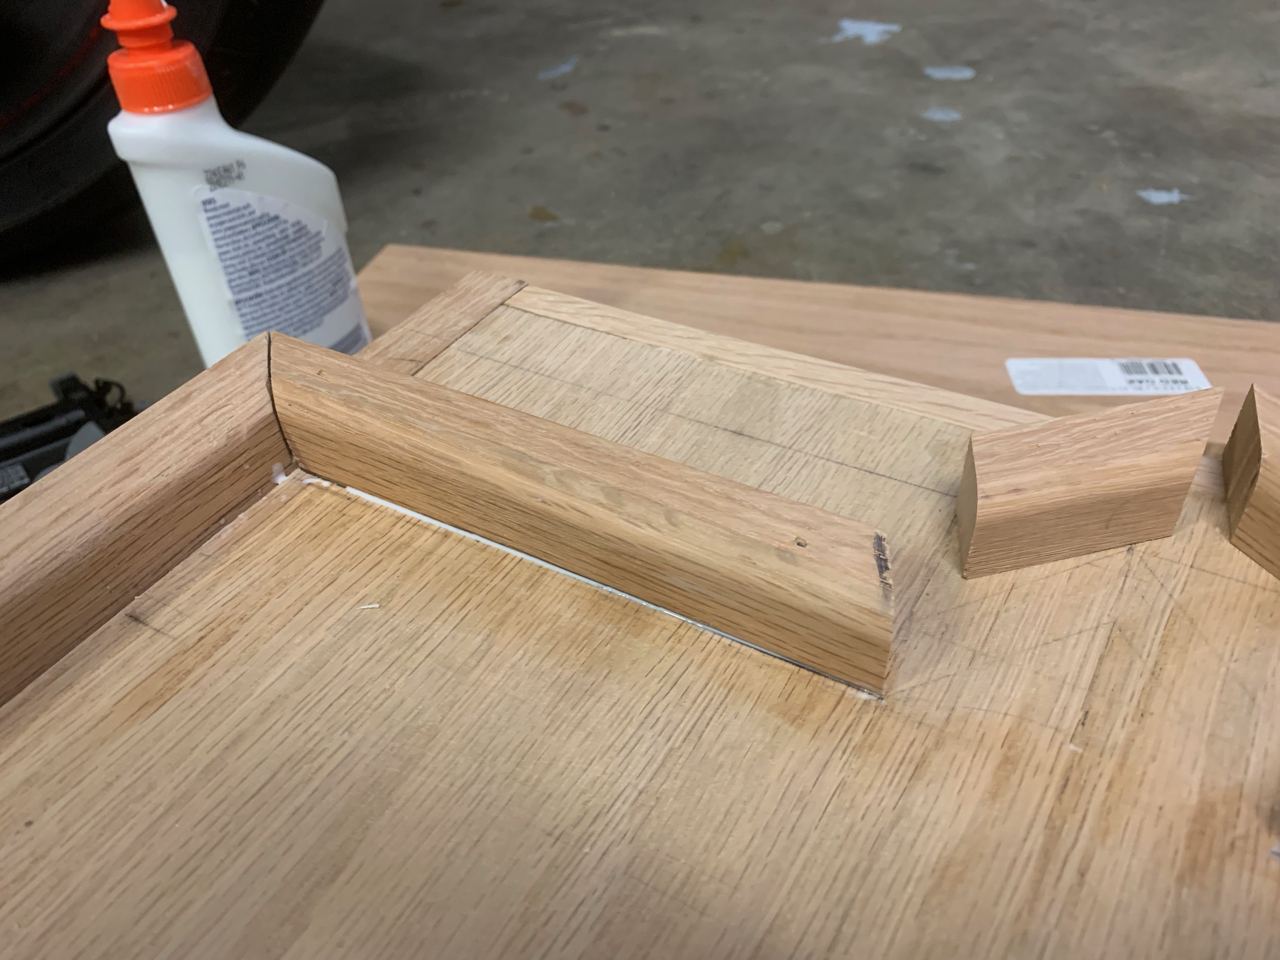
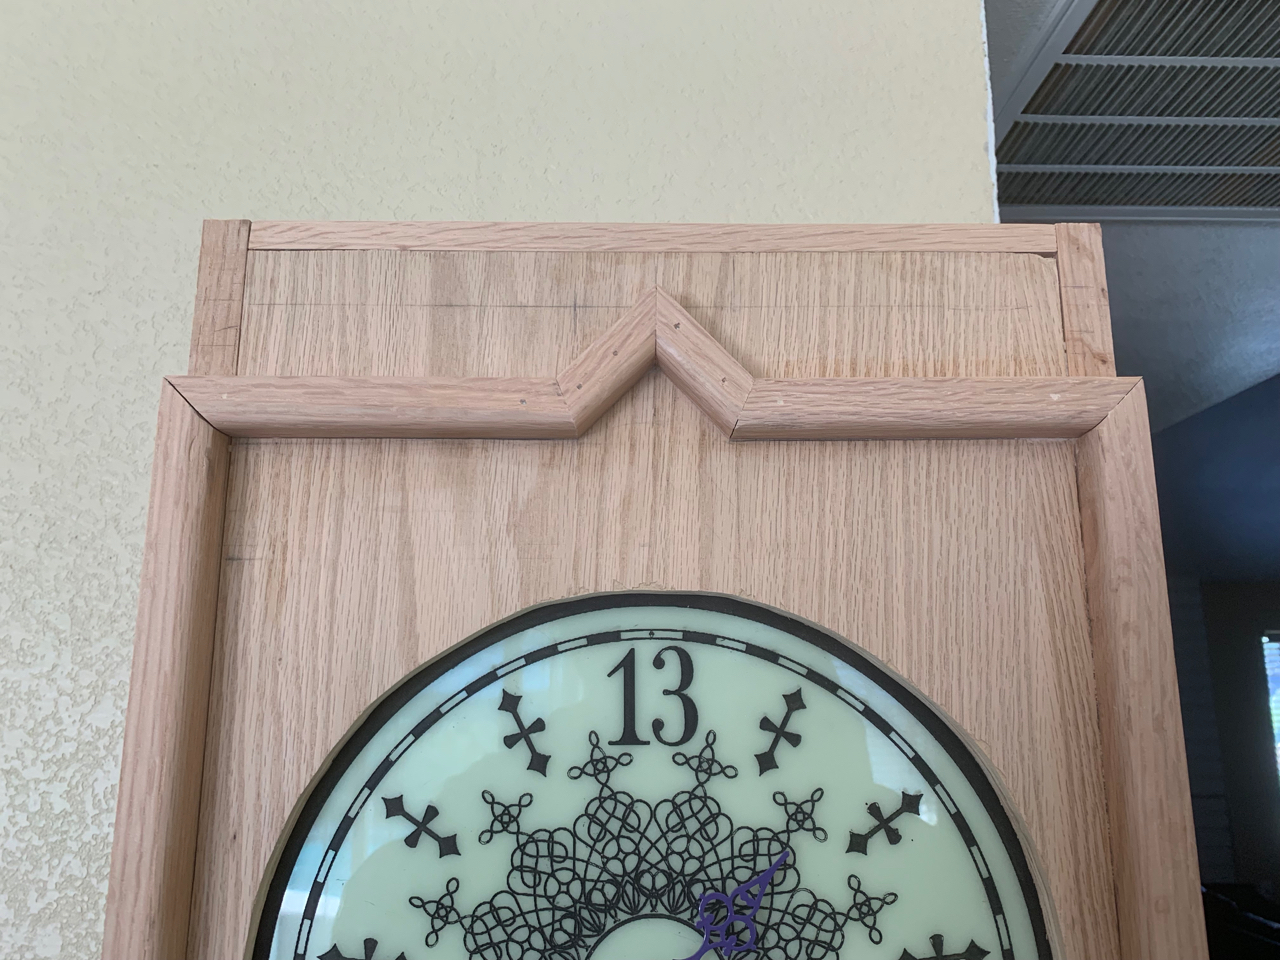
In order to hold the cover on, and this is the basic structure that’s going to hold this whole thing together, I built a bit of a frame to go around the sides/top of the top box and pin nailed those in. On the sides it got a little trickier because the sides are supposed to stick out 3/4” for the border. There’s an inner border that goes around the top and sides of the dial and sticks out 3/4”. On the sides, I’d incorporated the side borders into my side structure. The border goes down to 3” from the bottom of the front piece, and about the same from the top. So I cut a little notch out of the bottom and the top, with a 45 degree top cut, which I continued into the top section of the border which will form the upper ‘lip’ that the teeth will go beneath.
Here’s the edges that will be sticking out past the front piece…
I hung it up like this for a week before drawing the path for the upper/inner “lip” across the top. The next weekend I added those pieces and made a huge difference:
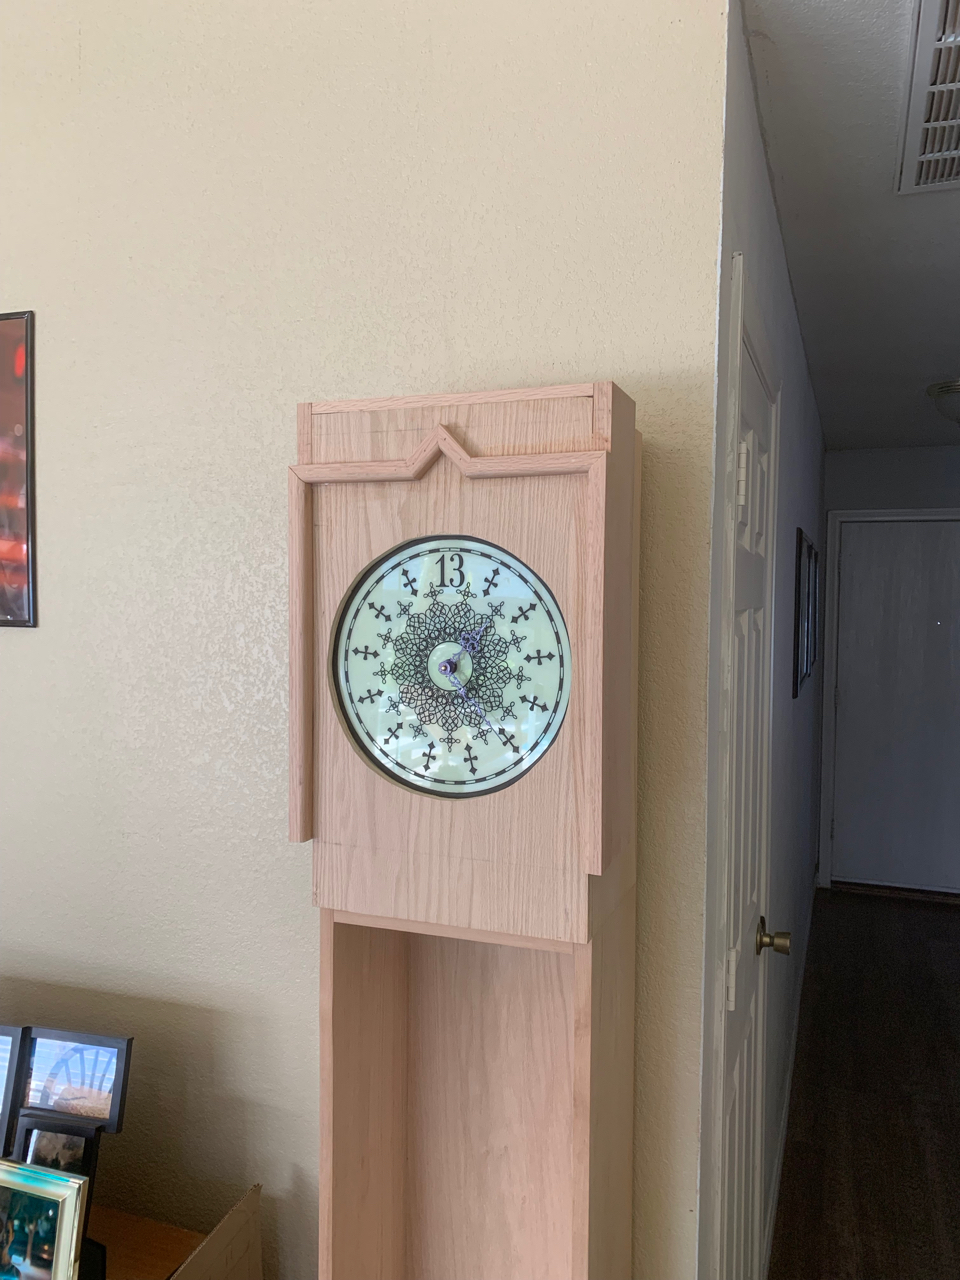
And this is how it’s sitting, decorating my dining room right now!
I’m loving the way this is looking. This weekend I’m going to try and get the bottom border piece, and the outer borders cut and nailed in. It’s going to be a little bit trickier since I couldn’t get 1.5” thick red oak solids, so I’ll have to clap a couple together… but that should be OK. The bottom border I’m really looking forward to because like a puzzle, there’s a few different things that build out from this piece.
After this step, we’ve got a functioning, time telling clock!
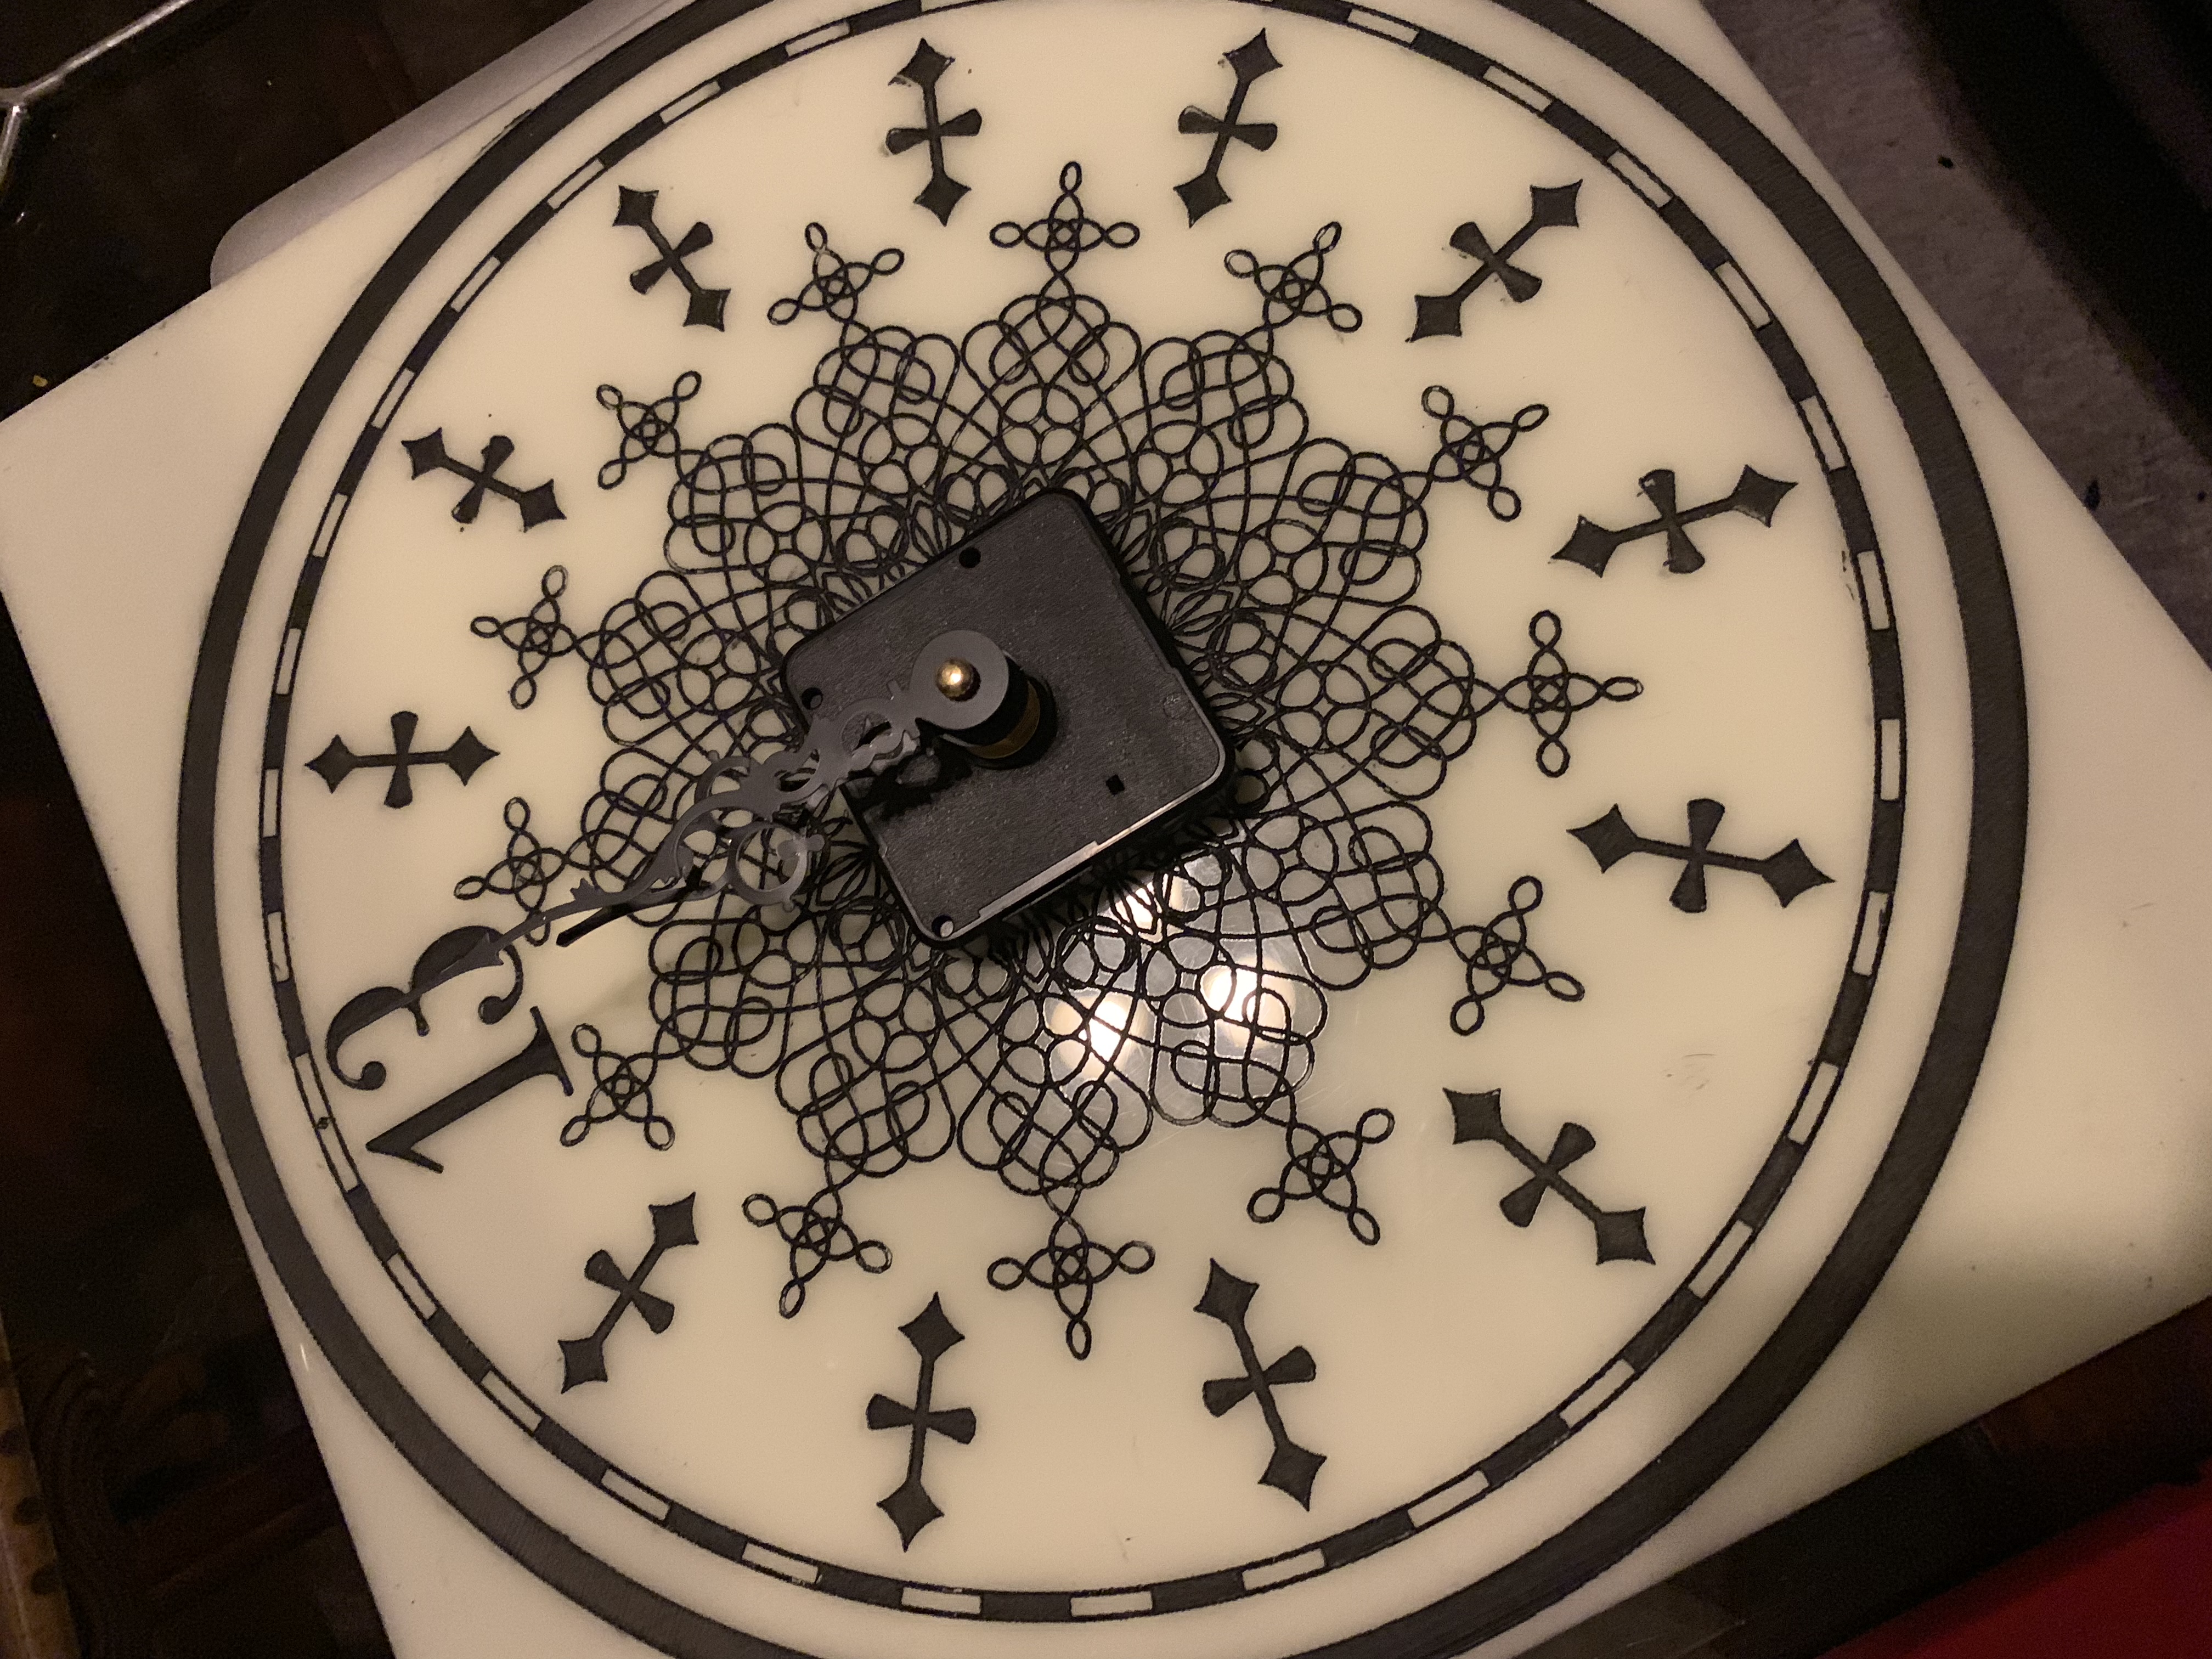
I’d picked up a cheap little quartz hobby clock kit from Hobby Lobby as I was too impatient to wait for one to be shipped. It’s just a little $5 quartz movement with some matching hands. I wanted some nice ornate hands for this thing as a nice clock should have. I decided to take some artistic license here and not go with the fingers that are used as hands on the actual clock, I just think that’d look silly. I do think a nice set of gothic ornate hands would look right at home though to give it that nice powerful look, and they had these with the movements. The hands could maybe stand to be a little bit longer…. I’ll continue my search for the perfect length hands in the meantime. I may try to find something a little higher quality at some point. Well, now this thing is a real clock, and that tick is so satisfying. (Now onto the chimes!)
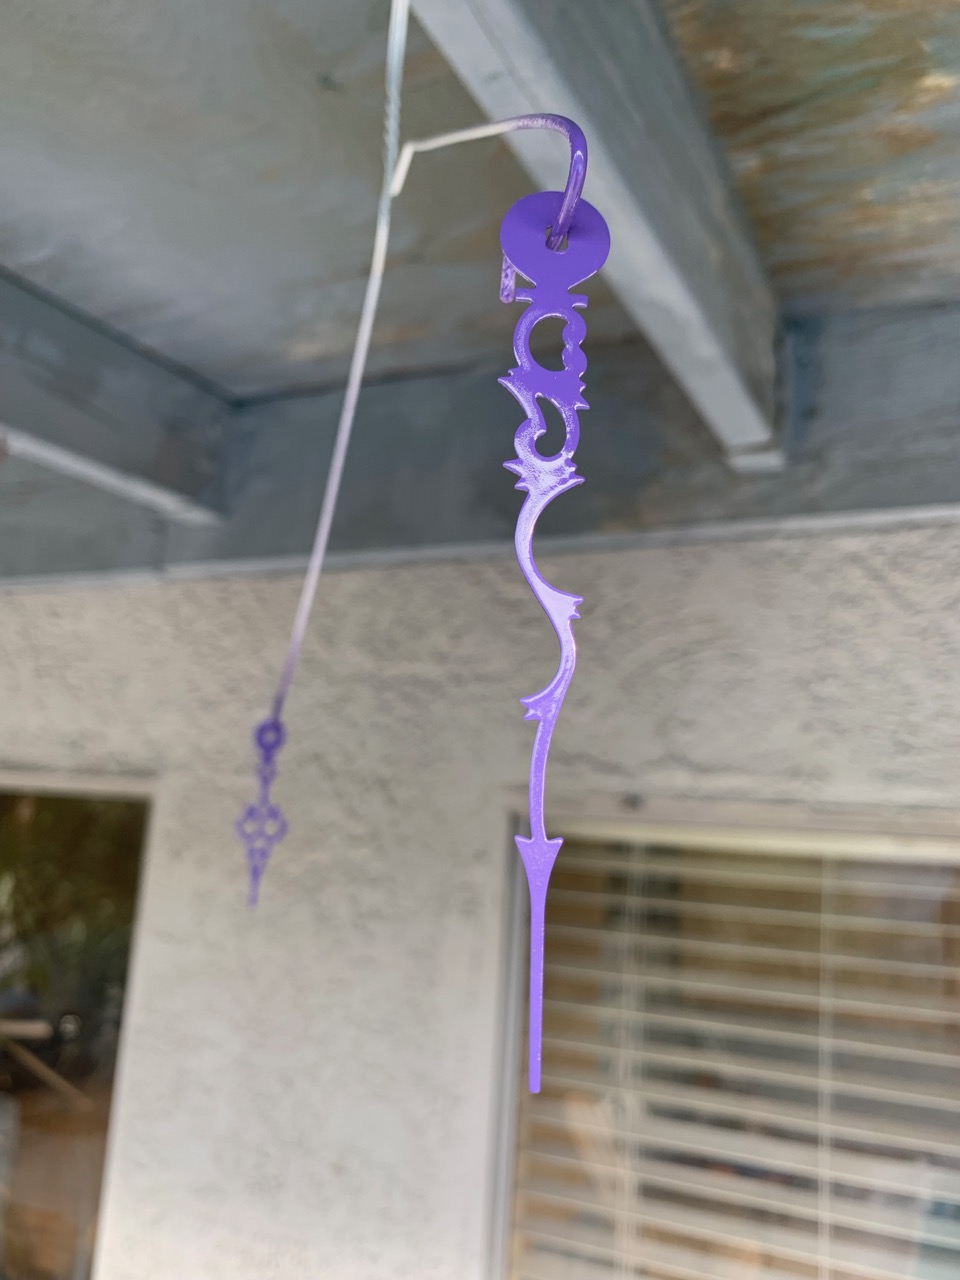
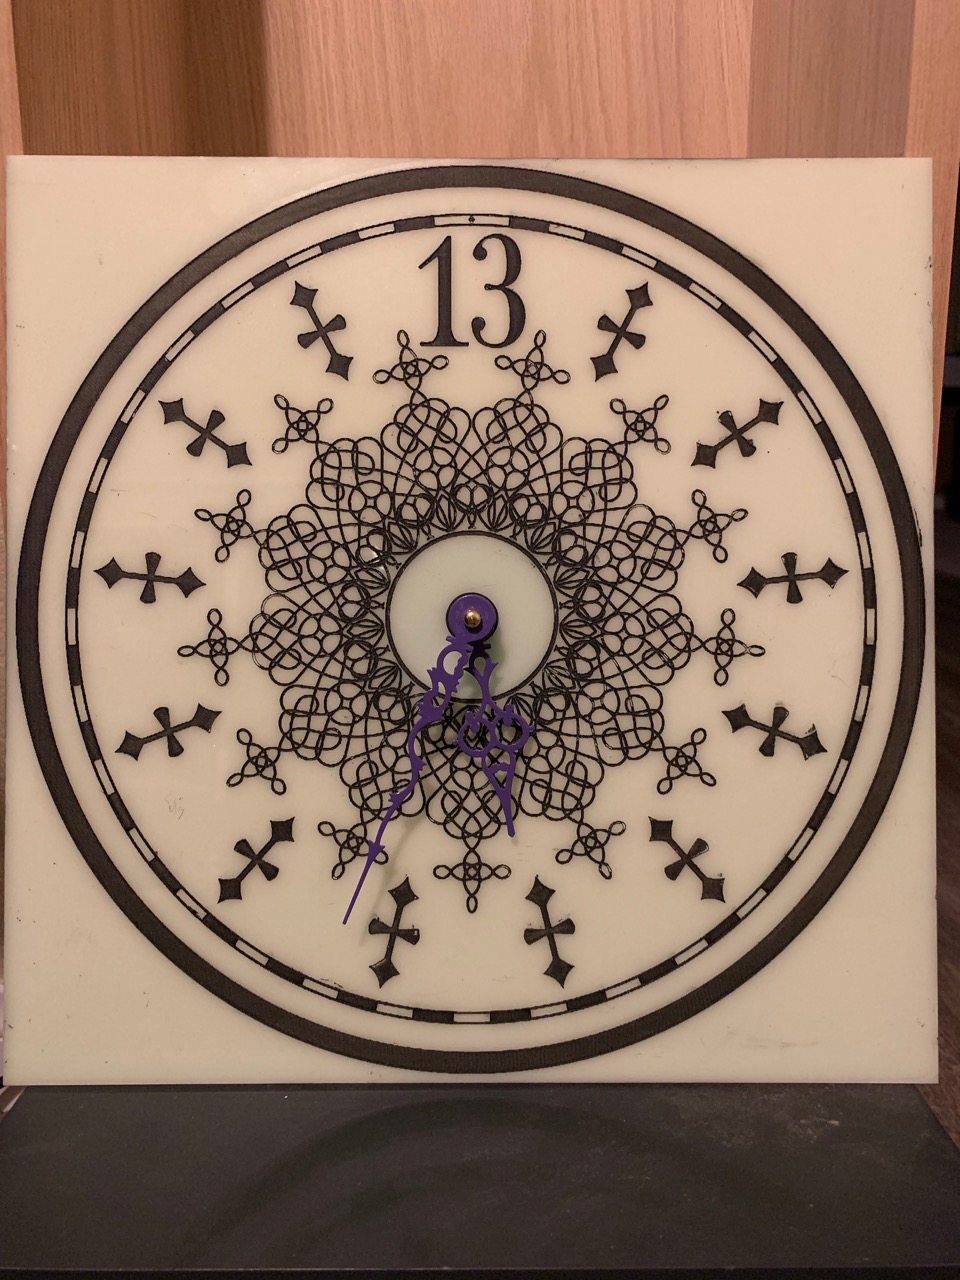
Unfortunately the design of the hands gets a little bit lost in the inner design of the clock, especially black hands over the black design. So I decided to paint them. I went with a nice solid purple to match the color themes of the mansion and hit it with a nice triple gloss spray to make it really pop. I love the color and the shine, but… I’m wondering if a nice bright red or crimson might work a little bit better…? More of a blood red color with the same shine coat may stand apart from the designs in the dial a little bit better… I think the hands were only a couple bucks so I might just grab another set and paint those separately so I can compare and keep whichever works best.
The original idea which was sadly thrown out was to put a real grandfather clock movement in it. There’s just something so satisfying about a real solid grandfather clock movement, they’re just so nice with that tick, the chimes, the sound of the chains when you wind them… but that price tag. What I’d really LOVE to do some day is find a way to control the hands with a Raspberry Pi (since that’s what will be driving other parts of this clock anyway). Set it up to stay synced with NTP so it’ll always be accurate. Surprisingly to me, there are very few Pi controlled analog clock projects out there, tons of digital, but it looks like analog may be a lot tougher. So for now, that moves to the after-build list of future upgrades. Quartz will do for the time being!