This step, the painting, is where this clock dial really comes to life for me. Etching the plastic was a huge step, but painting it brought it to life. Though we did kinda go about this the long way (as described in the lessons learned in the previous post.) But it did come out fantastically, and I’m really happy with the result.
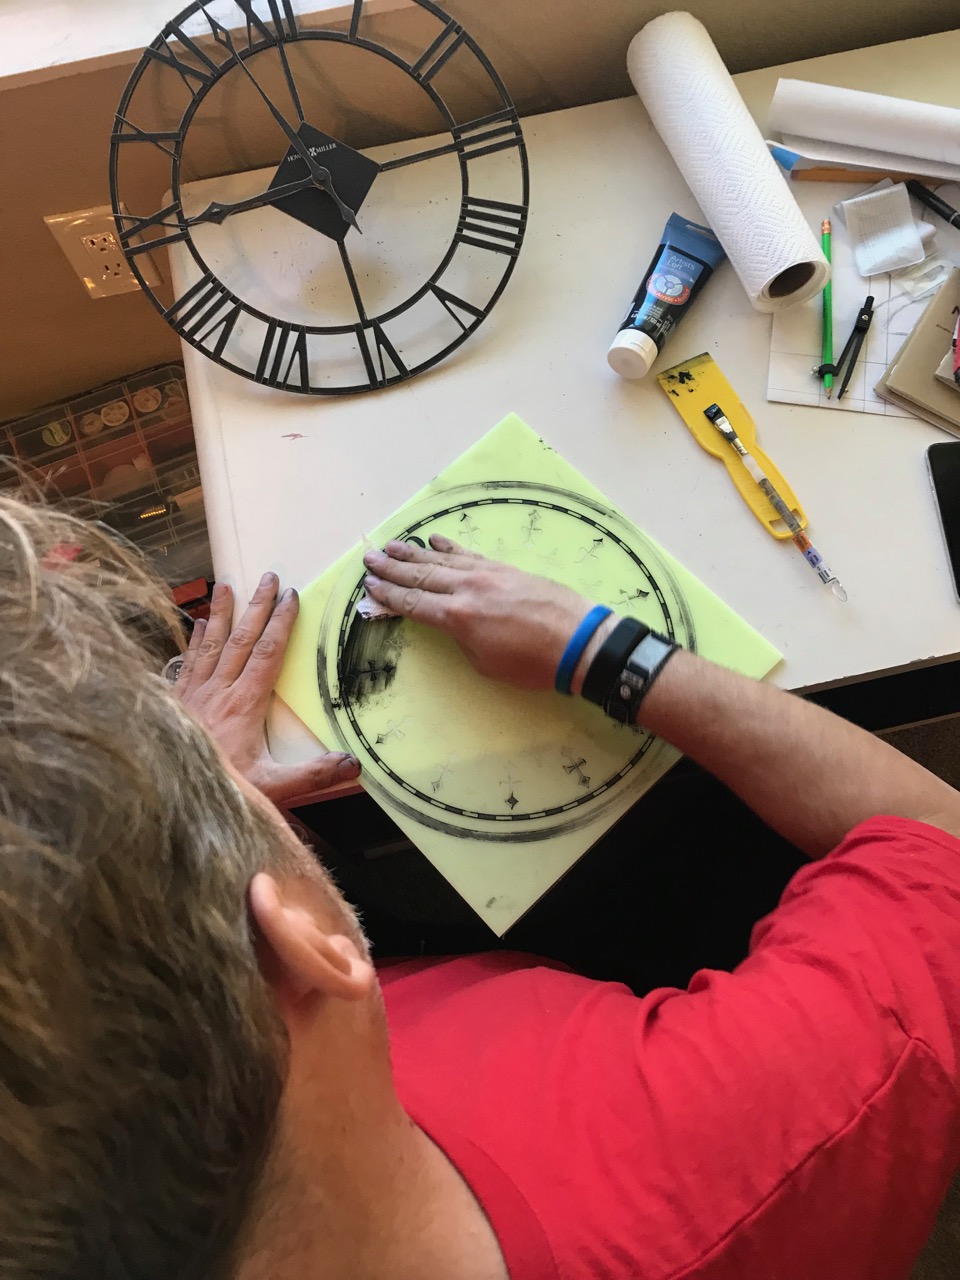
I took my etched plastic and got some black acrylic paint (I went with “Ivory black”, why can’t they just sell “black”?) Basically the technique I used in accomplishing this was the same as you would use for grout. I just squeezed a bunch of paint into the general area of the lines I was trying to fill, then wiped it with a FLAT paper towel. The paint would wipe INTO the cracks and fill ‘em up, while off of the flat surface and clean it up, all at the same time! I’ve noticed that the paper towel needs to remain flat in order to smear the paint into the cracks properly, otherwise it just picks the paint up instead. I thought of using a small squeegee or grout squeegee or something, but this worked out perfectly.
Painting and wiping away…
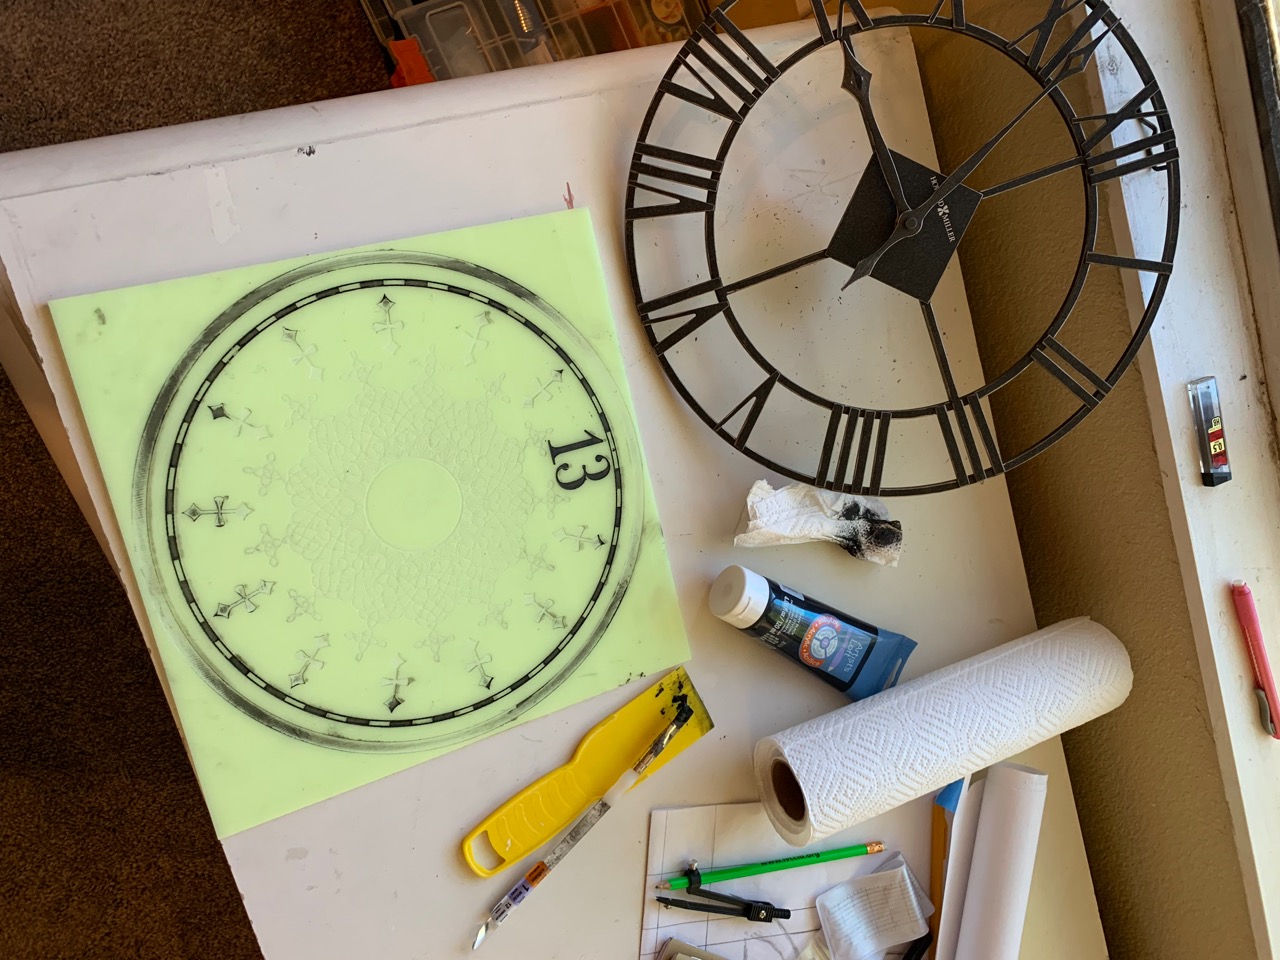
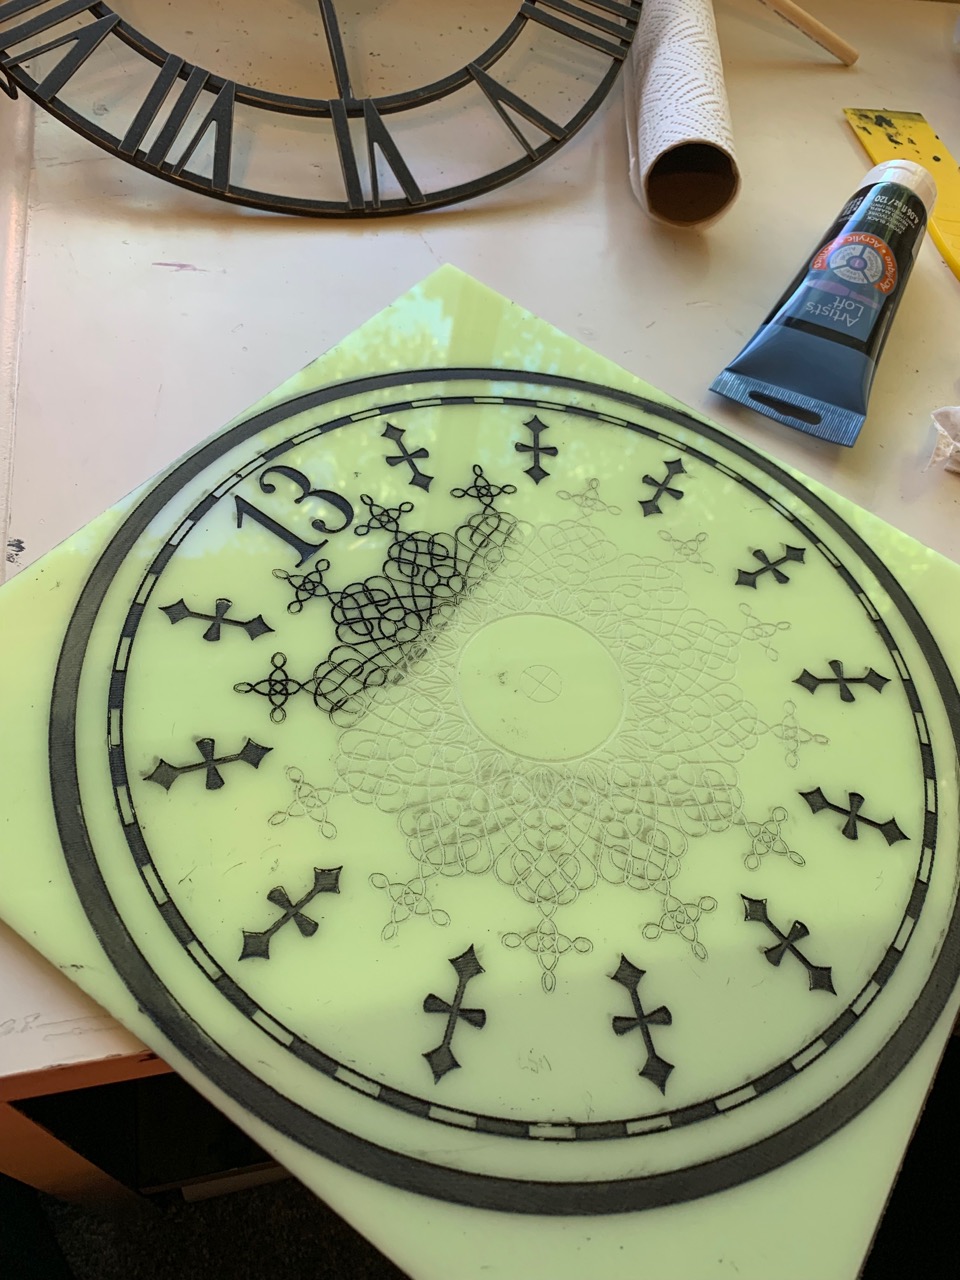
Progress check after starting the fine details:
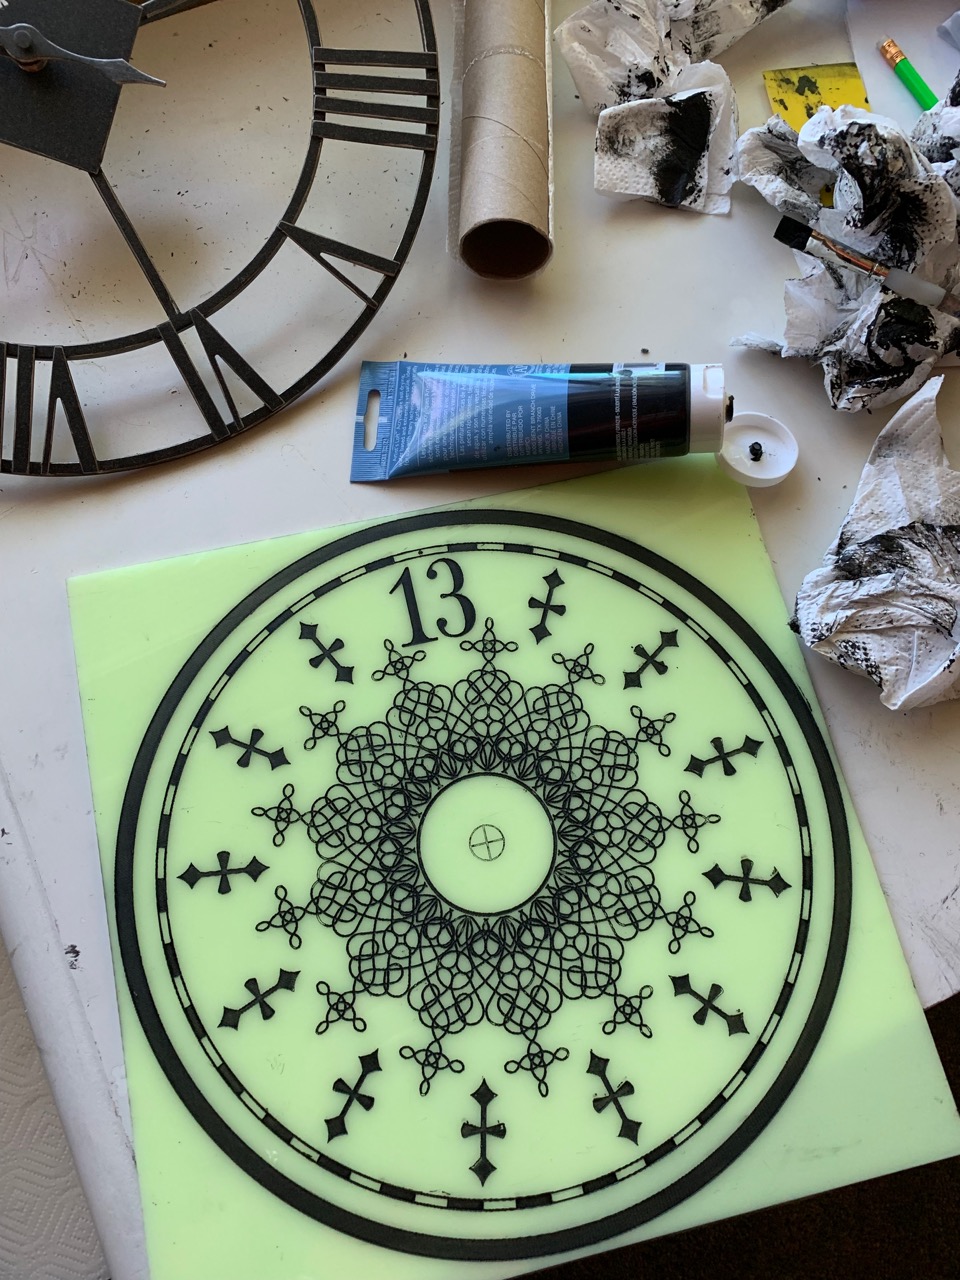
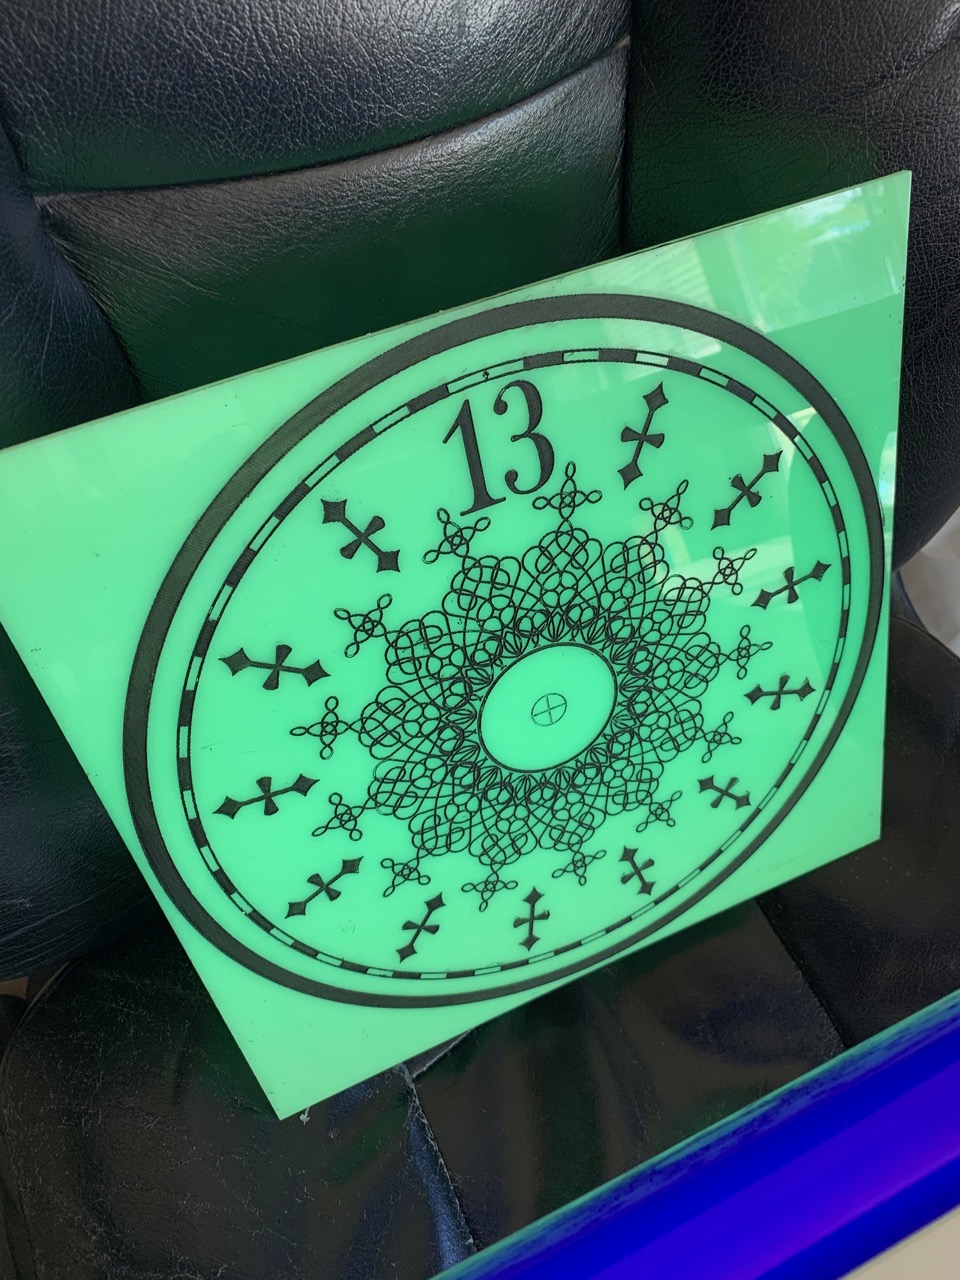
Final result after finishing the painting process:
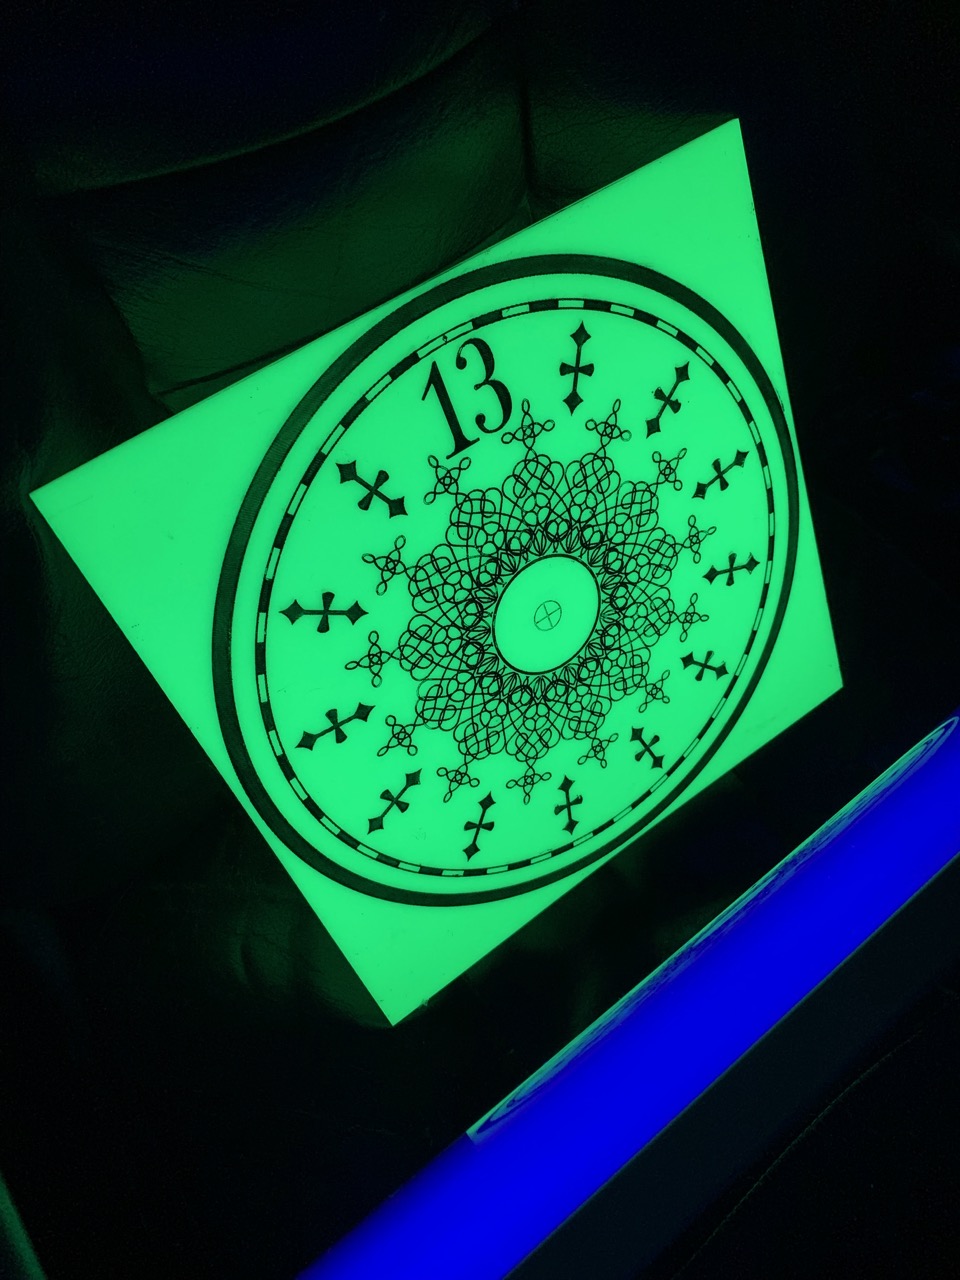
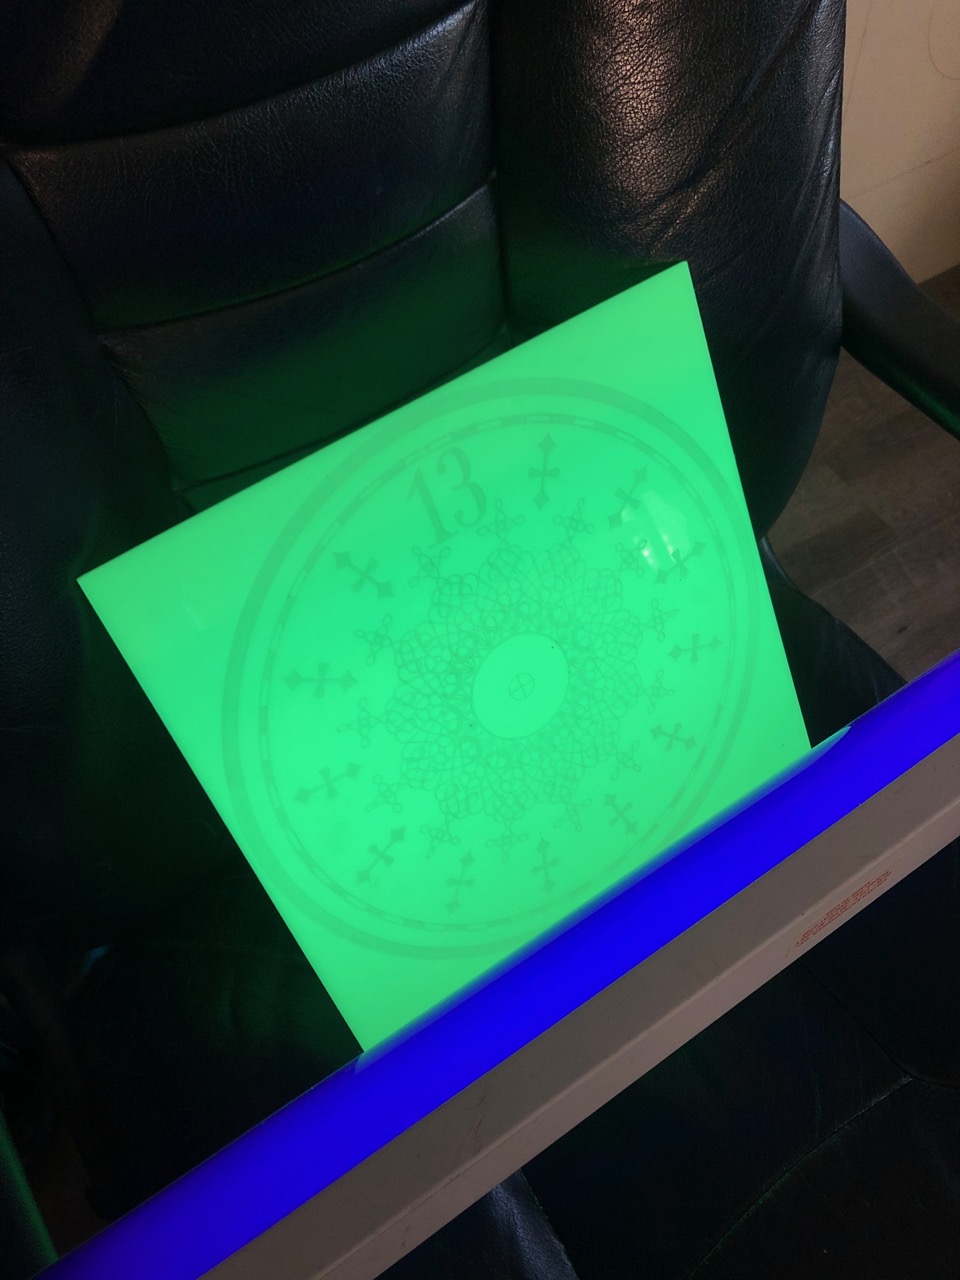
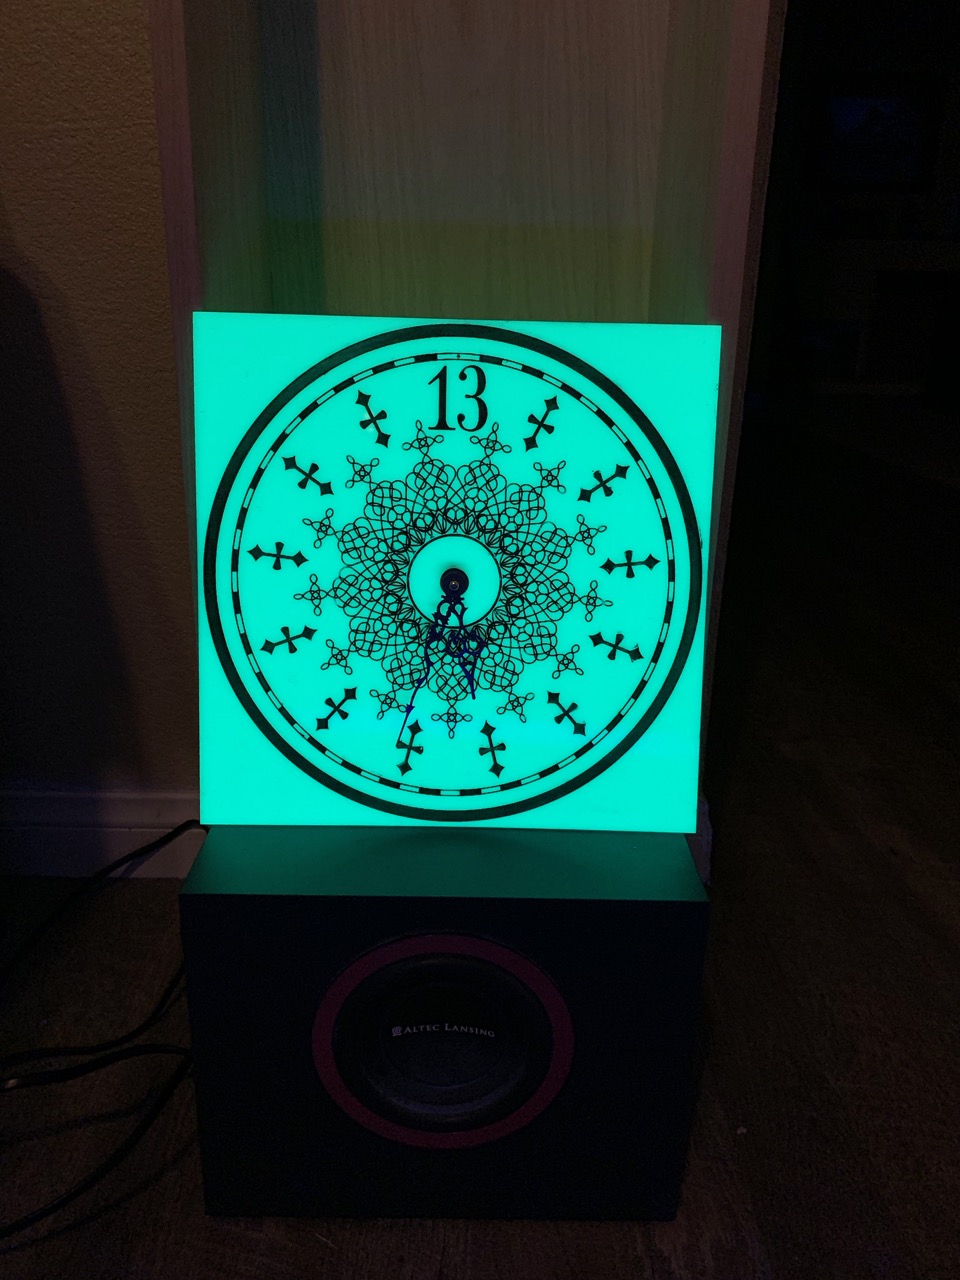
Now I was anxious to hit this thing with the black light and see how it looks now that it has some actual detail to it:
And as well as that went, I was really looking forward to the night:
Now this part was a lot of fun for me. I went through a lot of different ideas and a few impossible wants, and it took a while to get to where I ended up. The end result was well worth it. I’m really happy with how this stage took shape.
What I REALLY wanted for this thing was a glow in the dark green dial like the toy has. I wasn’t sure which materials were available to make this happen, or what I should even be asking people for. I was hoping for a glow in the dark green plastic or something of that nature… But to get the design on it… Hand paint it? print it? Stickers? I’m not even sure.
Idea 1: I’d seen an image floating around which would be perfect. A high res jpeg of the clock dial laid out perfectly for printing (from our very own lostcasket, unbeknownst to me at the time!) A friend of mine printed it out BEAUTIFULLY on vinyl for me. I wasn’t sure if I was going to just adhere that to clear vinyl and backlight it? Leave enough of a gap in front of the dial to front-light it with LEDs, or take a LOT of time to hand cut out the detailing with an x-acto and just stick the details on some green plastic that I could backlight? I’m not sure.
Idea 2: So I’d picked up my stickers, and while I was contemplating my possible methods of using these things I started driving door to door to every plastics/sign shop in Vegas. A couple had some green acrylic, but it wasn’t the green I wanted, usually it was clear green, one place had frosted but it was a lot greener than I’d wanted, and only sold by the sheet, WAY more than I needed and not ‘perfect’ anyway. I’d found a couple places online that had actual glow in the dark acrylic but the sticker on the webpage was way too much. Anyway, at this point I was so confused by which places I’d been to and which I hadn’t I just started calling websites that had the glow in the dark, maybe one would sell me a 12×12, even if it’s expensive it’d cost less than a sheet, and I only need one. Turns out one shop was in Santa Ana, CA, Paragon Plastics (not far from my parents’ house, link toward the bottom) and they had ACTUAL glow in the dark acrylic for 50 bucks for a 12×24” piece. Perfect! More expensive than any other color, but I’m only going to need half of this so now I’ve got two tries with the material and it’s exactly what I was looking for. I’m totally OK with this. My girlfriend just happened to be in the area that day and offered to pick it up for me, so I tell them over the phone I’ll take one 12×24” and she picks it up for me a half an hour later!
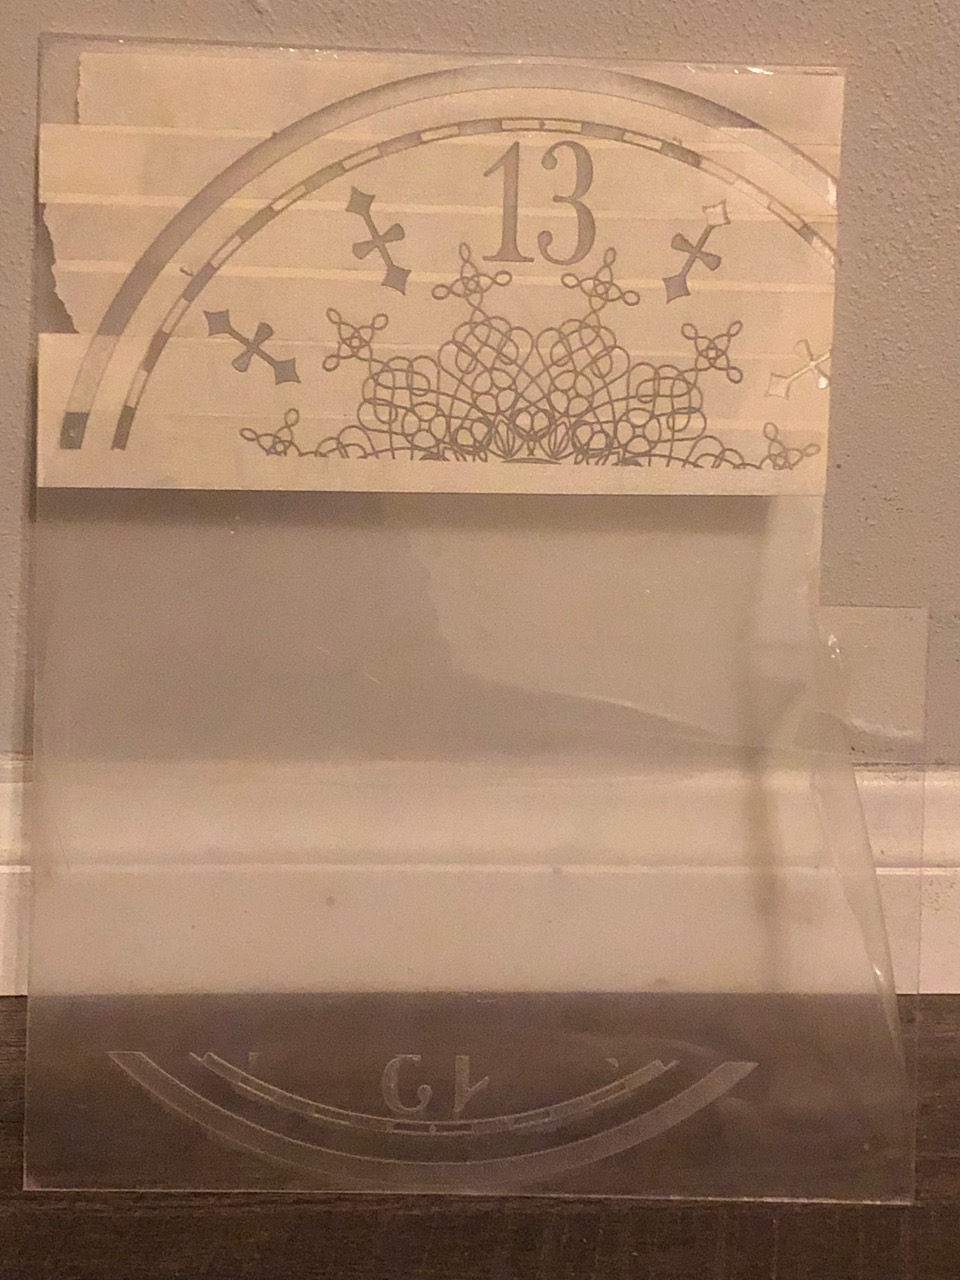
Now back to the problem of… what to do with this thing? I was still considering cutting the details out of lostcasket’s sticker, it’s the best way to get perfect lines as long as I very carefully take my time. Hand painting would be possibly a better (more personal/organic) way to do it, but no way it would look as ‘perfect’, and a stencil would be tough to make… I had gone back and forth with a couple friends who tell me they have access to a laser cutter and to just clean up the image, send it to them, and come cut it. Best. Idea. Yet.
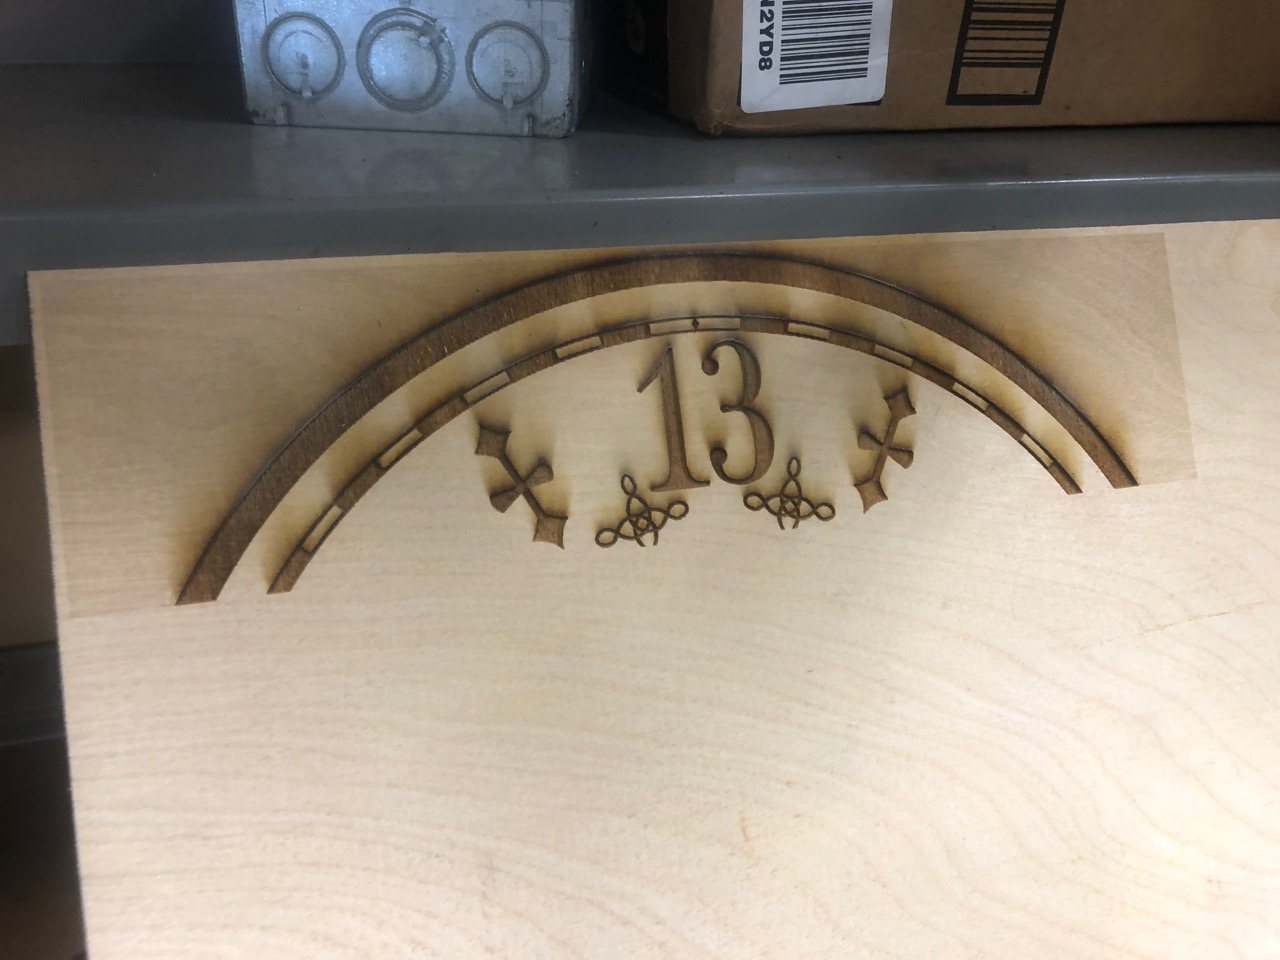
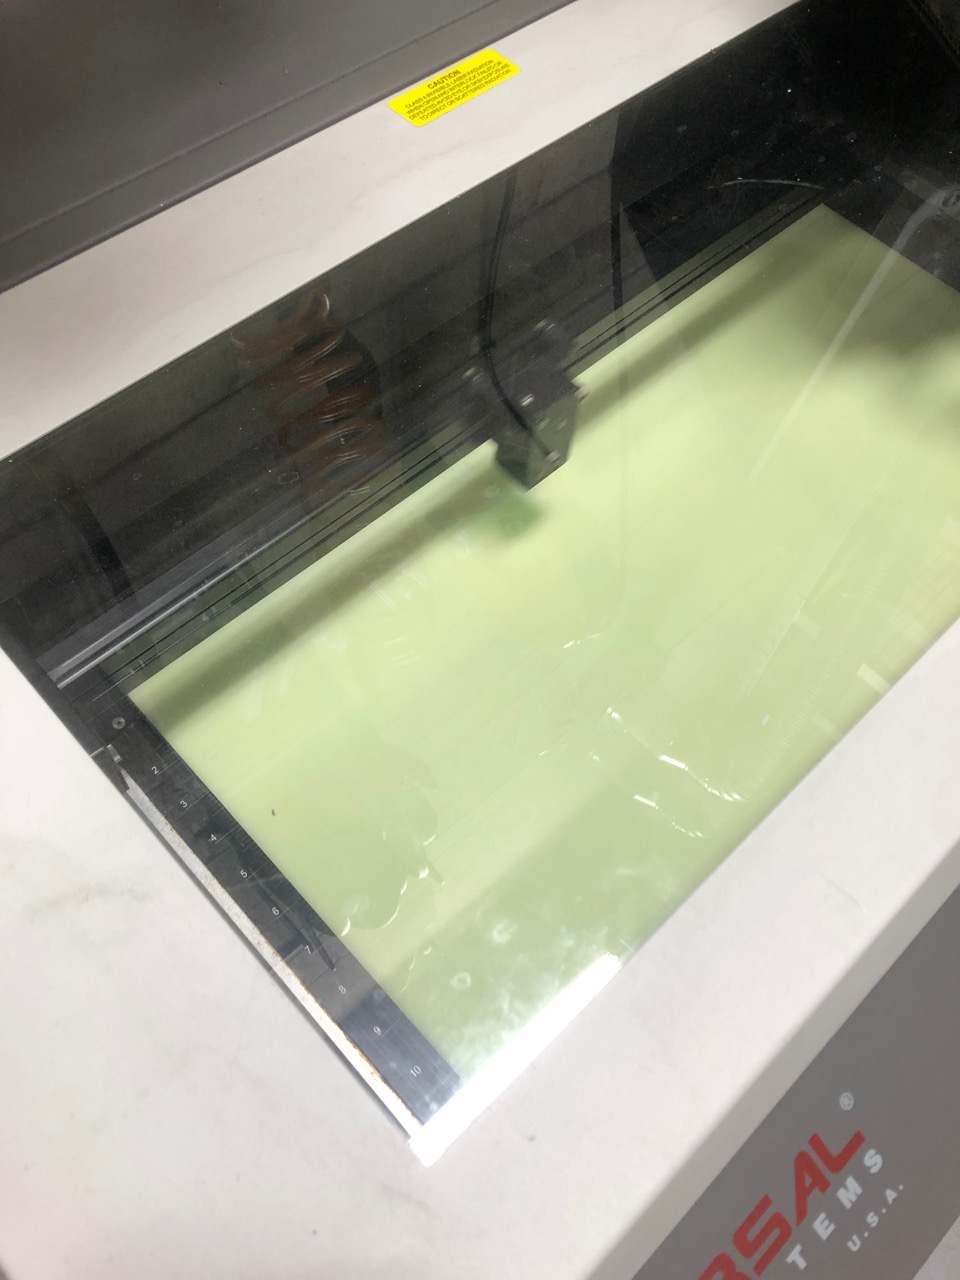
I send one of them the image and he cleans it up nicely. Unfortunately what we have is a JPEG which apparently has an effect on the way the engraver works. I mention this only because we now have vector images provided by lostcasket! (linked below!) So now we’ve got the image cleaned up as much as we can and they get to work. First they printed a test image on wood, which looked amazing (I’ll be asking them to reburn me an oak dial once I decide on a stain!) Second, they ran a test on some inexpensive clear acrylic to see what adjustments we would need to make for the plastic vs the wood so we can MAYBE get this right in one shot on the much more expensive glowing plastic.
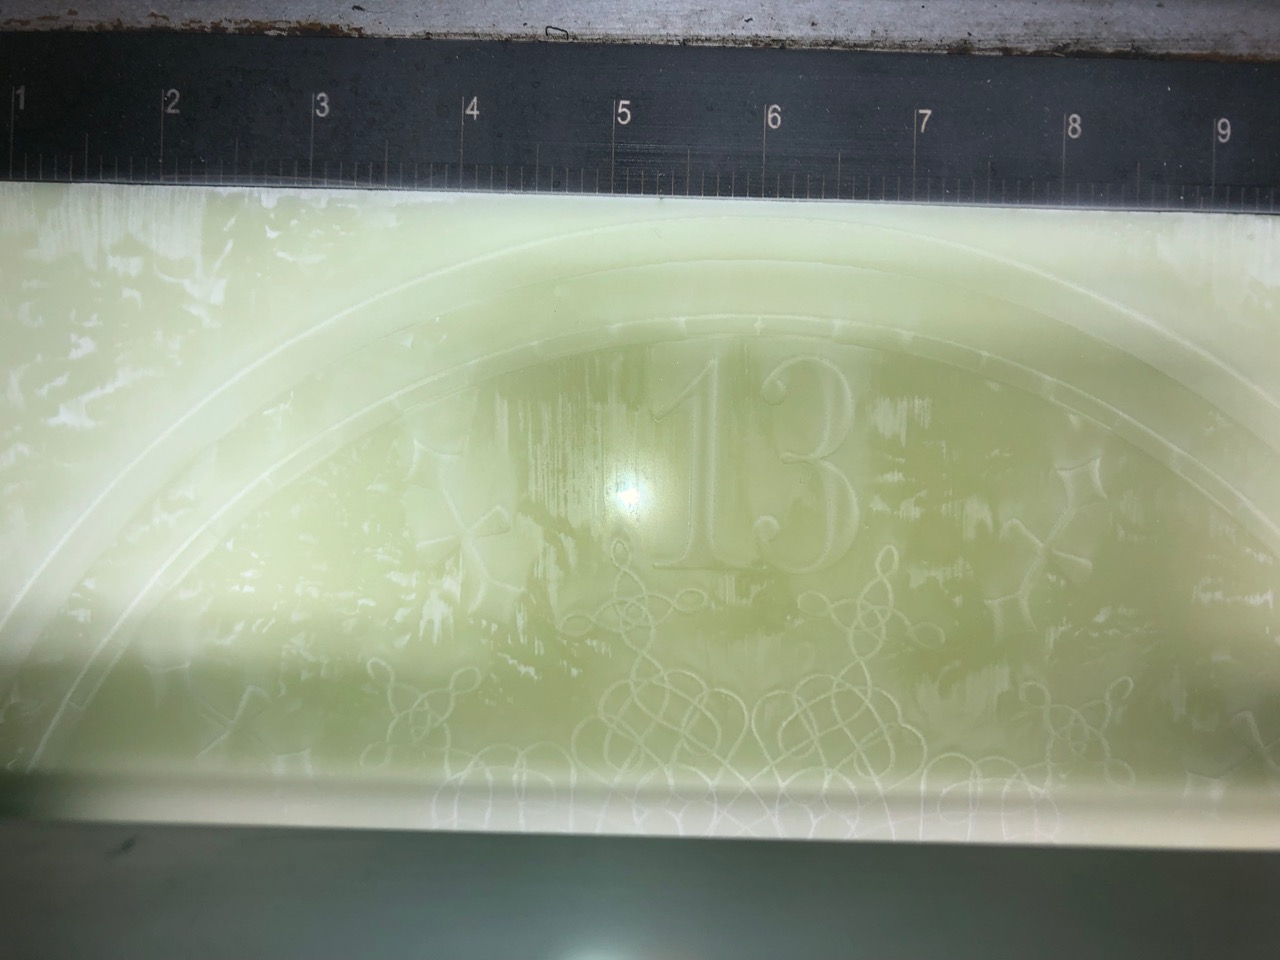
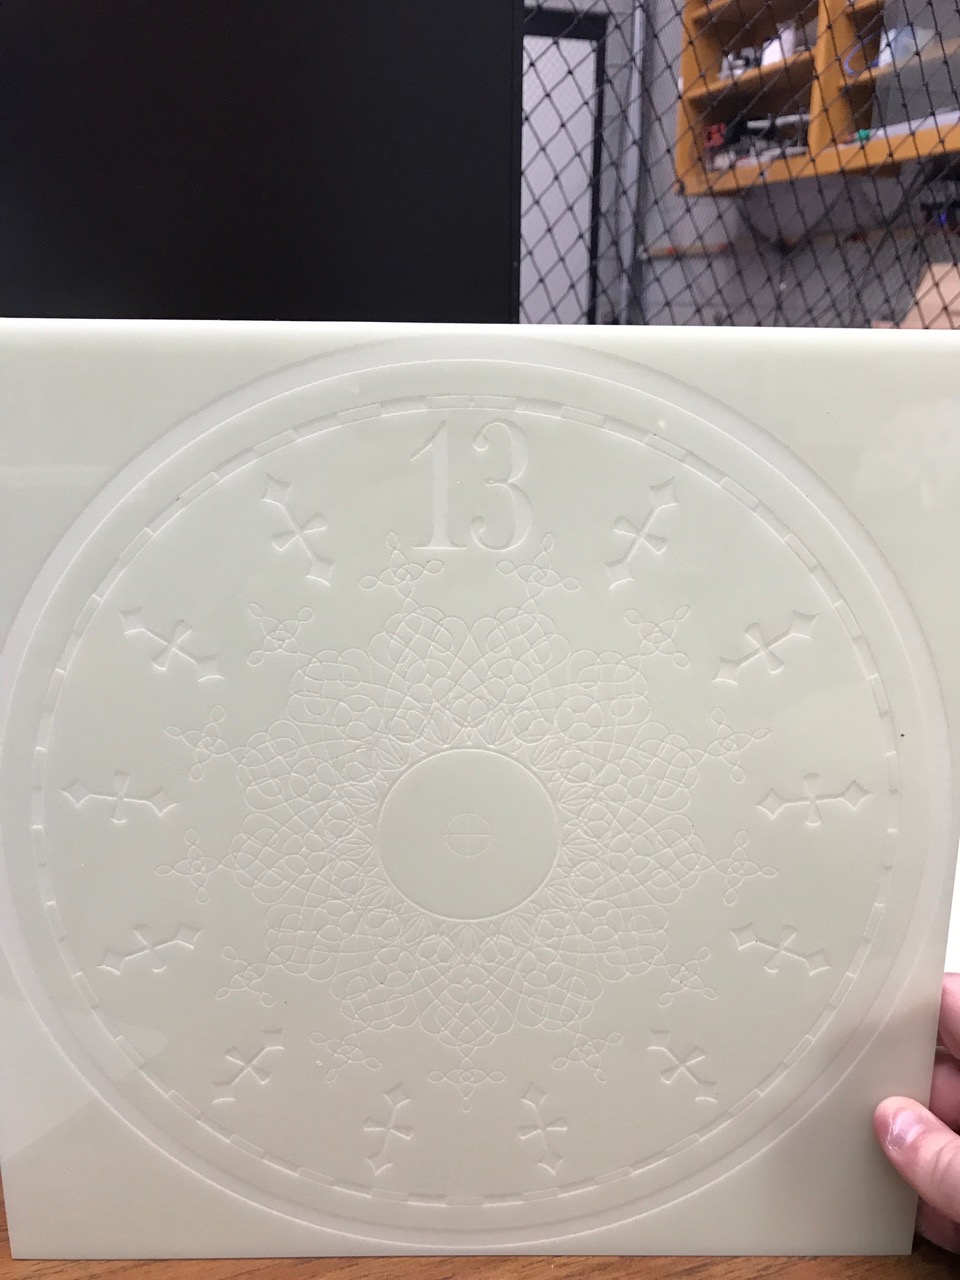
The first attempt on the glow in the dark acrylic was perfect, as good as I could have hoped for. The ONLY thing we had to look at was some ghosting outlines from the laser since we didn’t tape the plastic. Being that it was frosted plastic anyway, you couldn’t even tell. We did do a second attempt without removing the protective plastic so that we could protect the acrylic with the plastic covering it. Bad idea, it cut the image into the plastic, but melted the plastic covering the plastic, into the plastic. That didn’t work too well, and now I had to hand-pick dozens of tiny pieces of well stuck flat protective plastic from the design on the acrylic. I think it will be just as useable as the first one, but the first one is more perfect, so that’s the one we’re going to use. (lostcasket has since provided me with a link of 3 vector images to download (and distribute!) so we will eventually be re-doing this for one more dial with all of our lessons learned.) When we do another, we’ll be removing the protective plastic, covering it with painters tape, lasering it using the newly acquired vector images, spray painting it, peeling the tape and enjoying a very easy perfect print. But we’ll get into paint in the next post.
For now, pictures of plastics and other materials! (and links!)
lostcasket’s design printed as an 11.75” sticker.
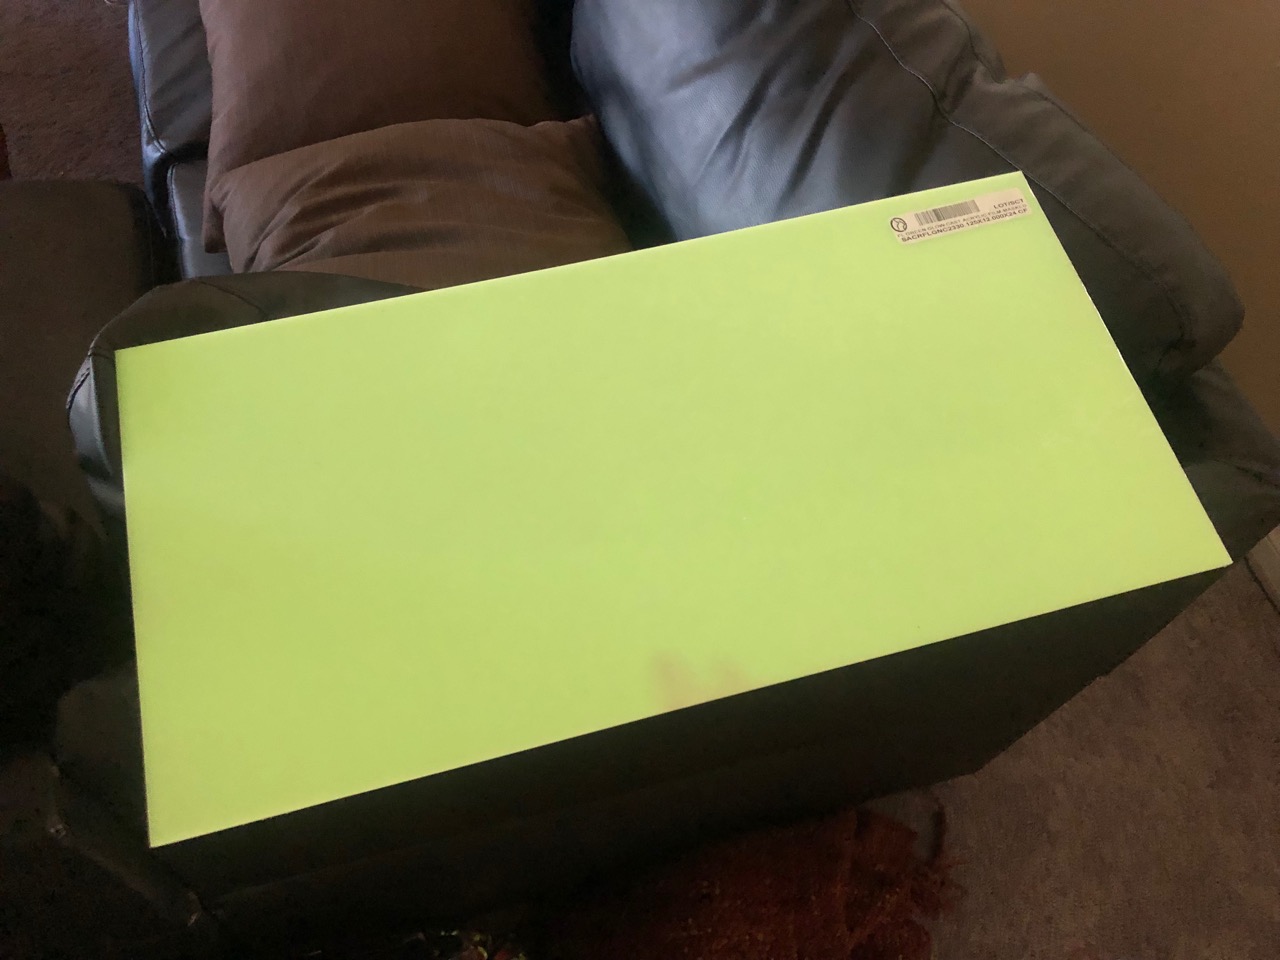
Beautiful glow in the dark acrylic from Paragon Plastics at 12x24x1/8” (You can even see where I was holding it, the glow is really nice.)
First burn test (in wood)
Second burn test (clear acrylic) Bottom is from the first test, later on we used the other side to see what we could accomplish with tape.
Paragon Plastics Glow in the Dark Acrylic! Phosphorescent Acrylic Sheet -Tag says: FL GREEN GLOW CAST ACRYLIC FILM MASKED SACRFLGNC2330 125X12.000X24 CF
At this point I had a few things going at once. I’ve got my measurements for everything, and want to build out the body to give myself something to build against. My dad, being a carpenter by trade, and amazing with wood-making, offered to help with this. We went over the measurements that we’re looking for together and decided on final measurements for the three boxes that are going to make up the body of this clock. We’re going to have the top box, the body box, and the base.
Also, we went with Oak for this, as this seems to be the popular choice for grandfather clocks. It wasn’t cheap, but I want this thing to live forever in my home. I want the body of this thing to hold to the standards of any store-bought grandfather clock. The audio, the dial, that may change out from time to time but the audio will be invisible and the dials will be made to a high standard as well, and just be swappable parts. So we’re not pulling any punches with the materials on this one.
Box measurements (w/h/d):
Top box: 13x22x9 Center box: 13x41x9 Base: 13x9x9
I’m still deciding where all of the guts are going to be arranged in this thing, but I’ve got a pretty good idea so far.
<SPOILERS!> Inside the top box we will DEFINITELY have black lights. I’m thinking a couple little 4” tubes will do the trick (if they come that small?). I thought about LEDs, but I’m not sure they’ll have the same glow effect that the tubes give. We’ll probably have a couple small speakers up there too. In the base we’ll have a nice sized PC sub. I’ll have a Raspberry Pi running quarterly chimes, and hourly music with number-of-hour bells (with a bonus 13th bell at 13 O’Clock which was a great suggestion by Jintosh.) That Pi will PROBABLY be in the top box. Then in the center box I’ll have the serpent pendulum. That one I haven’t even really thought about how I’m going to build and control that yet, I’ll save that problem for later. First we’ve gotta get the box, the dial and movement, the face, the trim, the stain, and the electronics taken care of. </SPOILERS!>
Without further ado, the photos!
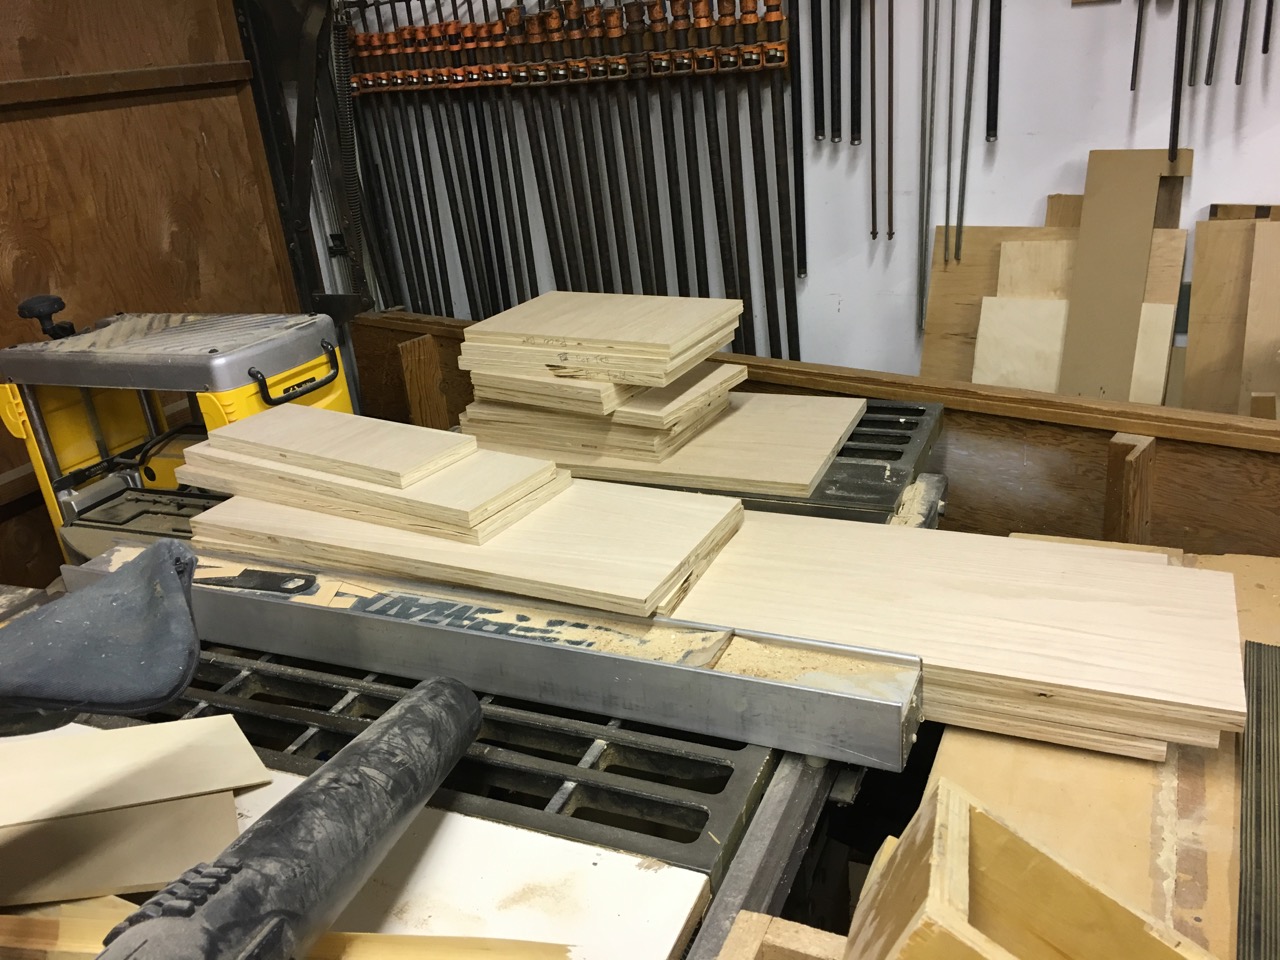
Wood’s been cut:
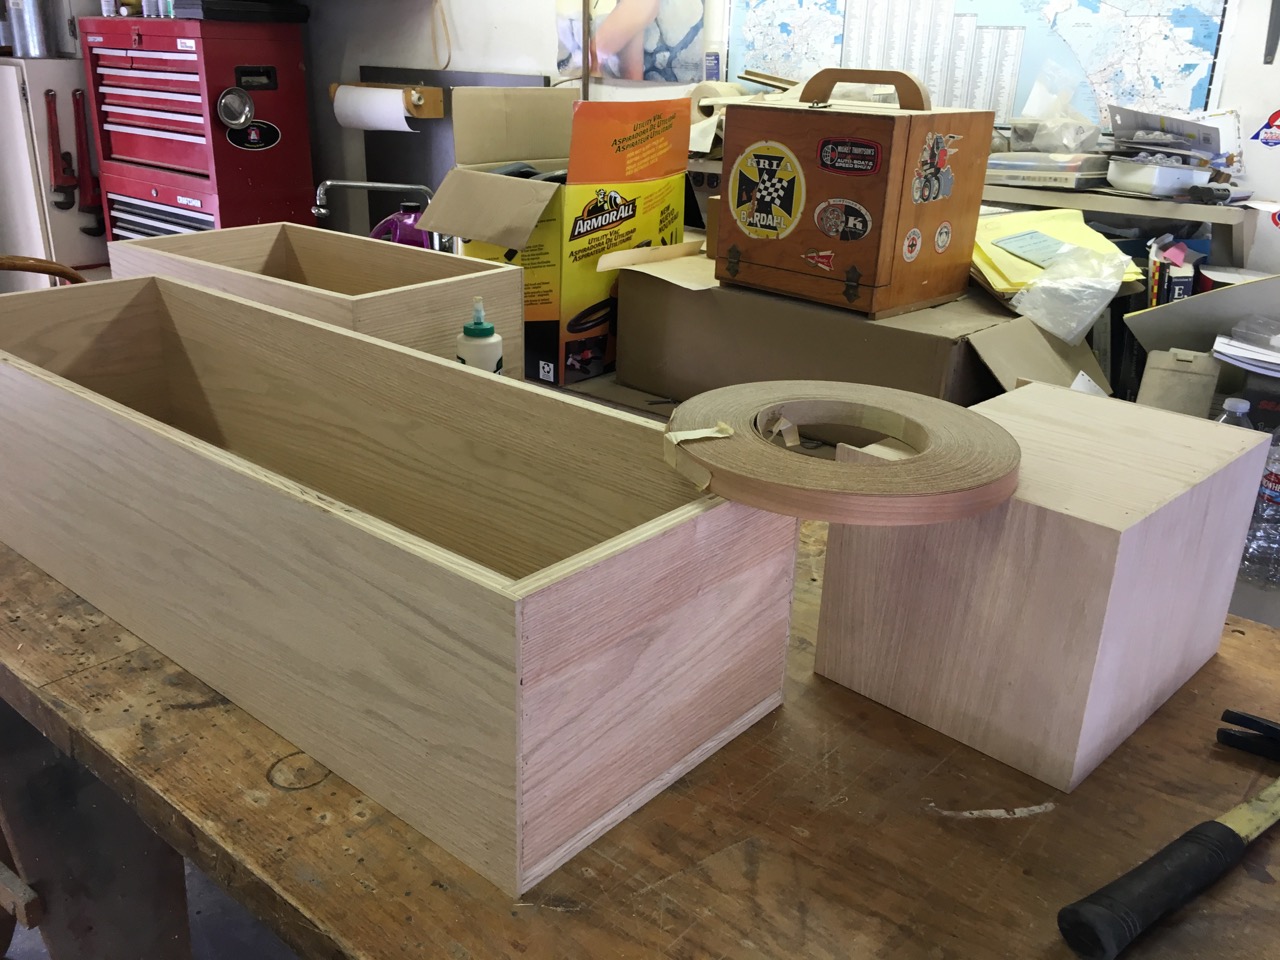
Boxes have been assembled:
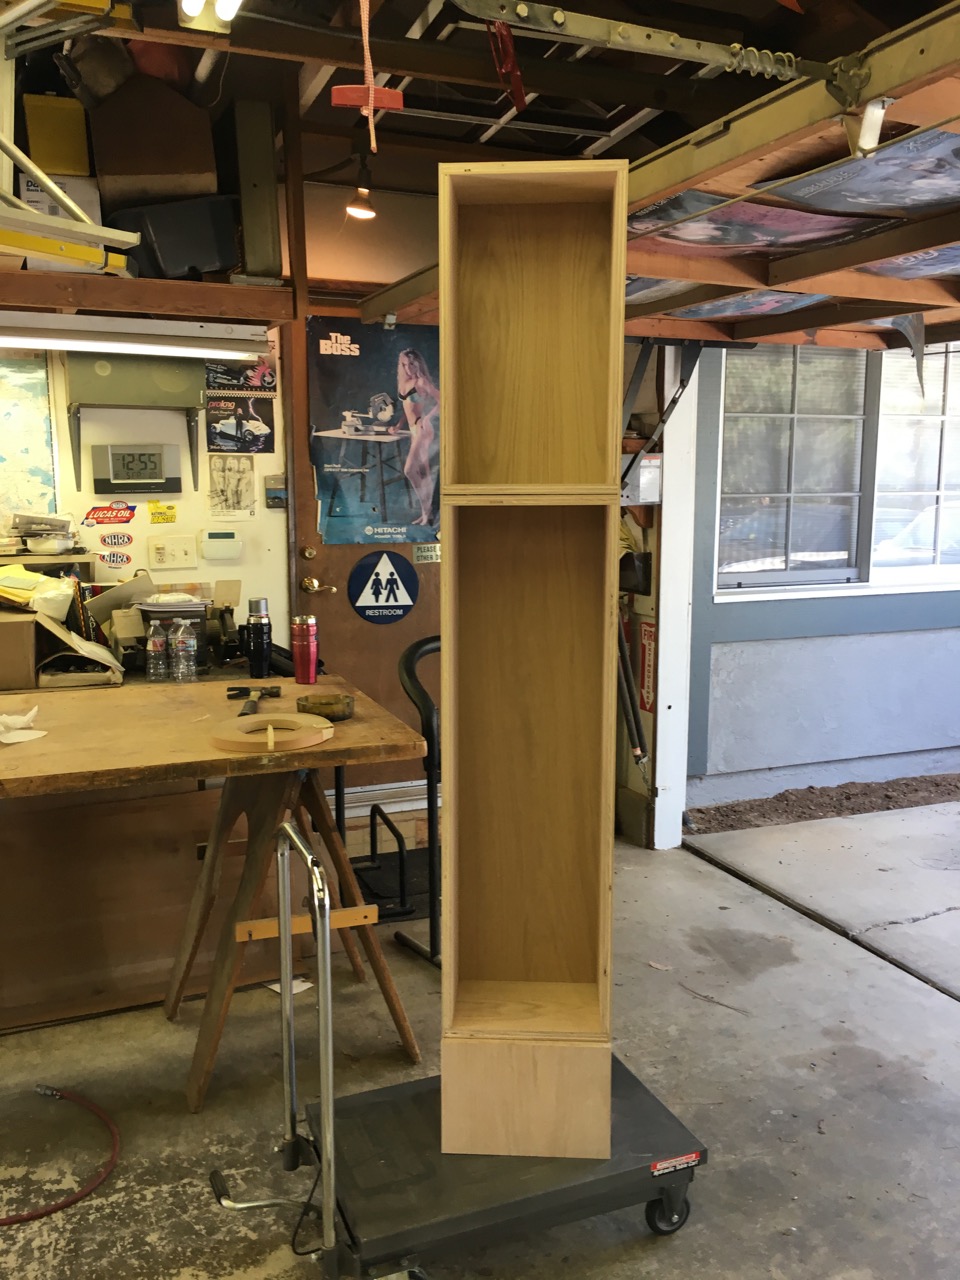
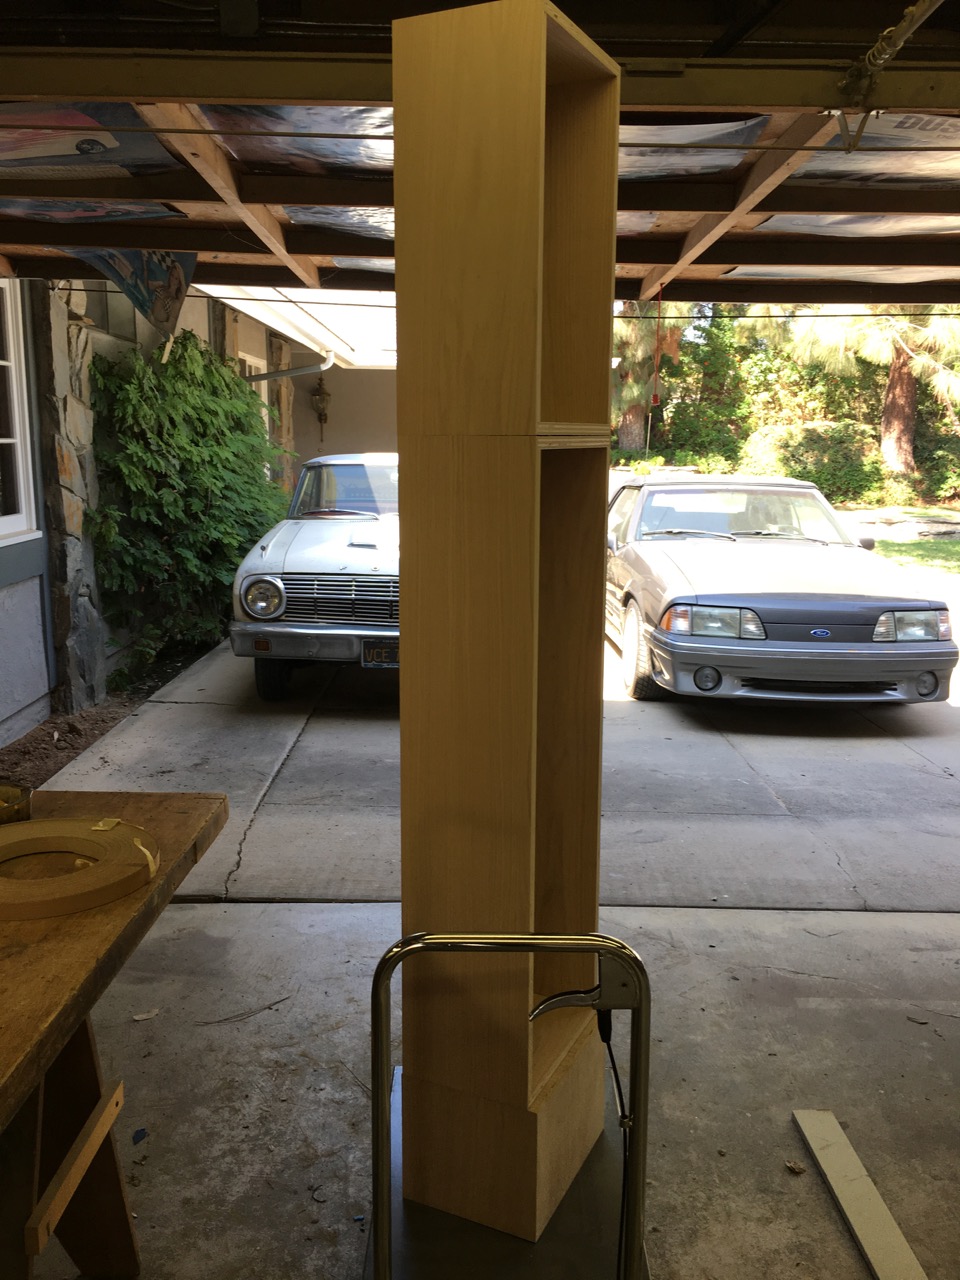
Front view!
3/4 View!
And a nice close-up of the top box, where most of the guts of this thing will reside:
So here stands 72″ of clock body. The clawed feet will add another 6″ to the bottom, and the head should add about another 7″ to the top for a grand total 85″ tall!
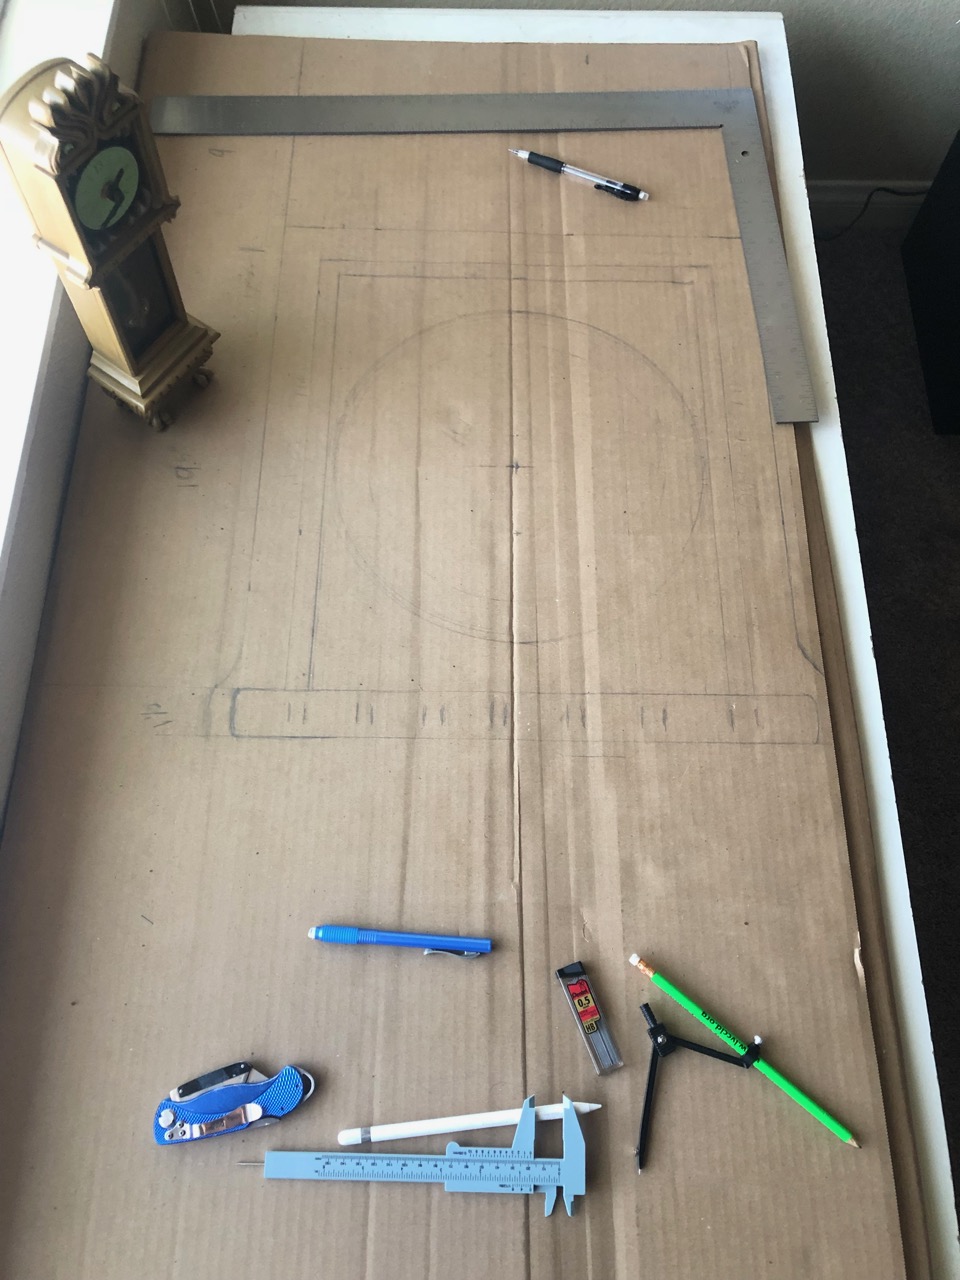
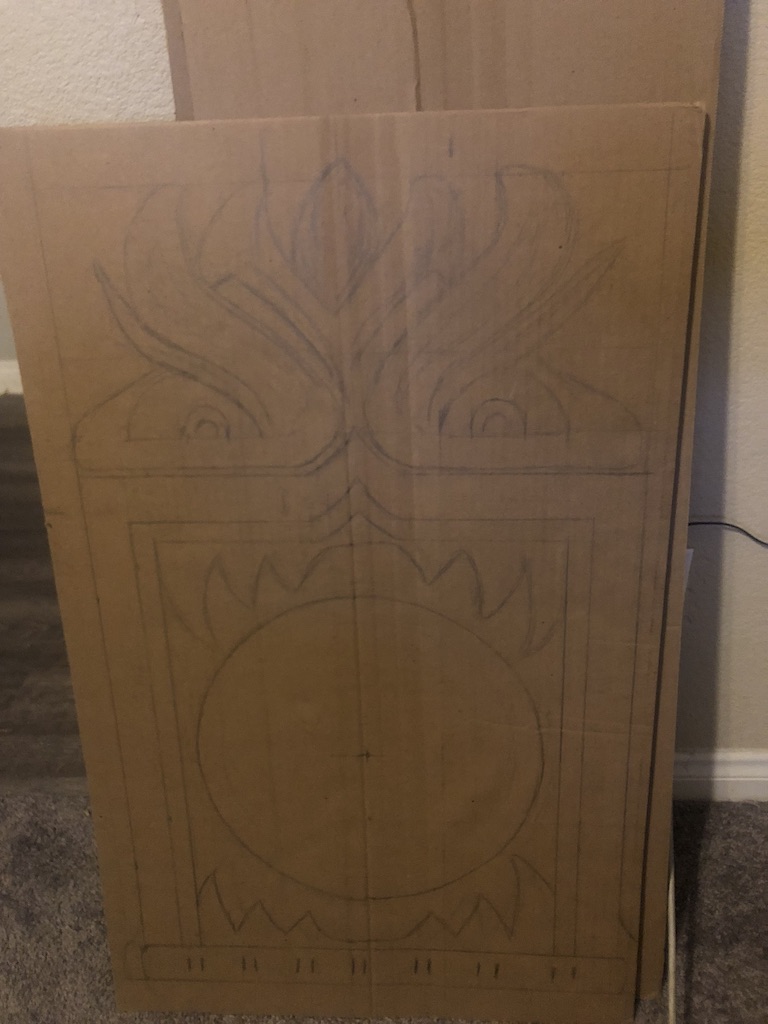
So with cardboard and measurements at hand, I set out to pre-build the most important and detailed part of the project, the face.
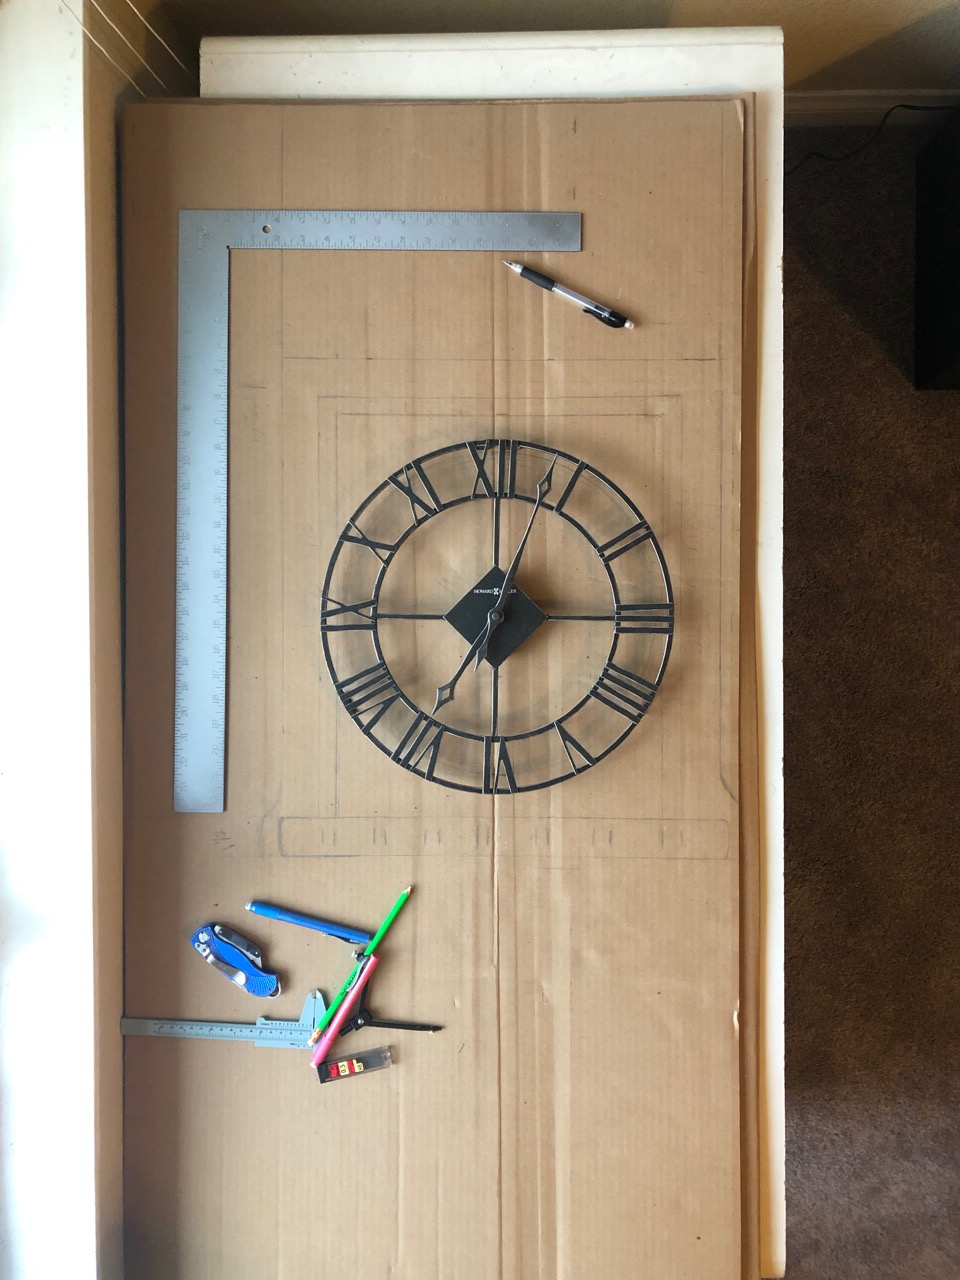
I started by drawing out a square from the outer borders of the face and the lower decorative bar. I had a 14” wall clock laying around that I was able to use to check the scale, and I was really liking the look of it (though it was a bit big compared to what I wanted, which is good.)
—
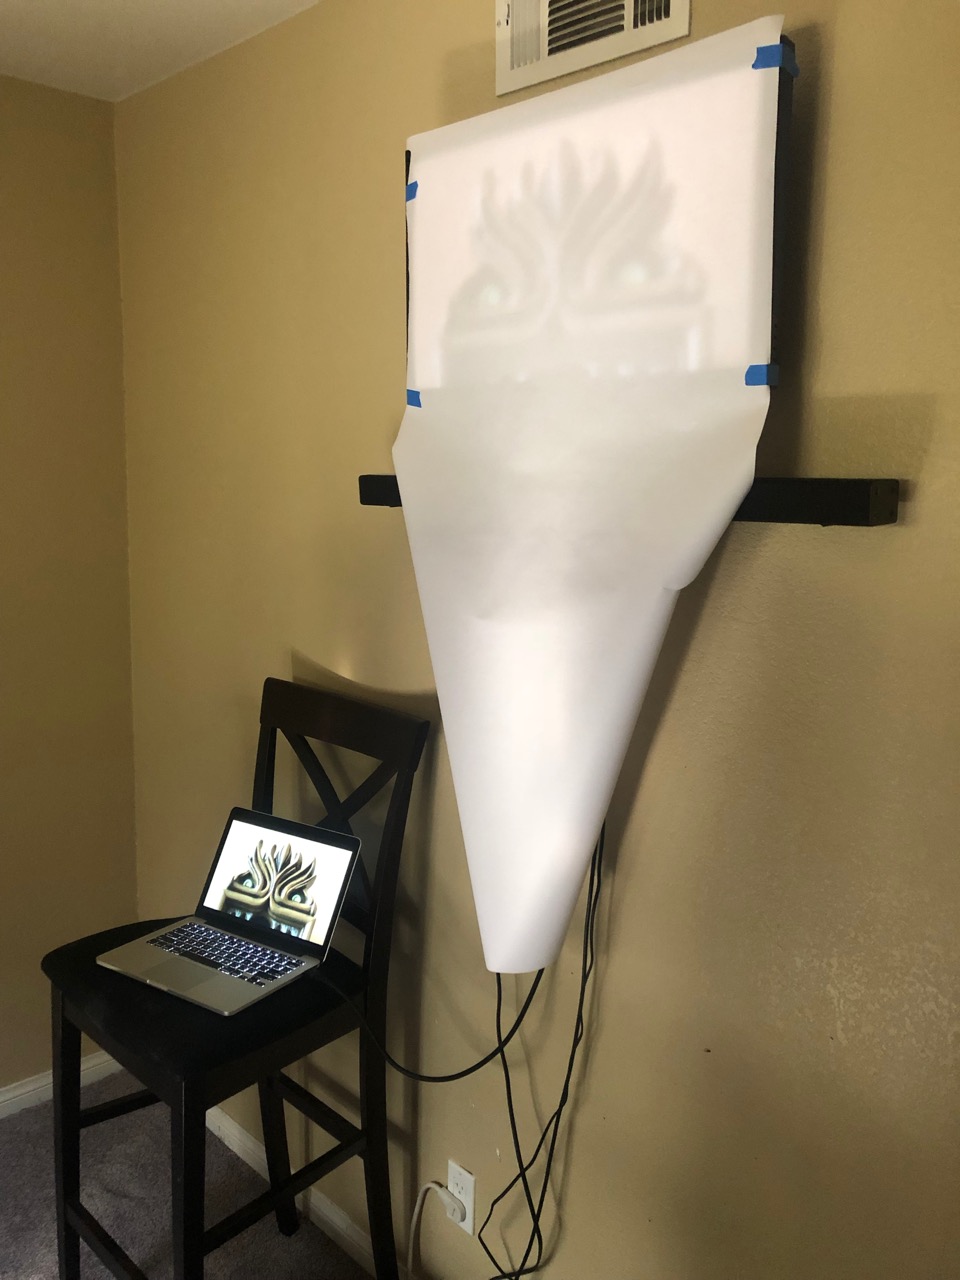
After building the main structure of the face, it was time to add the details. Not having a projector at hand I grabbed a cheap roll of white paper and draped it over a TV to trace. This actually worked really well as I was able to load the image of the clock on my laptop through HDMI and zoom in until it was full size. So I zoom in until the distance between the borders was what it should be (13″, and the border measurements lined up perfectly, so that was reassuring!) With that I was able to trace the face details in pretty easily, then later transfer those to the cardboard.
Two things that would have made this a lot better though — using my bigger (and much brighter) TV in the other room, but there was too much junk around it that I didn’t feel like moving, or option #2 just breaking down and buying a projector from Michael’s and drawing this directly and perfectly onto the cardboard (I may still do this to draw it onto the wood).
I also built the body of this thing out of cardboard for size and proportion comparisons, but those parts are a bit more boring.so I didn’t bother with pictures. With that looking pretty good, I worked with my dad on measurements for the three boxes that make up the body of the clock which he offered to put together for me (he’s the carpenter by trade, I’m the tech) while I work on sourcing and building a dial, a movement, and some actual clocky stuff.. This is where it starts to get a little more tangible!
Now I want this clock that I’m building to be a real, working, actual grandfather clock. So that’s exactly what I’m going to base it off of, and what I’m going to build it into.
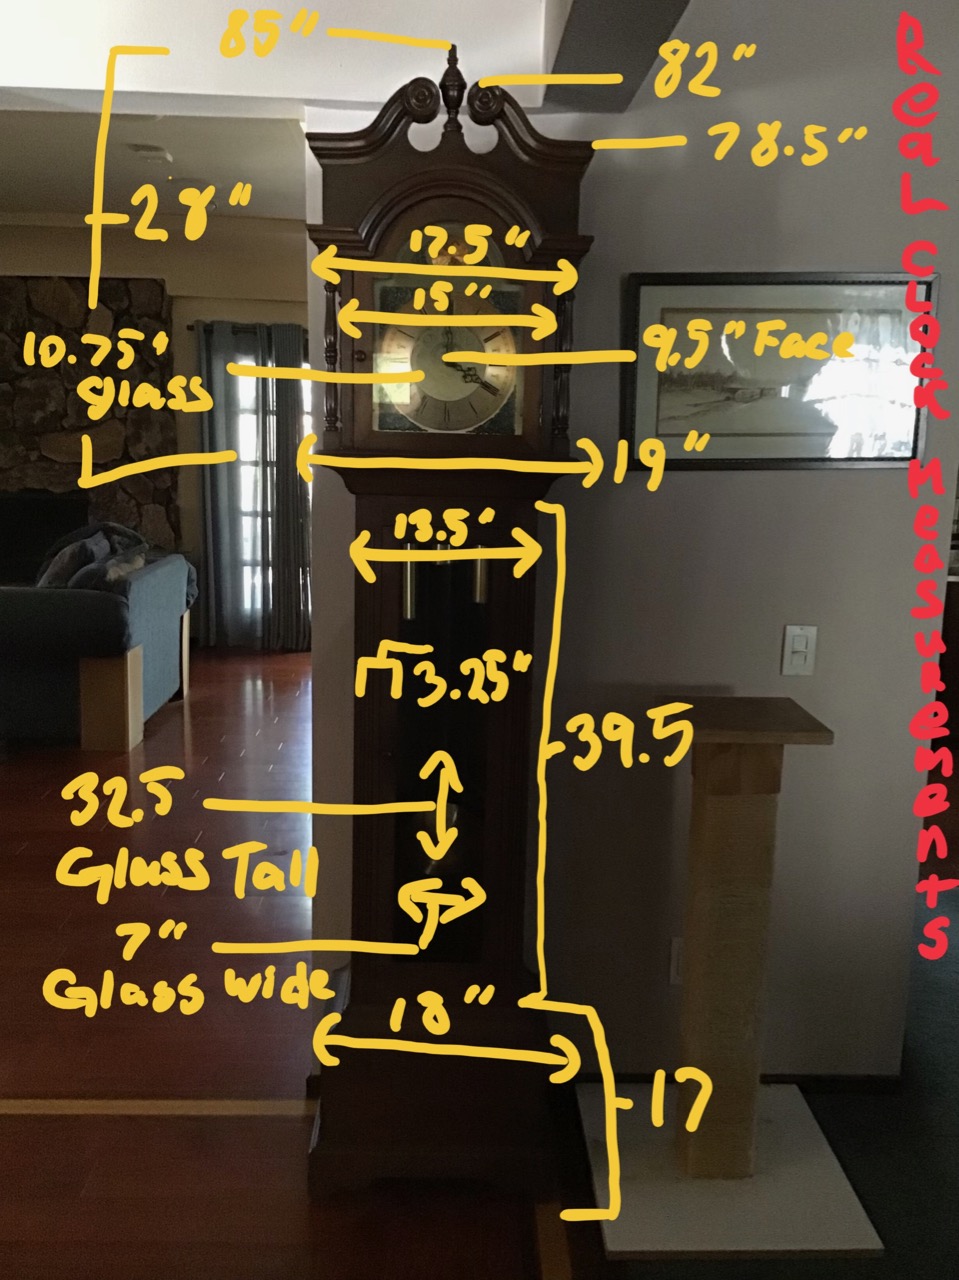
This is my parents’ grandfather clock.
And these are the measurements of their clock:
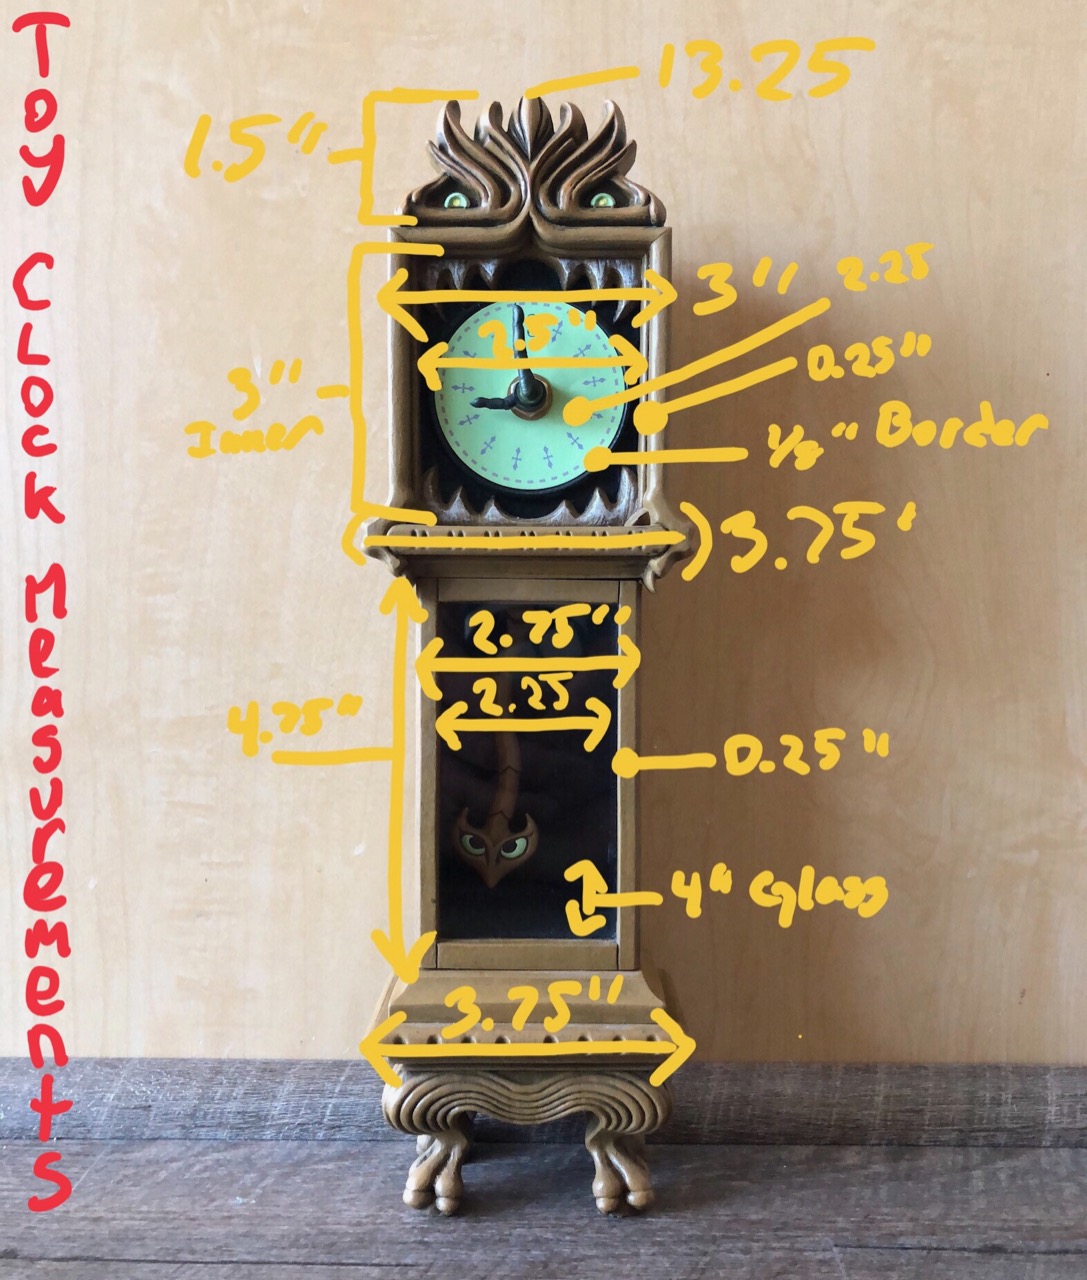
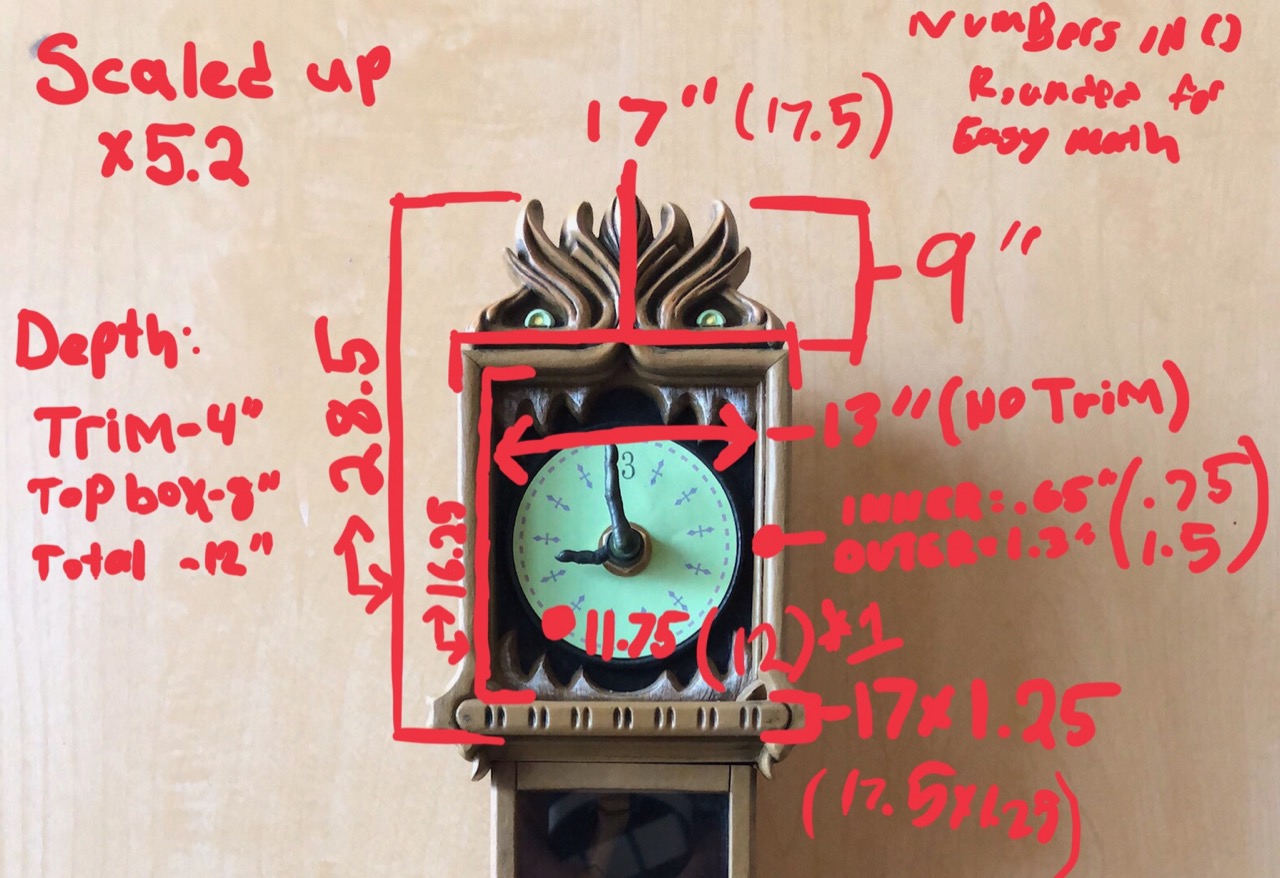
And here are the measurements of my toy clock:
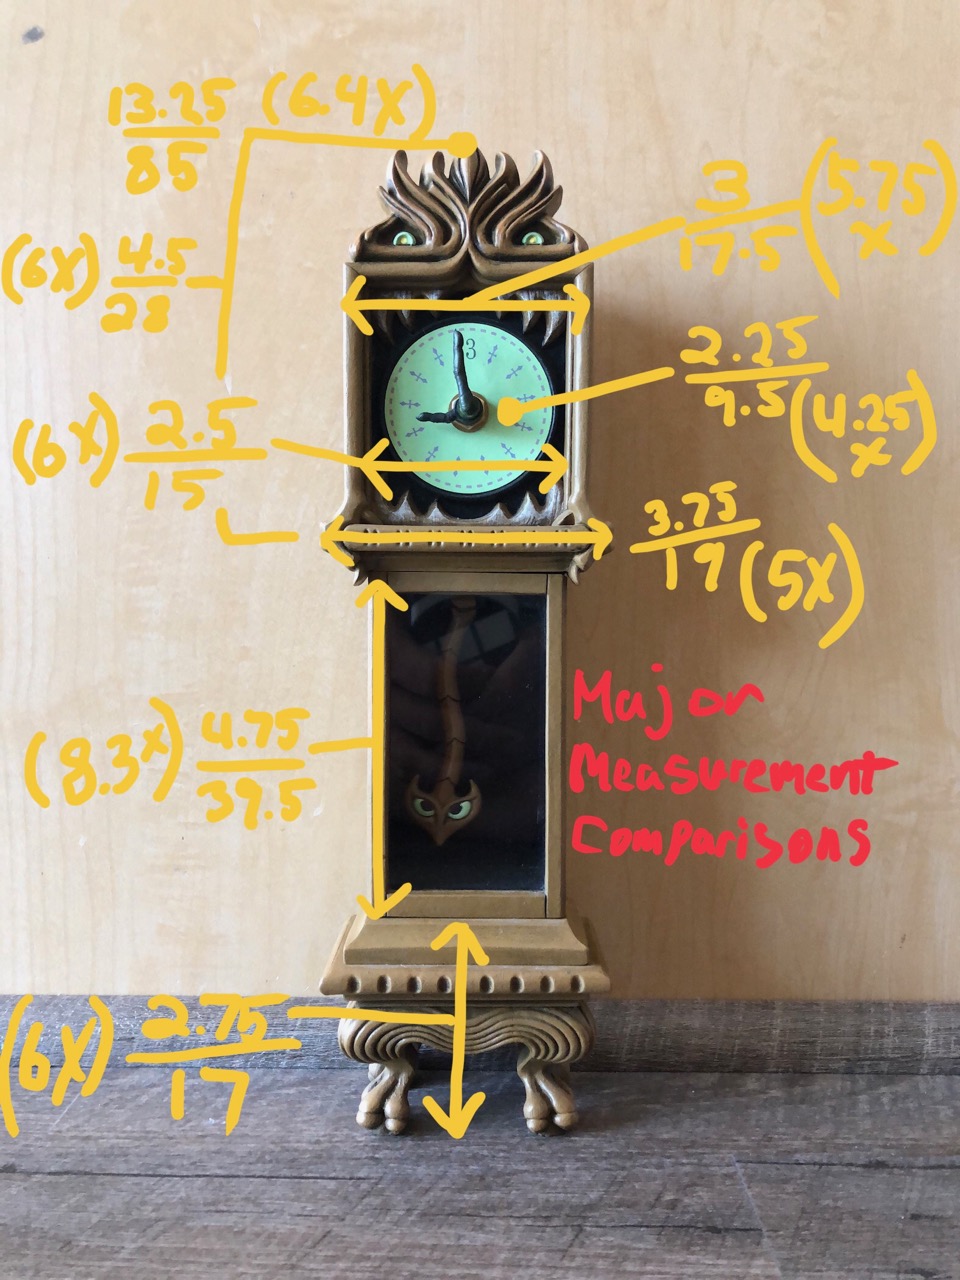
I took the measurements of the real clock and the toy clock and did a little math on them to see what the differences were:
Between the height and the width that I was shooting for, I had to make some compromises… If I scaled out based on width I’d have a short clock, if I scaled out based on height I’d have a fat clock. I took some liberties on the middle section as I think this is where you have the most room to make un-noticed adjustments, also that’s where it seems the toy clock strays furthest from real world dimensions. The measurements on the top box were all pretty close between the real life clock, and the toy clock, the base measurements were too, so it seems like the toy clock actually was made a little shorter (proportionally) by shortening the middle box, so I’m just going to stretch that back out. In doing so, I’m making my middle box the same dimensions as the one on my parents’ clock, and now all three sections are pretty close in height and width respectively. Without really changing the measurements or proportions of the top box or the base, we’ve managed to line up all three sections just by adding some inches to the vertical on the middle box.
The magic number I came up with in this upscaling was 5.2x. It seems that if I upscaled all (most) of the toy clock’s measurements by 5.2x I came pretty close to the numbers I wanted to use. I want to use the actual height and width of the real clock. Upscaling the face pieces by 5.2 got me the exact sizes I wanted for the top box, which is the most important part. I got 28.5” x 17” vs. my real world 28”x17.5” depending on where you consider the outer limits of the clock box to be.
–
I’m going to post this writeup that I had done despite disagreeing with some of the numbers at this point (I don’t know what I was thinking with the depth, because those numbers are definitely wrong since there’s some overlap…) Apparently I had a note about the 12” dial that I had erased or cropped out… But aside from those two things, this picture shows what I’m going with on my face measurements at this point (for now):
I’m going with an 11.75” dial, that much is locked in for sure. I’ve already built a full scale cardboard demo of what the face is going to look like. These dimensions look pretty solid at the numbers shown here, and the 11.75” dial will do very nicely against that size.
So, I’m not sure where to start with this. This will be my first big build. A while back I was hitting Disneyland a lot. A sentimental place since as a local socal kid I had spent a lot of time with an annual pass visiting on a whim for years. Now I live a couple hundred miles away from the parks. Although I still get to visit more than most, I miss it. Due to this, and my new love for making stuff, I’d decided to bring a little bit of the parks home with me. My favorite rides, constantly fighting for the number one spot, are Pirates and the Mansion. It’s a bit more difficult to bring subtle yet noticeable nods from Pirates into the home than the Mansion, it seems, after all, the Mansion in itself is a house.
I’ve also always been a big fan of watches, clocks, horology in general. So one day I was riding through the Mansion and got the big idea that it might be nice to have a replica of the big grandfather clock in the Mansion hallway. I’ve always wanted a grandfather clock. From there I searched all over (finding a few really wonderful recreations online, some even complete with measurements) but I wanted mine to be a bit more… real. It was really tough to try and accurately estimate the sizes, measurements, or even proportions of the real Mansion clock as it’s only in view for a few seconds, and it’s hard to get the quality photos I needed of it because you have such a limited window. As much as I’d wanted to, I NEVER break down in front of the clock, just everywhere else and even if I were to get a perfect crystal clear photo, I’d still only have a two dimensional photo to scale from. I want this to be perfect… despite the numerous allowances I’ve made in the scaling of my real-world replica of this beautiful clock.
In comes the Disney toy Mansion clock replica, my savior. I bought it on my first trip to the parks after its release. This toy clock, paired with the fact that my parents own an actual grandfather clock, should allow me to scale to a very reasonable representation of this clock and turn it into what one may expect to find if this were ‘real’. I’m looking at it in the same way as a cartoon->live action translation, but kinda ‘fantasy world->real world’ translation, I guess. I’m trying to keep it as accurate as possible, but it has a few weird measurements that would make it really odd at full size, so I’m having to compromise a little bit to keep the fantasy clock within real-world clock dimensions. I’m trying to keep the face, accents, base, and all of the important accented parts therein as accurately scaled as I can get them, while lengthening the body and keeping the width based off of my real world clock. I think the body leaves a lot of room for un-noticed compromises to help get the height I want while keeping the width from getting too cartoony. As long as the top box is perfect, I think I can stretch the body a bit to get my height/width proportions perfect on this thing while only making it look a little bit better in the process.
—
I’ve been working on this project for a little while already and have made a bit of progress so far. I’ve still got a lot of work to do and I’m playing this one really cautious as I don’t want to get each step right the first time. The first few updates will come pretty quickly, but they may slow down a bit after I catch up with myself. I’ll be posting all of my measurements, math, and material sources as I go (and probably in full at the end) for anyone who wants to play along.
The toy I’m basing this all on…
And a tease of the dial thus far, this has been the fun part (along with a hint of the box, and what’ll probably be powering the quarterly/hourly chimes.) It ain’t finished yet, but I guess it is technically a working clock at this point: