I’ve added a ton of detail to the base of the clock over the past couple weeks…
Based off of this image of the original clock off of flickr, a comparison of what I’ve got so far on the base:
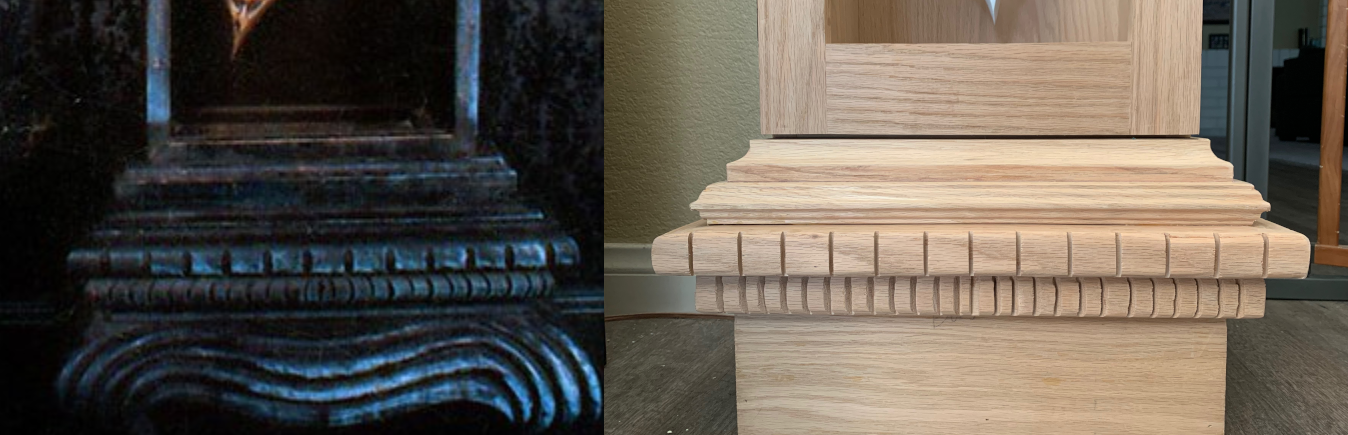
I’m really happy with the way this adds to the clock… It’s a little less rounded than the original, but I think it wears it well.
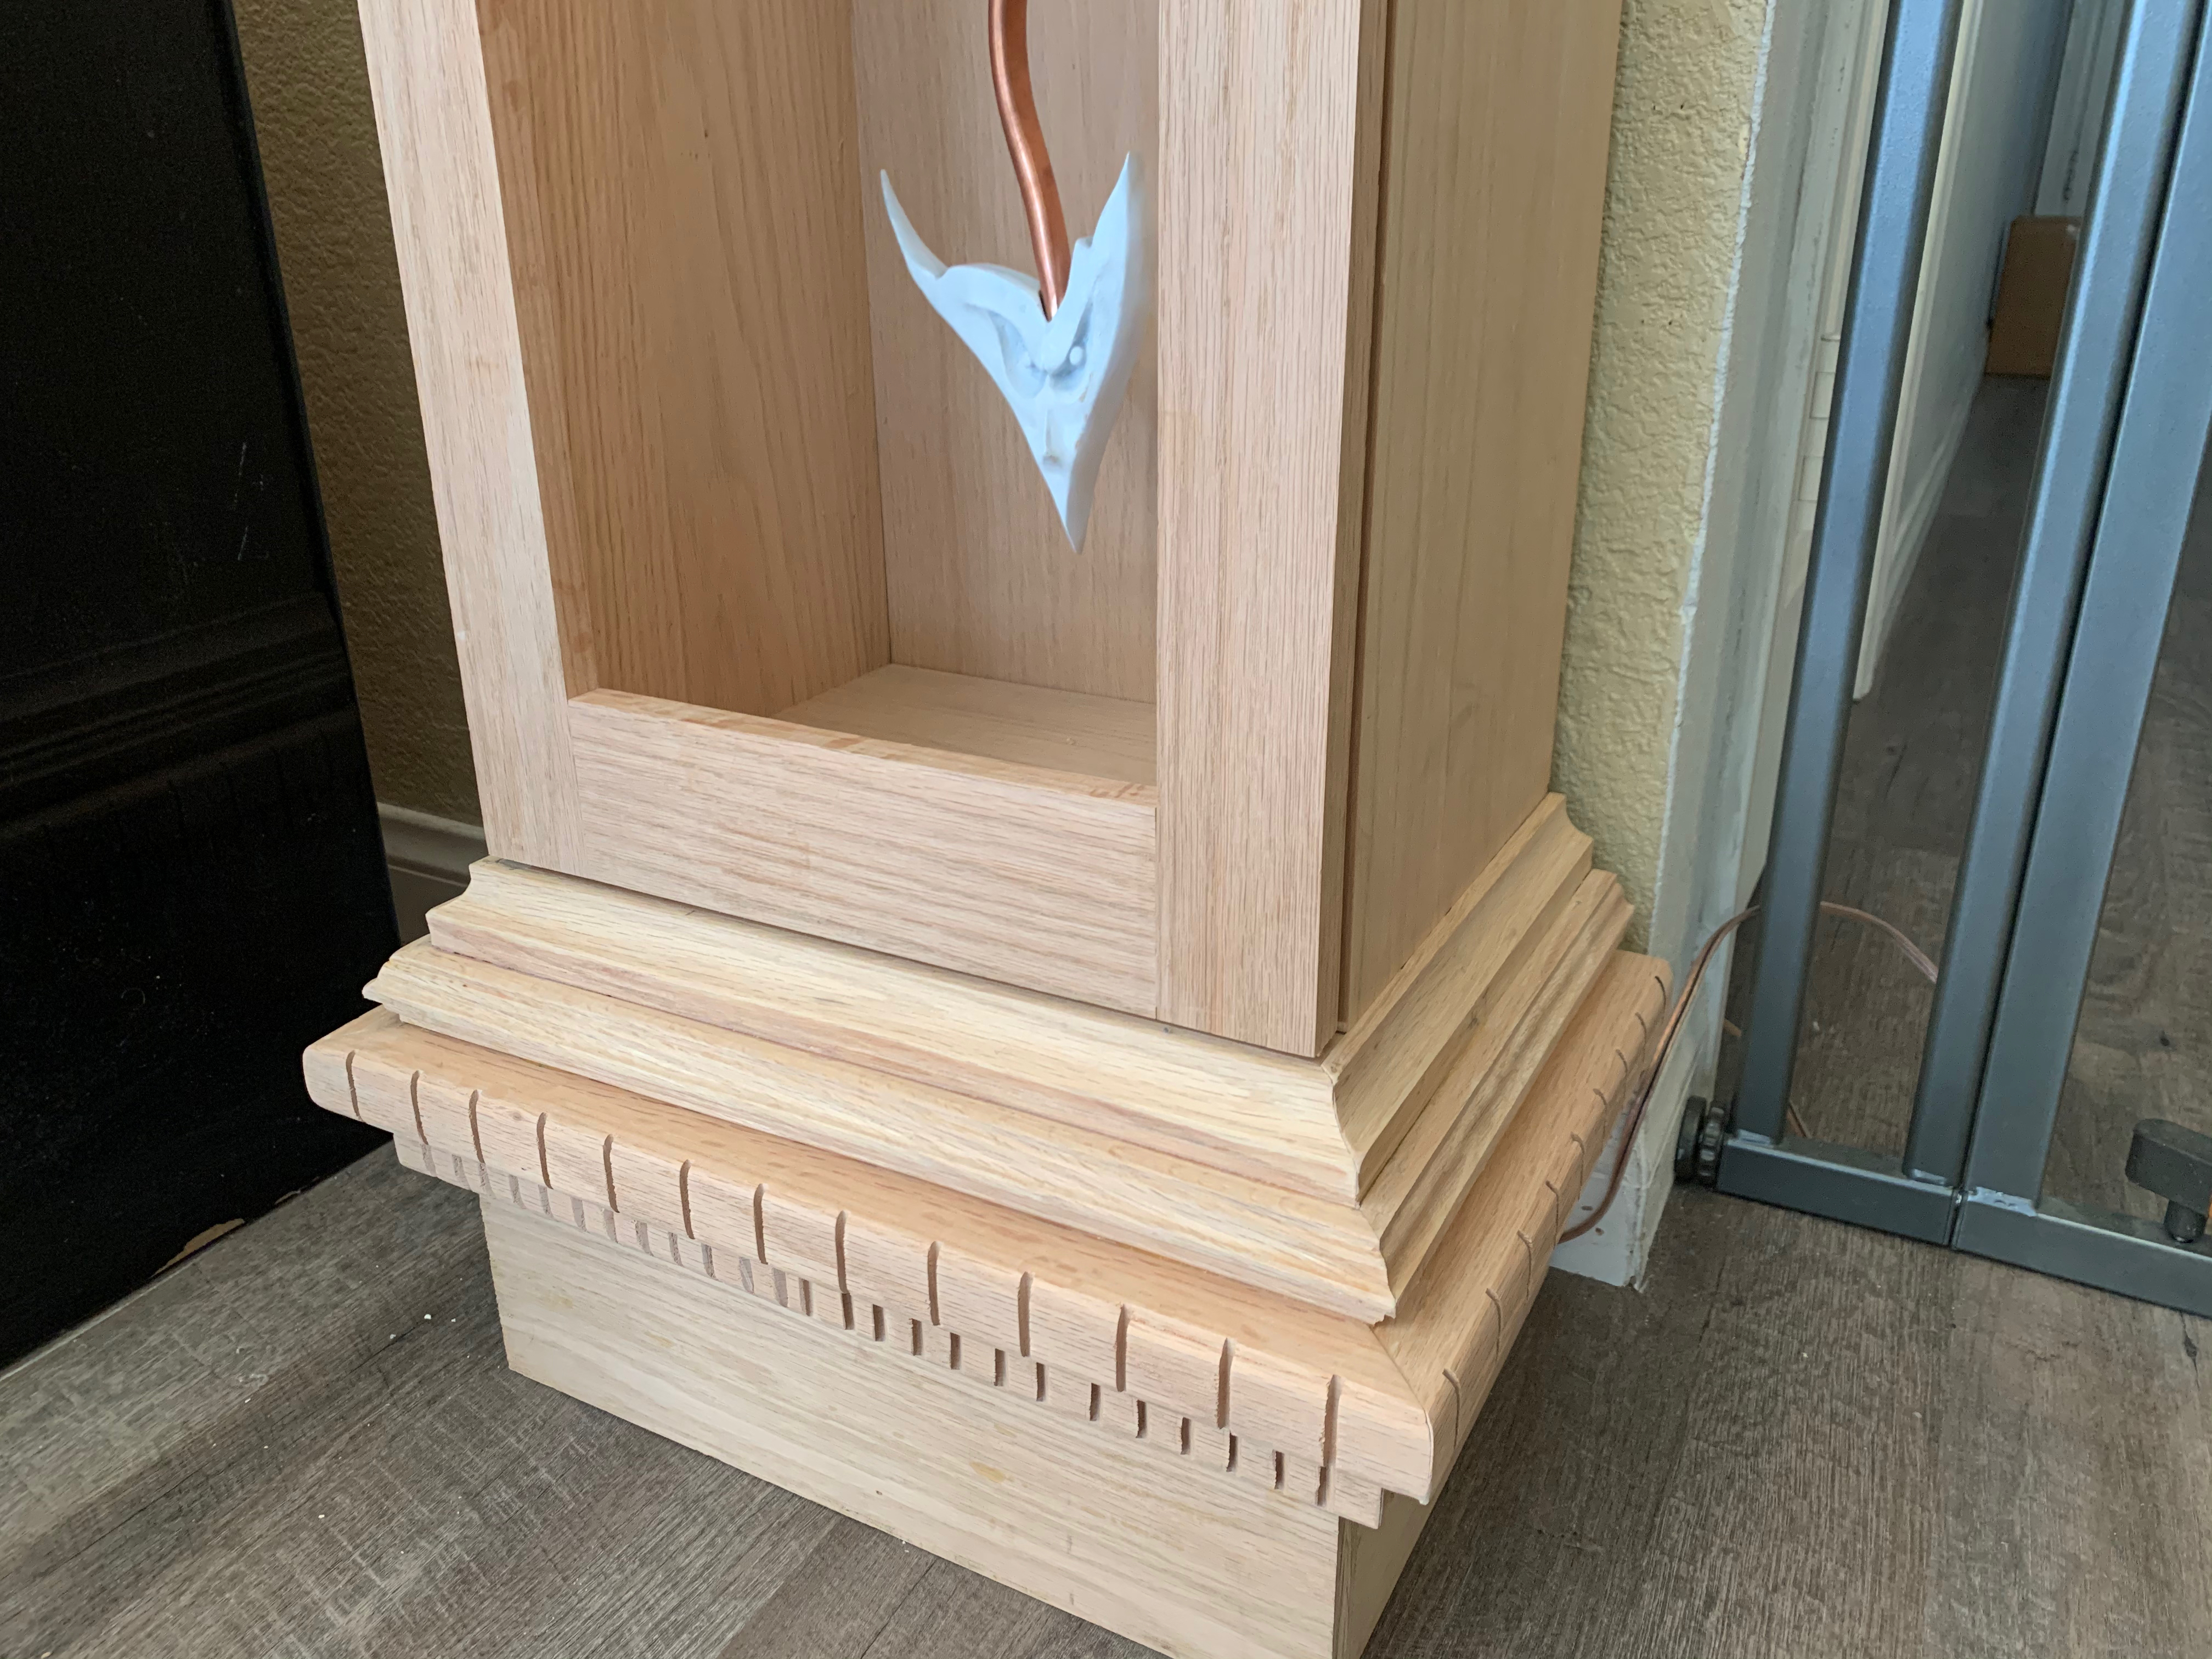
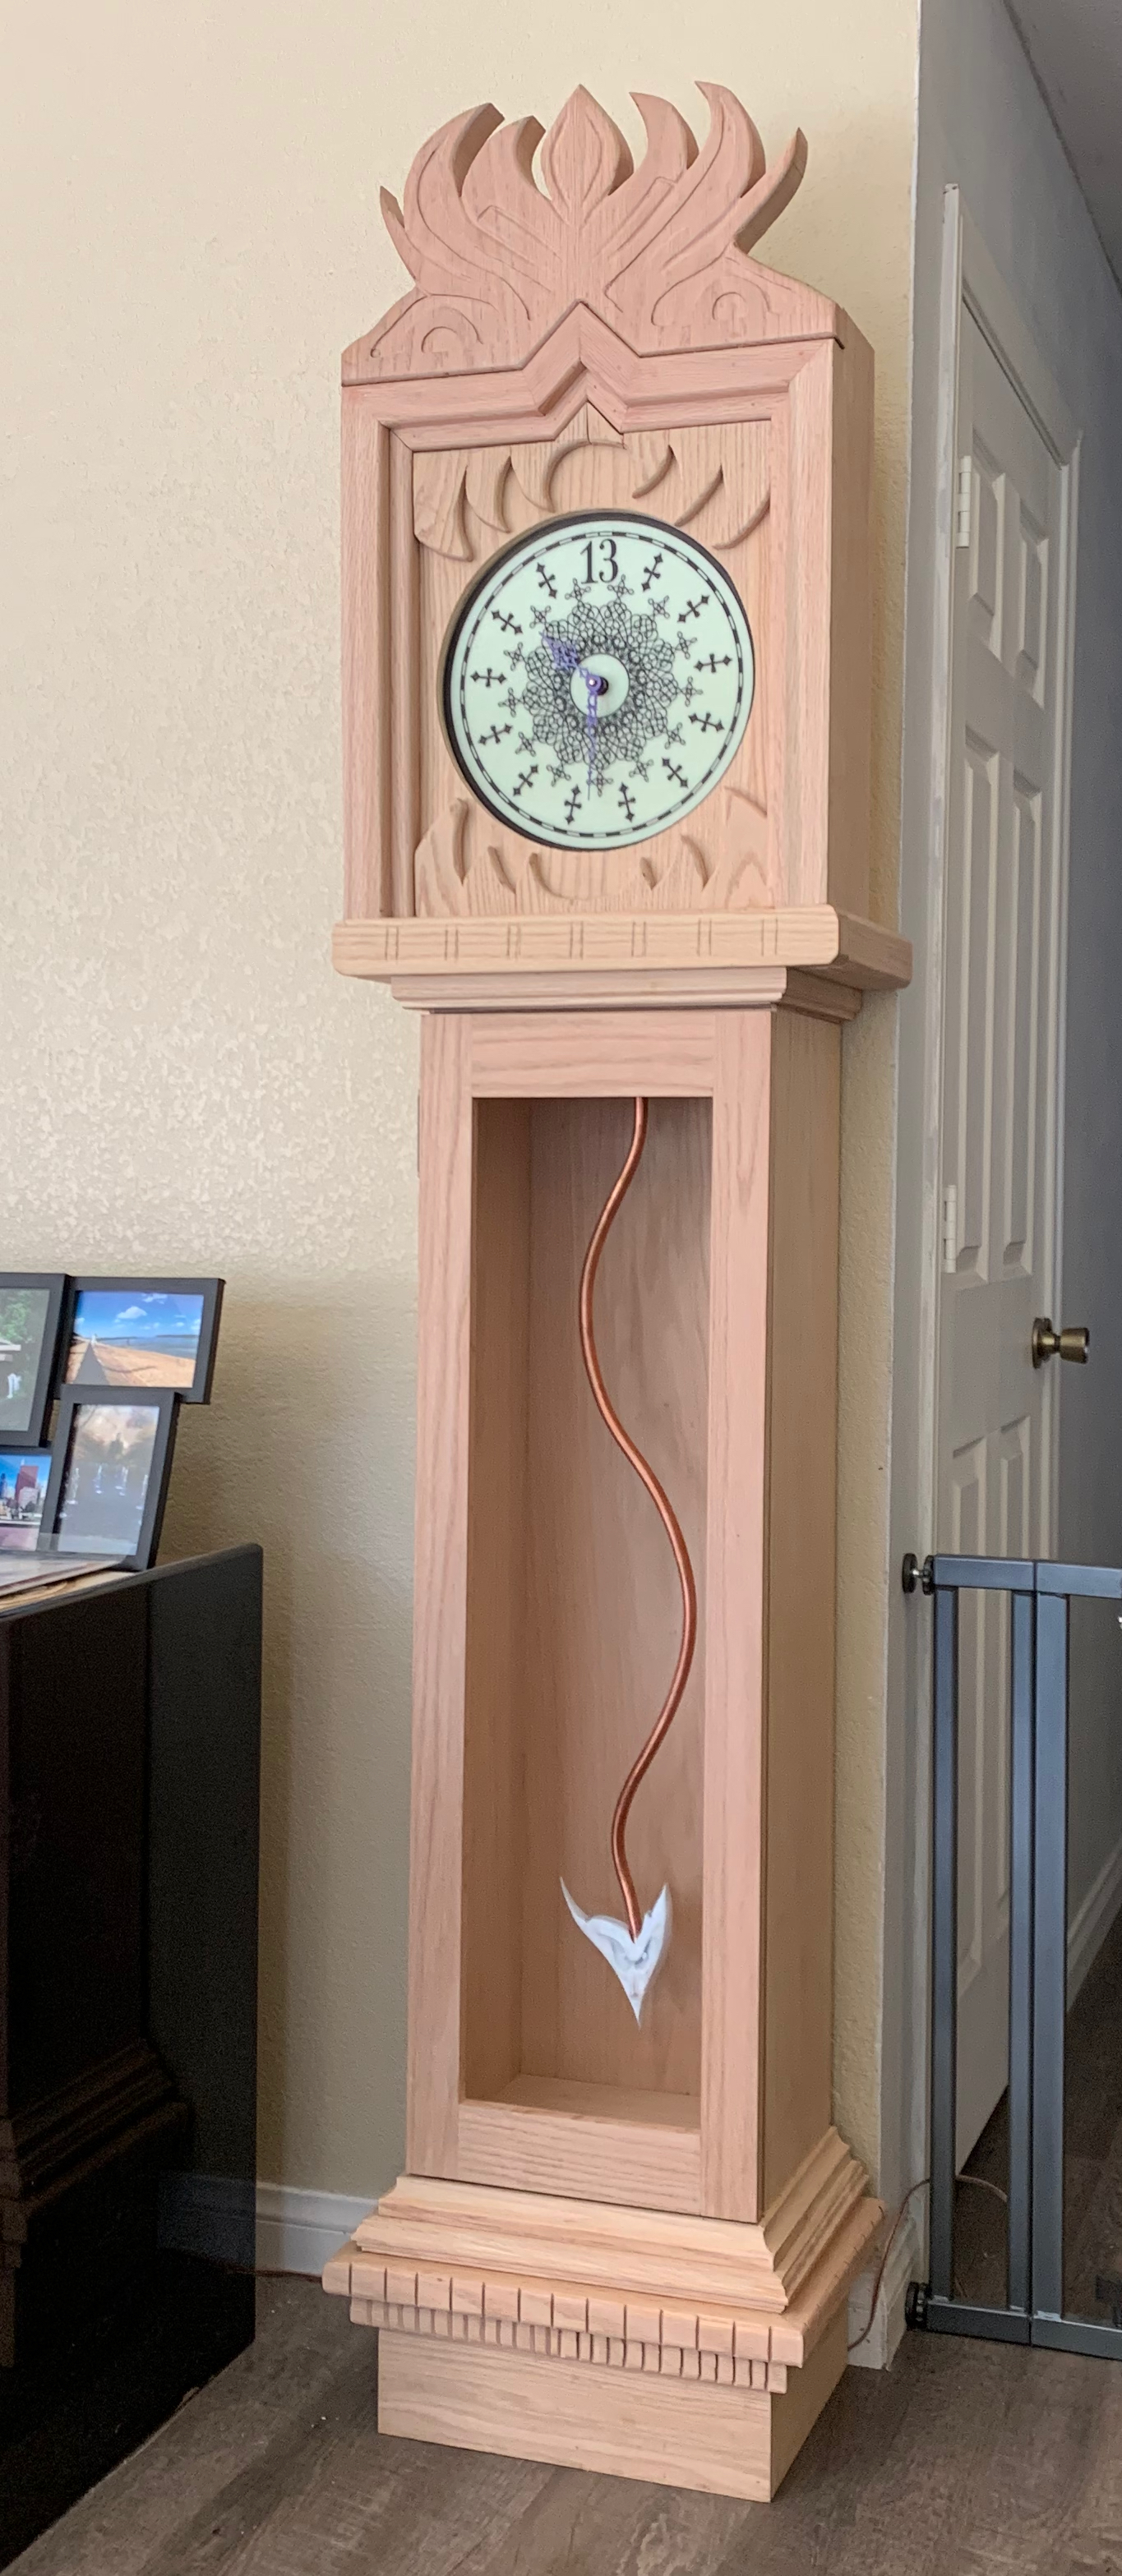
And a full length version…
I took the base box and added a sheet of plywood leaving a 3/4” ledge at the top of the box. I inset the first piece of 3/4” moulding that I routed into that and it fit perfectly. Beneath that I had a piece of moulding that I originally intended for the top box, but didn’t use… It wasn’t quite right, but after I flipped it over and routed the other side I was able to give it a jutting-out type lip which matches the original clock enough that I’m totally satisfied with it. The next piece was 2×3/4” pieces on top of one another, I rounded the edge and ran it through the table saw on 1-1/4” intervals (giving me 13 marks!). Beneath that I had to set the saw to a 45º angle and ran it through every 5/8ths facing the outside from the middle, so the left side cuts to the right, right side cuts to the left, 12 on each side and a 13th in the middle shared by both, totally unintentional, there’s one more mark on the top piece, and I think one on each side on the bottom piece, but it made the spacing work out a lot cleaner..
Next up I’m going to have to make a skirt for the bottom with the beast’s legs, that one is going to be tough, but I think I’ve got an idea to make it work. I think while I work on that I’ll order some glass and paint the pendulum. I think we’re going to go with an old aged/weathered brass for the pendulum and the serpent head. It’ll be a first and I really hope I don’t mess that part up. After that is the even more intimidating staining of the clock, looks like we’re getting into no-mistakes-allowed land.